

 Tweet
Tweet
I have now move from my basement workshop in Colorado to my new hangar in Washington. I built the wing jig in Colorado, like many others did, with a structure on each end that connected from the floor to the ceiling. Now that I am in the hangar, that is not an option because the ceiling is over 20' high. What have people done for a stand alone wing jig that does not break the bank. It would also be nice to have a wing rotisserie ideally as part of the wing jig. What have you guys done?
-
John Snapp (Started build in Denver, CO) Now KAWO -Arlington Washington Bearhawk Patrol - Plans #255 Scratch built wing and Quickbuild Fuselage as of 11/2021. Working on skinning the left wing! -Ribs : DONE -Spars: DONE, Left wing assembly's: DONE., Top skins : DONE YouTube Videos on my building of patrol :https://m.youtube.com/user/n3uw -
What about parallel to the wall, maybe 4'-6' away, then go from the top over to the wall for support.
DougScratch building Patrol #254 -
Glenn Patterson (Bearhawk 727) had his wings in a stand alone jig. I used to have some pictures but I can't find them now. You might send him an email and ask. He's on the forum.Comment
-
We built a pair of strong free standing welded steel frames with base plates anchored with Tapcon concrete screws. The Tapcons screws anchor the base plates well & leave small holes when removed. We had no walls handy to brace to and needed a system that was solid that would allow easy access to both sides of the wing. The main frame is 2" x 2" x 3/16" wall tube with 1" sq tube braces with baseplates at each floor contact . The square tube is better than using angle iron. There are angle or square tube upper corner braces. The overhead cross bar is high enough that a person could walk through without getting a bell rung. The frames were rigid with zero movement. It allowed us to make the wings dead straight so the jig pin holes through the ribs appear as one hole through the wing. The upper boards clamped on were used to secure the sting line that we used through the jig pinholes for the alignment process. Lower boards are wing tip guards as it is maddening to accidentally kick one & bend it. Did that once.
The wing support brackets were similar to those that we saw either with Russ Erb or Eric Newton's build information. We had access to an automatic surveyor's level so it was used to get the heights to shoot in the points to mount the spars level.
This a link to a previous conversation where our system was discussed. http://bearhawkforums.com/forum/tool...g-assembly-jig. There is a more in depth information there. This is the PDF with the photos similar to what I may have given to Wayne. The PDF is borrowed from the previous discussion where I gave a more detailed description.
It might be possible to get a some steel from a salvage yard that may save some. The square tube is not that expensive. My preference is steel as wood is affected by humidity and not as rigid in a compact form.
I have been not been checking as often lately. Been head down & hope to mount the wings soon.
Hope this is of some aid.
All the best,
Glenn
BH727Last edited by Glenn Patterson; 04-20-2016, 11:39 PM.Comment
-
John.
Good luck with building the stands. We made plywood tees that were put one up & one down clamped together to adjust & hold bottom spar level along its length. We checked frequently measuring against the string lines for level or straight. We had a string line running 40mm or about 1.5" above the top spar supported by spacer blocks at each end of the spars. Being Canadian we go back and forth between metric and imperial. we took a hack saw and cut a groove in the block until we hit the 40mm depth at both ends. Then its is easy to check anywhere along the spar whether it is up or down as the measurement should be the same anywhere on the spar. We would adjust the tee supports to keep the alignment. It changed as it loaded up with the ribs. The reference string went through the nose rib lightening holes. We also ran string lines through jig pin holes during assembly. The string lines had heavy weights to ensure the line was taut & straight.
Glenn
BH727
Comment
-
Can you explain? What am I missing? The rear spar moves up and down while adding ribs?Originally posted by Glenn Patterson View Post
I agree about the steel. I am building mine now. I ran across 3"x3" post at the scrap yard that were from some kind of pallet rack. Hey, airplane material for $0.40 a pound. They have holes every 2" so will be easy to attach to.
Doug
Scratch building Patrol #254Comment
-
The 3 x 3 is a perfect find. Our material was laying around so its price was right as well.
The spars hang in free space supported by their ends. We kept the alignment string running parallel to the top spar and as the ribs were added we noticed that it was sagging downwards so we put the temporary supports under the rear spar. The Middle ribs maintained the 32" spar c-c. We used a metric ruler and had the string set at 40mm or 4cm above the top of the web. So for example it it was reading 41 then it was down so we would adjust it. We held it straight until until we got the skins on. We drilled all the skins for all ribs and spars as we went along as we were confident that it was straight. This was our experience. It was our habit to check measurements before starting and during work to keep it level. A steel channel legs up or down will sag.
This is my conjecture. The spars are spliced across the web and not across the flanges. The spars flanges are downward and the spar is essentially two channels joined across the web. The flange joint may allow some sag as the bending is the strength of the spar web & capstrips. A half inch aluminum plate the width of the spar and the length of spar spanned flat at its end points would sag & that is more metal than the spar capstrips. Continuous legs would reduce the possibility of sag but it is all a system. The spars are strongest on edge, the ribs and skin provide the lateral support to the spar (beams) and the skin is the diaphragm that makes it all work together. Again IMHO
I worked in a pulp & papermill engineering department where we did everything including surveying and aligning paper machines to tight tolerances. We worked with the construction trades assisting in erecting equipment, setting reference lines & elevations for equipment. We set up long runs of conveyors using piano wire held under extreme tension for the working center lines. We set the spar heights with a surveyors level height & plum bobs for vertical alignment. Once they were vertically aligned then they stayed ok. It was with the plum bobs that we found out the attach points & spars do not line up for the assembly as given in the Beartracks. It got pretty heated with my partner as he just wanted to arbitrarily align the spars & I wanted to know why. The attach points are offset 3/8 of an inch from the drawings. Wayne Massey discovered the mismatch and asked the question on the forum. I made a very clinical explanation of the offset on the forum. Wayne wrote about his discoveries aligning the spars and the method I gave to align the spars. Wayne's write up shows how the ribs meet the spars with the Beartracks method & setting the spars flat & level with the attach points offset 3/8" so the ribs meet the spars square. http://www.mykitlog.com/users/displa...g=36225&row=38 Either method yields a good flying wing.
It is in my DNA that I need to work with flat, square, level and straight that I can see and measure. My foible.
Glenn
BH727Last edited by Glenn Patterson; 04-22-2016, 10:10 PM.Comment
-
Glenn
Thanks for the explanation. I was planning on supporting my rear spar from the floor in several locations. When I welded up the aileron and flap drive support frames I also welded up 3 aluminum ones to clamp in to hold the spar spacing. I figure with the 2 permanent ones and the 3 temps all evenly spaced out, then a leg to the floor under each of those everything should stay put.
DougScratch building Patrol #254Comment
-
Hi Doug,
I liked the question. I was warned about about building a curved before we got underway through early conversations with our inspector.
Your question made me think about the sagging as I just know it is natural as that is the weakest direction to hang a channel. The break in the flanges weakens it further.
I had a discussion with our inspector prior to starting construction and he told me about a builder that built a perfect & beautiful set of kit wings for an airplane. He did not tell me the model. He said the wings were flawless with one exception. The leading edge curved & that the wings took an arc during assembly. We put temporary supports between the spars to get started as well.
We did not install the ribs right to left but jumped around around. We set the end ribs then put ribs in at the mid point, then half way between and kept in filling that way until it was done. We ran the level string line parallel to the spars to check straight. We removed the leveling string as we installed the nose ribs and put it back between rib installations. We put a plastic bead on the string line through the jig pin holes & could see the alignment was on by seeing the same amount of clearance around the bead. There was about 10 -15 lbs of weight on the end of the strings. We had a loop & a hook so the weight came off easy. We laid a 4 ft square across the ribs to see if there was any issues. We also slid the long level up & down the ribs prior to skinning to check that the flanges were flat to lay the skins on. Setting the wing up flat, level & square makes it easier to assemble. The lines do not mislead & are visual indicators that are easy to work with. If the spars are aligned through the attach points then the offset threw me off. Keeping the spars straight are key to assembling a straight wing.
All the best with your build.
Glenn
Last edited by Glenn Patterson; 04-22-2016, 09:32 AM.Comment
-
Thanks for the info. You can tell by all the questions that I also think this is a very important step, to get a straight wing.
DougScratch building Patrol #254Comment
-
Glenn Patterson, old post here but still useful. Thank you for your advice on the setup of the wing jig. I am contemplating a floor-standing jig because my garage door likes to be open in the summer and there goes my ceiling.
The key decision I am trying to reach, before I get started, is whether or not to start framing on a table, or to start in the vertical jig outright. If you are reading this and have any thoughts regarding a build table pro or con, I'm all ears.Mark
Scratch building Patrol #275
Hood River, ORComment
-
I really like this setup for a wing jig, I'll probably do something similar...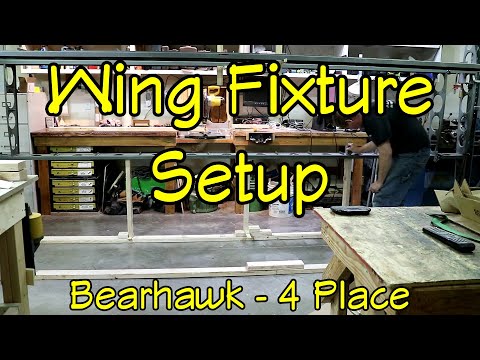
https://www.youtube.com/watch?v=EP_j...VyrIC&index=10https://www.youtube.com/user/fastfox23
Patrol plans #398Comment
-
CAUTION : I spoke of this in the past, not so much as how to build a jig but the spar alignment. If you are building the RIBLET wing align the spars as per the mylar rib sheet not the build book. I scratch built LSA plans # 061 Riblet wing . I hope this saves some pain as I started my wing build wrong and several agonizing days later I took it all back apart. The aircraft may have flown ok but it would Not have the Riblet wing. Things may have changed over the past four years but I am still not convinced . StingerYou do not have permission to view this gallery.
This gallery has 1 photos.Comment
-
The well known biplane guys like the Kimballs assemble their wings on fold up plastic saw horses. I'm considering initial assembly useing the same process. Then skinning in a traditional upright fixture. For more info go to the Biplane Forum and look for the Wolf wing assembly string. The sawhorse process allows easy access above and below. Notches were cut into the sawhorses to secure the spars.
Gerry
Patrol #30Comment
-
Stinger, thanks and noted! I've bookmaked a couple threads on here that speak to spar alignment, and even spoke with Bob about it earlier this week. My plan is to make the spars parallel to the floor long way and short way. I believe this will also make the chord line vertical. My general approach to life is if it looks parallel and square, I want it to be parallel and square. Looking at the Patrol profile, I get about 1/2" offset between the bolt holes between the front and rear spar, but that's only if you draw the line parallel to the chord line. Therefore I will not use a plum bob to align the spar attach holes, but to confirm the offset. I think. I guess. Maybe.
Back to the wing jig, N3UW what are you up to these days John?? We miss you! Are you done with your floor-standing, rotisserie skinning jig yet so I can have it? Mark
Mark
Scratch building Patrol #275
Hood River, ORComment
-
Chewie, I think you are on the right track . The cord line on the Mylar is correct. Example: on the LSA I measured up from the bottom of each spar to cord line on the mylar and set plumb bob string to fall across the actual spars thus achieving true alignment for Riblet in vertical jig. Example: LSA measured 2 1/6 front spar and 25/32 aft spar. I think it does make a difference as to the correct wing to achieve good performance. Good Luck Stinger
-
Comment