Bearhawk Aircraft Bearhawk Tailwheels LLC Eric Newton's Builder Manuals Bearhawk Plans Bearhawk Store

Announcement

Collapse
No announcement yet.

Wing rib nesting layouts

Collapse
X
 
  • Filter
  • Time
  • Show
Clear All
new posts

  • Wing rib nesting layouts

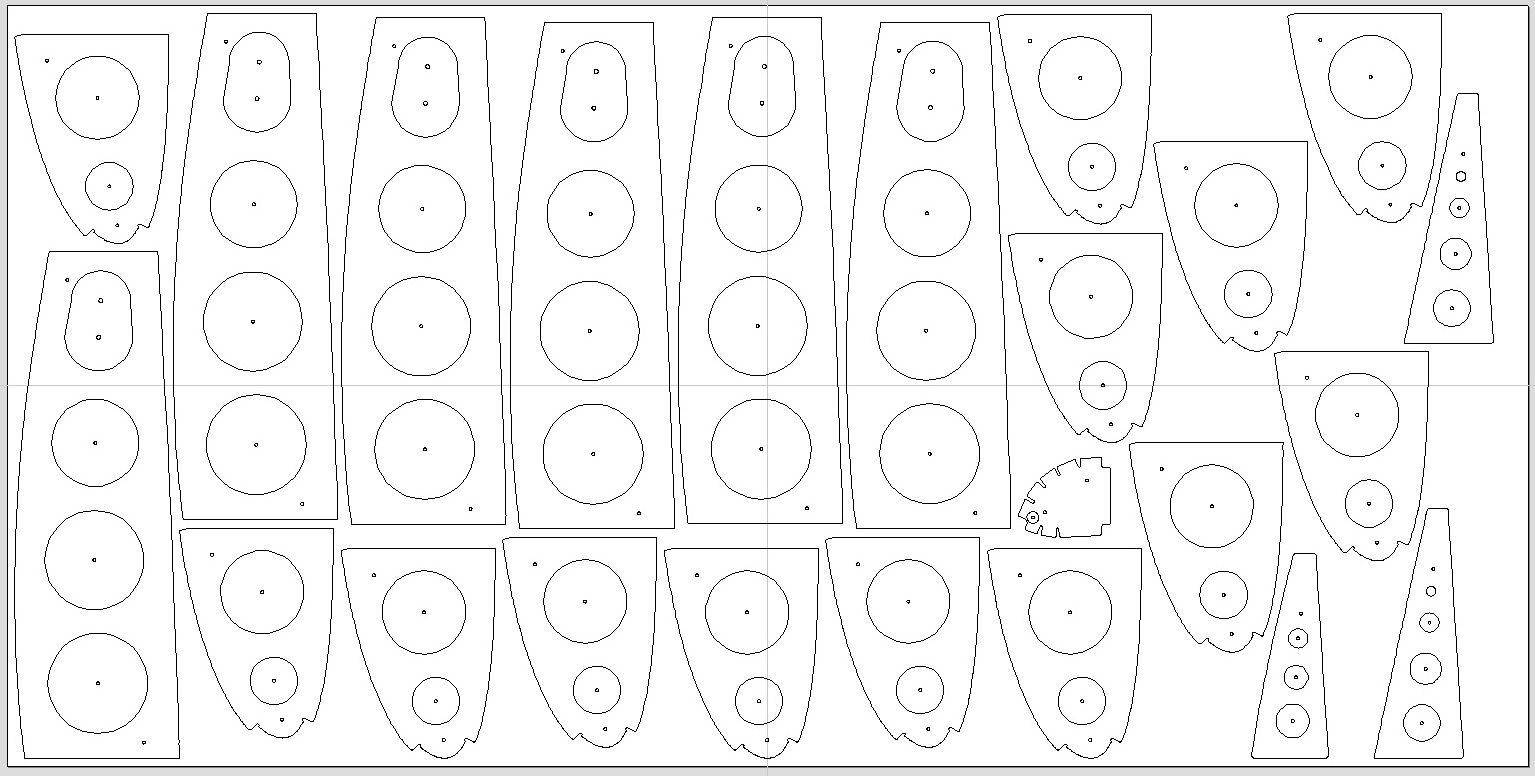
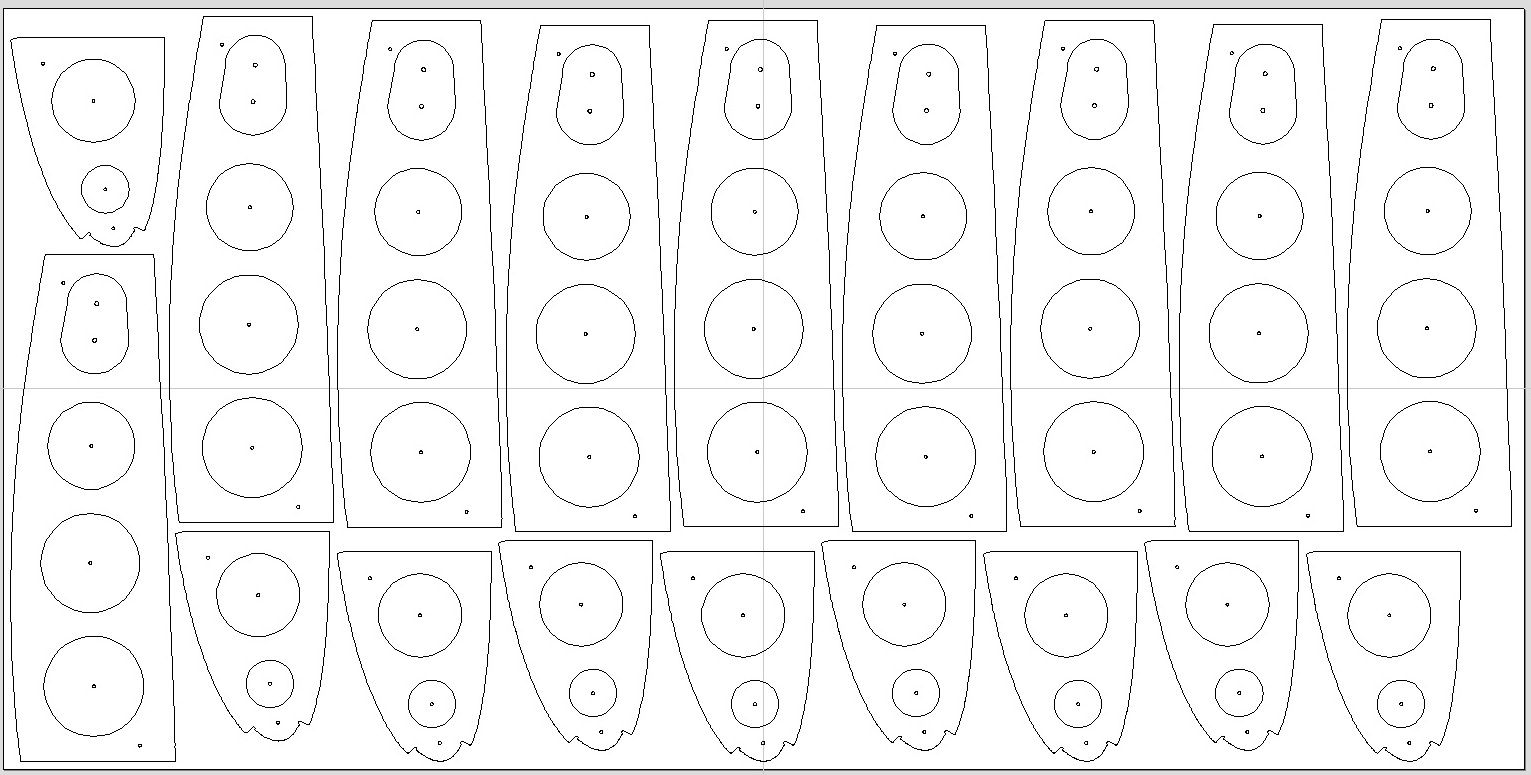
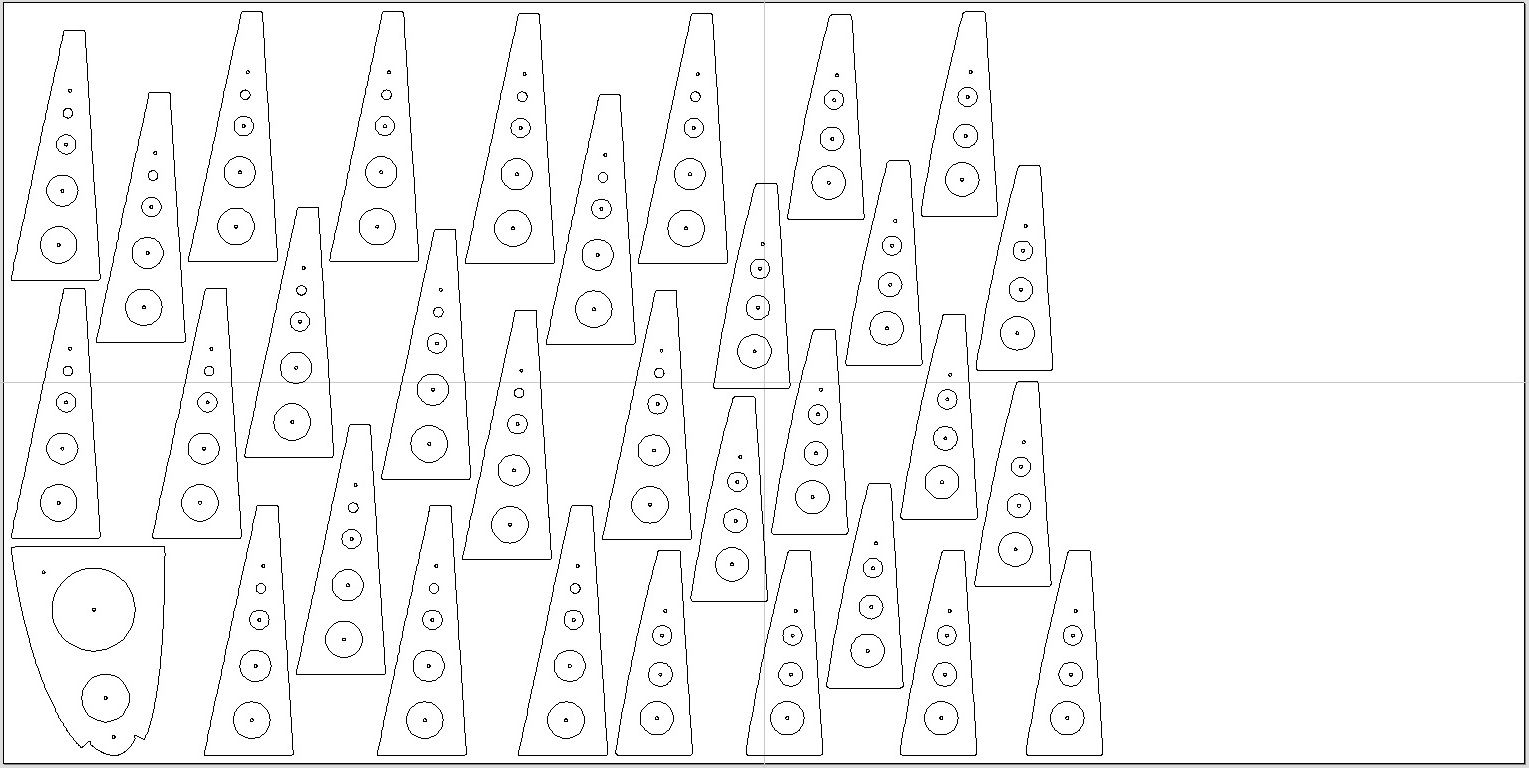
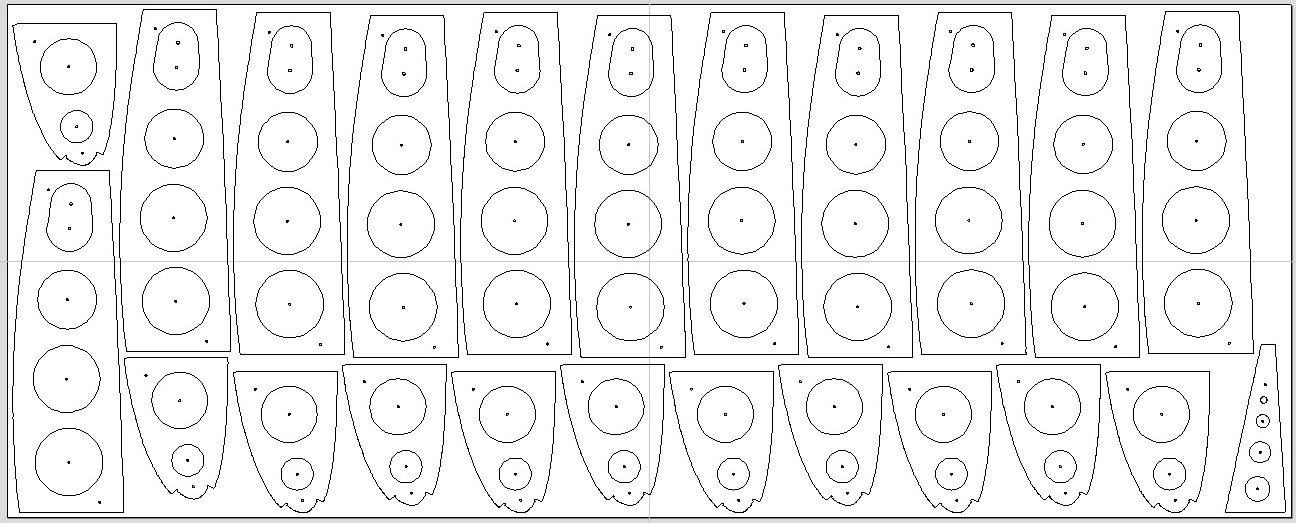
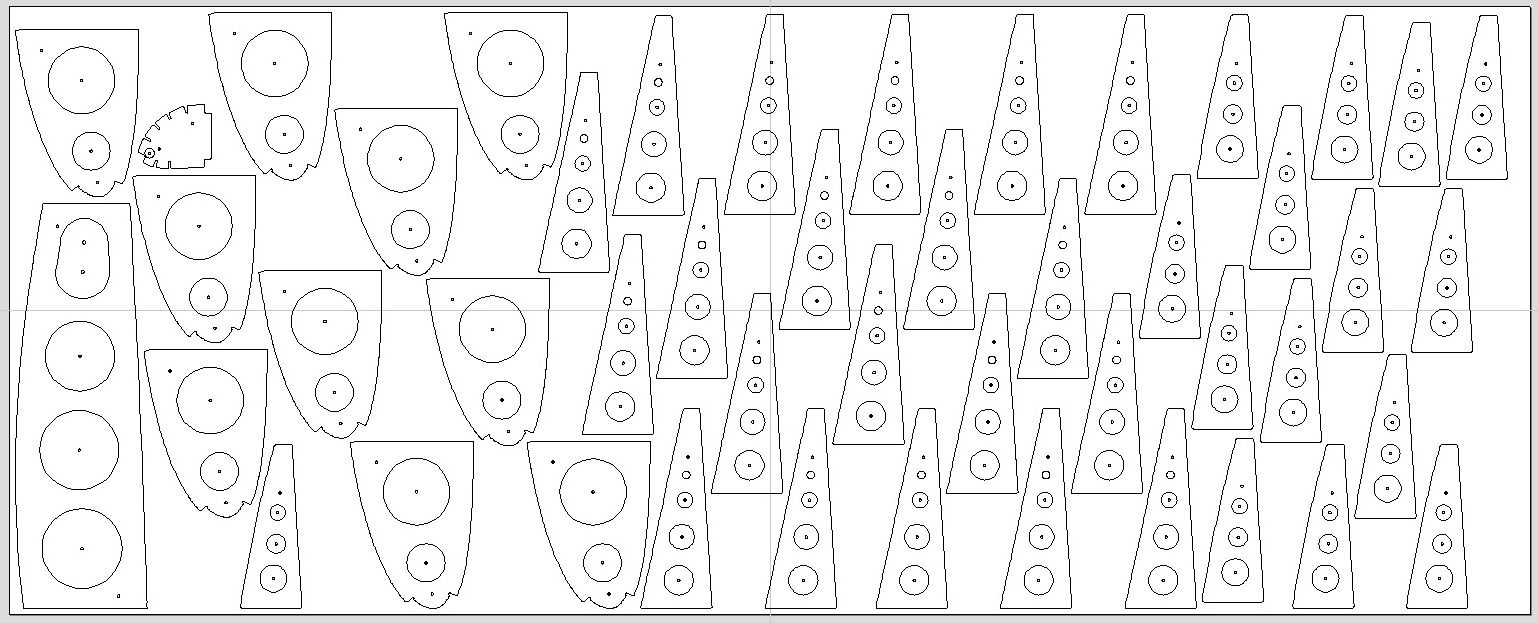
    Others have asked so I decided to take the time to do a couple of layouts for people. There is a 1/2" between parts so its not super tightly nested but it should be easy to do the rough cut outs before routing to size. Right now I only have the .025 sheets done.

    4x8 .025 sheet nesting
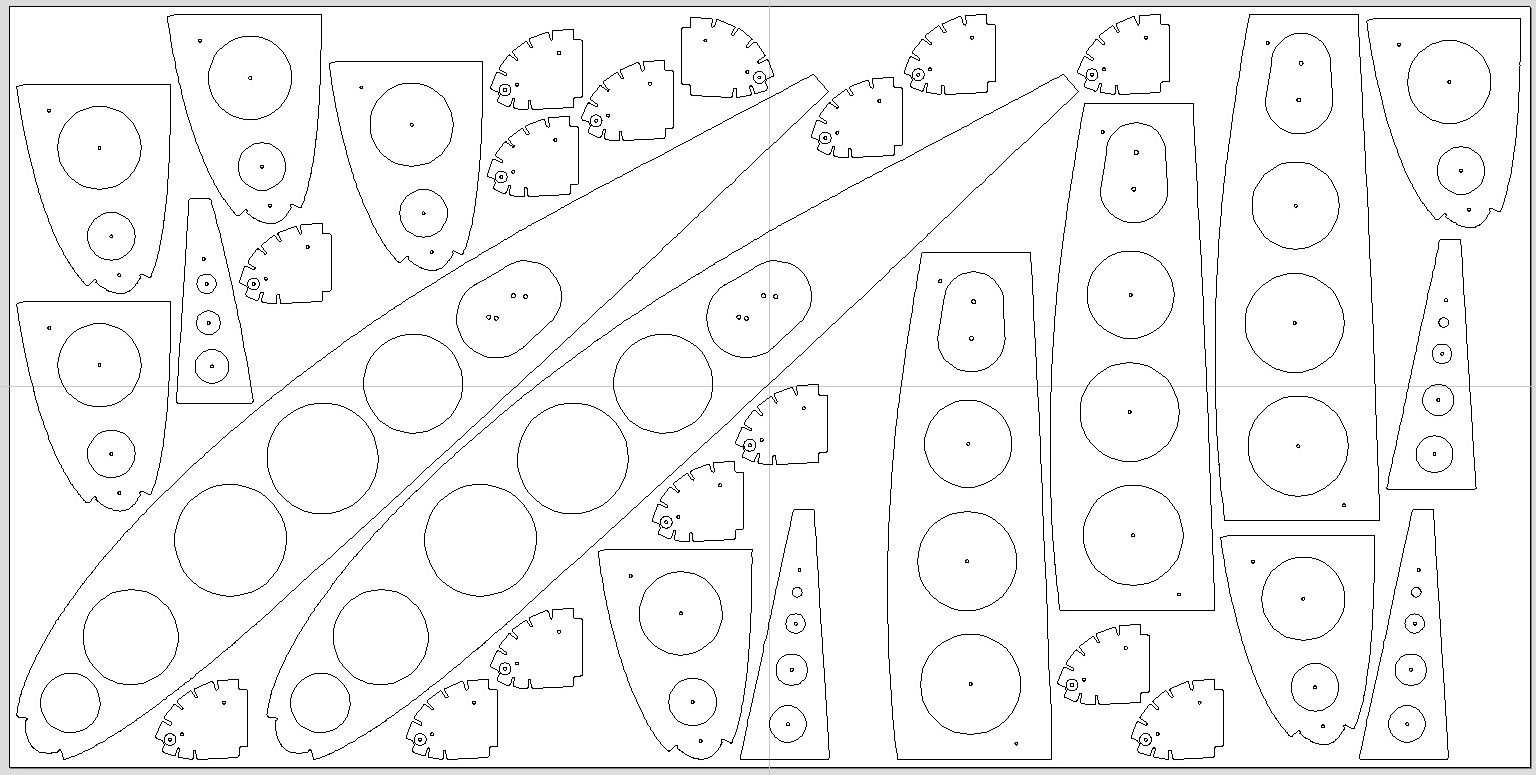


    Enjoy.

    Dan Patrol #243
    Last edited by X'N; 09-28-2013, 11:18 AM.
    Dan - Scratch building Patrol # 243.

  • #2
    4x12 .025 sheet nesting


    Last edited by X'N; 09-28-2013, 11:24 AM.
    Dan - Scratch building Patrol # 243.

    Comment


    • #3
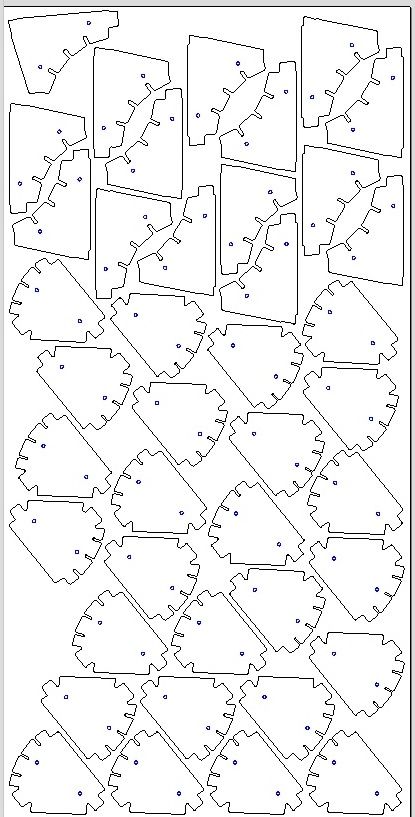
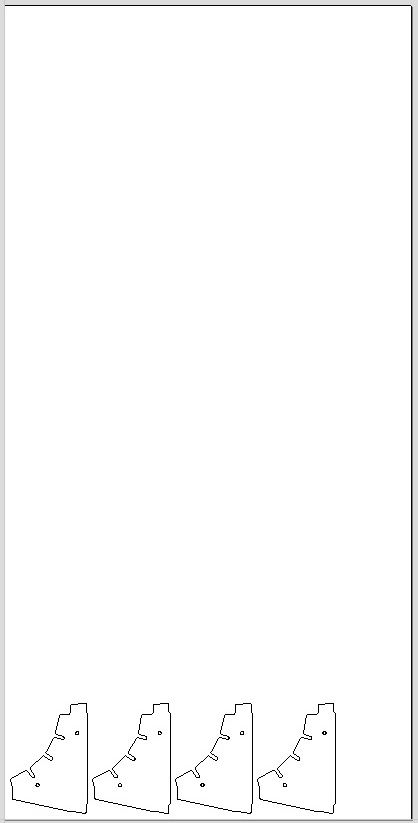
      .020 Flap nose and Aileron cove 4x2' sheets

      Dan - Scratch building Patrol # 243.

      Comment


      • #4
        You might get better packing if you alternate each part so that they are nose to tail next to each other. Think of it as first nose rib points up, next down, next up. The way I did it was to just make up a cut sheet for a count of all parts and tape it to the wall. Then I took my top and bottom router templates and a fat marker and went to town doing what looked right. It actually packed pretty well. I broke it down to smaller pieces - maybe 4-6 parts per piece http://www.bearhawklsa14.com/buildlog/?m=201209 and then cut that down to individual parts. You may find that 1/2" is tight if you use air shears like I did. They are the great for cutting up the aluminum.

        Looking at the blog I am at 1 year (first cuts on 9/24/12) and about to start alodining the ribs. I really need to get going on this thing.
        Dave
        Making Airplane Parts
        www.bearhawklsa14.com

        Comment


        • #5
          My CAD/CAM software is smarter at nesting then I am. FYI I did have on that the parts can be rotated and mirrored (you can see that in the aileron nose ribs) These are simply a guide to go by if someone wishes. Parts can be rotated some for better nesting. I've spent hours trying different nesting layouts before I've been happy. Personally I nested my parts differently because I used my cnc router to cut out the parts including the rib stiffner angles. I realize that is not ideal for most builders. I'd be willing to do layouts for others if they wish. Dan scratch build patrol #243
          Last edited by X'N; 09-28-2013, 12:46 PM.
          Dan - Scratch building Patrol # 243.

          Comment


          • #6
            good work!
            Andrew Serdyukov
            Scratch built

            Comment


            • #7
              Do you have the drawing in .dxf or .dwg format. I looking at using a local company here in Georgia that I deal with to use there CNC Router table to doe the job. But they need a .dxf or .dwg format

              Comment


              • #8
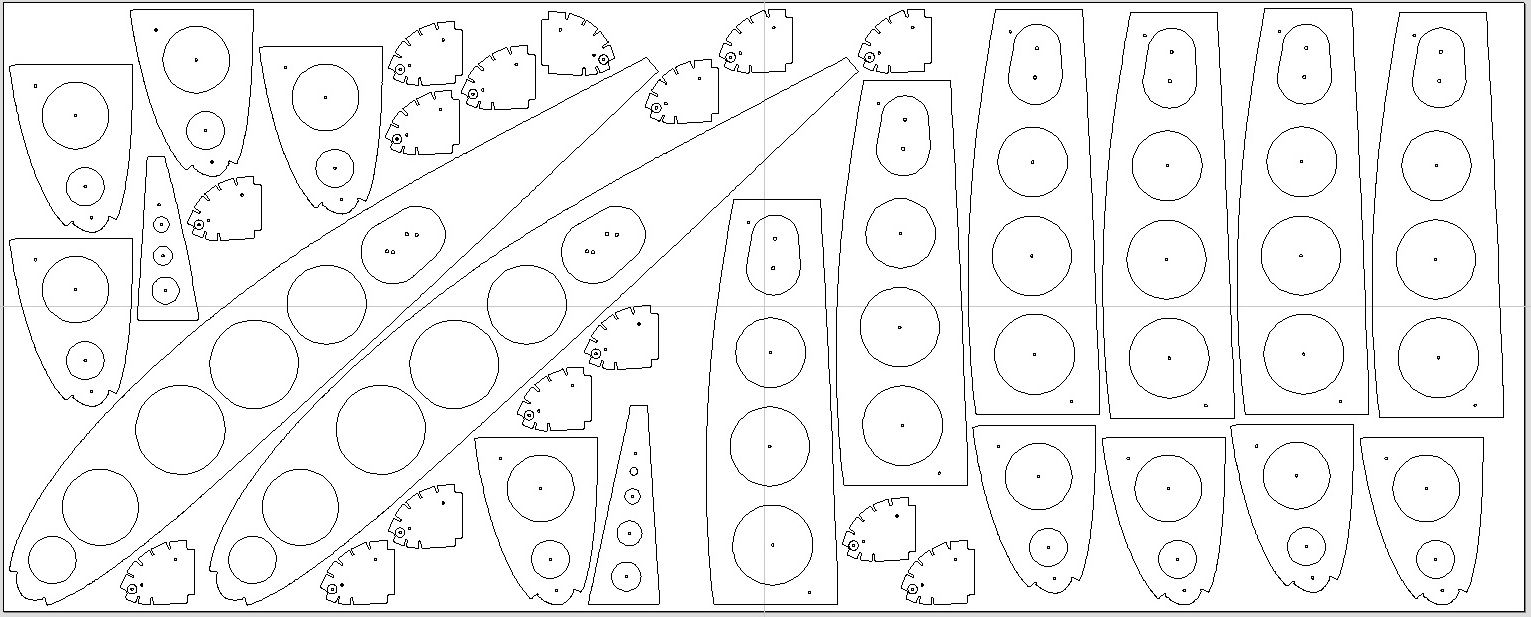
                I did something similar, only laid out the .025 and .032 so far. Happy to show anyone who wants to see. The above does a better job orienting the majority of the ribs so the bends cross the grain, but I'm told the design doesn't require grain to run any particular direction on these.

                If you're planning to make your rear spar cap strips from doubled up .032, save some margin on a long side of your .032 sheet so you can use the full 12' width.

                One thing that helped when marking the aluminum was to have my router templates already made. I used those to trace out the profiles of each part. If I wasn't sure something would fit, I had two templates anyway so I just leap frogged them over each other until I reached the edge.

                Be weary of scratches in the raw material. Mine had a fare share of scratches on the aluminum that the vinyl couldn't withstand, so I made some creative detours around them, including strategic placement of lightening holes! So much for making an ideal CAD-based layout...
                Last edited by Chewie; 04-27-2015, 01:56 AM.
                Mark
                Scratch building Patrol #275
                Hood River, OR

                Comment


                • #9
                  Mark,

                  I will be nesting soon and am interested in seeing what you came up with.

                  Brooks
                  Scratch building Patrol #303
                  Chelsea, MI
                  Brooks Cone
                  Southeast Michigan
                  Patrol #303, Kit build

                  Comment


                  • #10
                    Brooks,
                    This is where I left it, but there were changes along the way. I ended up with more usable scrap than I thought I would... so I used it!
                    Ignore the numbering.

                    -Mark
                    Capture.JPG
                    Mark
                    Scratch building Patrol #275
                    Hood River, OR

                    Comment


                    • #11
                      Thanks Mark! It's encouraging seeing someone else here on the forum that is about at the same place in the build process.

                      Brooks
                      Brooks Cone
                      Southeast Michigan
                      Patrol #303, Kit build

                      Comment

                      Working...
                      X