I am about to need fluting pliers. I have a home made set but not sure I like them. I have googled to find about 4 or 5 types.
The home made set I have used a 3/16 brass rod on one jaw and a polished steel cup on other side. It kind of works--- But I am concerned that its so
narrow that I wont get enough "shrink" near the top front of the nose rib where the curvature is the most severe.
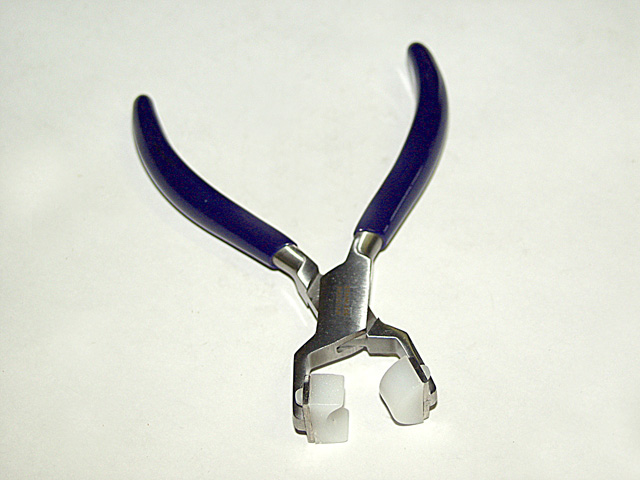
I found what I think are fluting pliers on an RV builders page. They are stainless and have blue rubber covers on the handles. They have special looking
cast jaws which hold fairly large nylon jaws. The male half of the jaw is kind of bullet shaped and looks like -if fully depressed- could make an flute maybe
about an inch wide and 1/2 inch deep. They have lasered on the side of them "made in pakistan". The page also shows an RV wing rib - and it APEARS
that the flutes might have been made with these wider pliers. I note in the picture that instead of his flutes being narrow (like 1/4 inch-) little things- they appear
to be wide..... I see that the bent areas all most touch the rivet holes ! yet the ammount of bend is pretty shallow--- the surface is kind of sine wave shaped.
Where as the narrower flute (i would think) would leave a much flatter "land" between the flutes. Here is the pic of his ribs..... I can all most see the outlines of those
wide nylon jaws in the nearest rib.
Here are the nylon jawed pliers----- and then his ribs-----
There seem to be at least 3 different types of fluting pliers by this same manufacturer. These appear nicely made----
Is everybody using the pliars that make a little 1/4 or 3/16 wide fluit ? or a wider unit like this ?
From experimenting with my home made narrow one- I think they would "eat" enough material for the less curved areas like the middle ribs--
AND---- do I want to only make 1 fluit between each rivet hole ? or Have yall been making 2 or 3 between the holes in the steeper curved areas ?
OR- do you use something like these pliers shown in the pic which can take up more linear inches of the flange material ?
I am guessing that once yall have made 70 or 80 ribs --- you have a definate opinion of what worked best (or would have if you had it- )
Tim


Comment