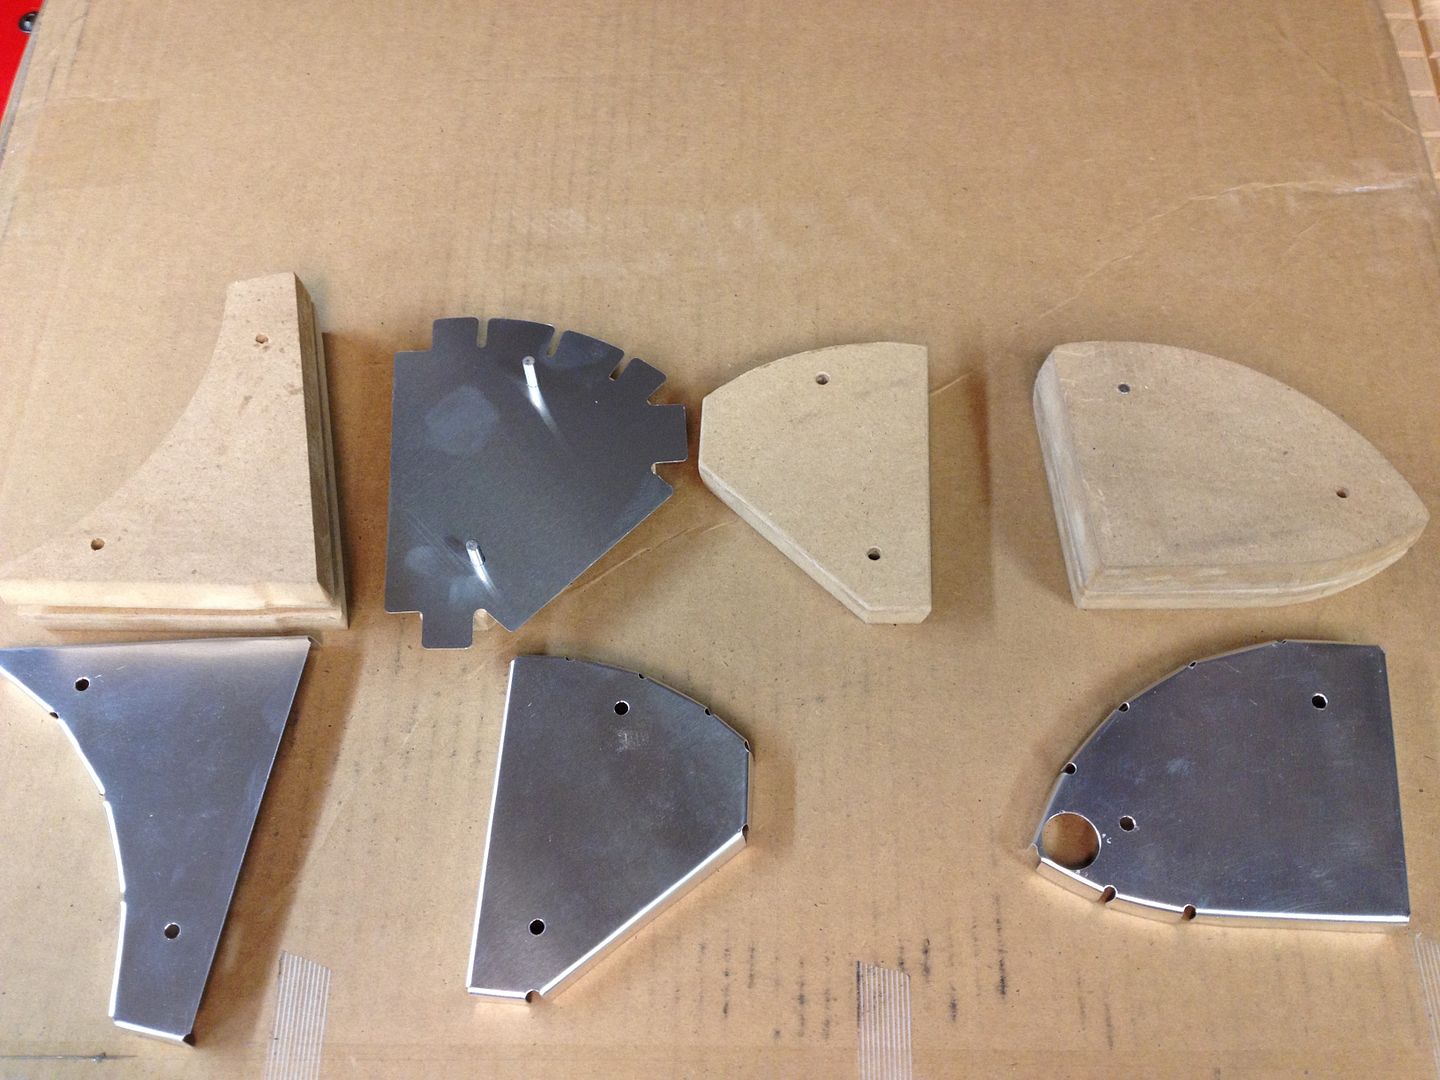
Is there a list of how many jigs we need to make the ribs? Is there a left side and a right side? Also when making the cut form where you trace with a 9/16 flange, how do you know where to stop to stop? See pic:
Announcement
Collapse
No announcement yet.
Rib Forms
Collapse
X
-
You should be able to measure where the flange stops from Page 6. Looks like you cut the top flange too short. You can bend left or right on the same forms so you don't need a need a left and right per say but for bending you really want to sandwich the aluminum between two pieces of wood. There is no list that I've seen hopefully this helps.
Use wood T-nuts in the wood instead of regular nuts, I also suggest using alignment pins in all forms and blanks it helps prevent the rib from moving. Also back cut the bending forms using a belt sander or a 7* dovetail bit. This will help you get your bends closer to 90* after spring back.
For blank cutout forms you'll want:
1 piece full length rib
1 for nose ribs
1 for center ribs
1 for back ribs
1 for aileron
1 for flaps
1 for aileron pocket
1 for aileron nose
1 for flap nose
For bending:
1 full length bending form (this will work for nose, center and full length ribs)
1 for back ribs, aileron, flaps
1 for aileron pocket
1 for aileron nose
1 for flap nose
In this picture you can see how I pinned each part (Im building a patrol so the shapes are a little different but the concept is the same)

I suggest cutting in joggles in your bending bending forms. You have to work it some but I liked this better then other things I've seen.
Sorry my picks won't upload right now.Last edited by X'N; 07-08-2014, 11:28 PM.Dan - Scratch building Patrol # 243.
Comment
-
That's not my picture, its the picture from the builders manual. I am just curious how they measured that. Also, where would I find the sizes for the lightening holes?
Desert Bearhawk does a fantastic job with his videos which are extremely valuable to the Bearhawk community. The issue is, that he doesn't have them for the initial jigs.
Comment
-
He does show the jig buildup in his videos. Here's part 1: http://www.youtube.com/watch?v=aKEBGDSN1YM
I agree his videos are a hoot!
-
-
Trace drawing in the the mdf, cut and then disc sanded it to the line, then sanded it by hand until the line disappeared. In some spots it's off by 1\16th, it the very end it's off by 1/16th. I am probably going to redo and even then I don't know if it will be perfect. Thoughts?You do not have permission to view this gallery.
This gallery has 1 photos.
Comment
-
Also, the wing form bushings...... Cant find the steel tubing locally, any other options? Sorry for asking so many questions, hopefully soon I will be a contributor on this forum.
Comment
-
Do you mean for where a bolt might pass thru or for alignment pins?
If you use a T-nut on the nut side you don't need to worry about that and if you use alignment pins you really don't need to worry about the bolt side. You can get solid dowel pins from McMaster Carr or your local Ace hardware. Get solid ones do not waste your time on split roll pins.
On the side note for small thin tubing go to your local hobby shop they usually have a great selection.
-
-
You are contributing by asking questions.
I gain a lot of knowledge for things I haven't known or experienced yet by reading answers to other builders questions. This helps me plan ahead. So please ask away. John, Naples FL
Bearhawk 4-Place Plans #1316
Patrol Plans #006
Experience is something you get, right after you need it.
Comment
-
You can order a piece of 1/4" 4130 tubing (.028) to use as the bushing. That is what Eric recommends in his build manual. I ordered mine from aircraft spruce. It was $8.50 a foot.Last edited by Flynguy521; 07-10-2014, 06:34 PM.
Comment


Comment