Back in the Game

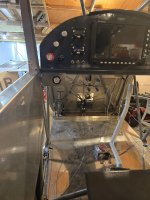
Since my last post, finished fuel system (just need to flow test), finished brake system including parking brake, layed out controls on panel, painted and installed panel, installed controls and made firewall pass thru. Next is engine baffles, wire up engine monitor, keep putting on parts for the last time ?
 

Attachments

  • 20250617_220436.jpg
    20250617_220436.jpg
    2 MB · Views: 1
  • 20250205_141909.jpg
    20250205_141909.jpg
    2.7 MB · Views: 1
  • 20250617_223944.jpg
    20250617_223944.jpg
    2.4 MB · Views: 1
  • 20250501_200814.jpg
    20250501_200814.jpg
    2.4 MB · Views: 1
  • 20250430_083644.jpg
    20250430_083644.jpg
    2.5 MB · Views: 1
  • 20250501_191220.jpg
    20250501_191220.jpg
    2.6 MB · Views: 1
Working on small details, throttle bracket, left windows sill, installed left rear window and closure piece.
 

Attachments

  • 20250630_205606.jpg
    20250630_205606.jpg
    2.2 MB · Views: 2
  • 20250630_205842.jpg
    20250630_205842.jpg
    2.4 MB · Views: 2
  • 20250630_210721.jpg
    20250630_210721.jpg
    1.9 MB · Views: 2
A friend once told me " The enemy of completion is perfection " so true Mark!
As i am doing final assembly of the LSA i find things I can do better, that will improve comfort without increasing weight but by grams. This is one. Upper window closure. But of course I had finished the window. Oh well, its almost done now. Lol
 

Attachments

  • 20250708_181837.jpg
    20250708_181837.jpg
    2.6 MB · Views: 2
Couple shots of the top window closure
 

Attachments

  • 20250708_190356.jpg
    20250708_190356.jpg
    2.5 MB · Views: 2
  • 20250708_190257.jpg
    20250708_190257.jpg
    2.6 MB · Views: 2
Sorting out window latch and catch, along with interior panel.
 

Attachments

  • 20250731_142836.jpg
    20250731_142836.jpg
    2.5 MB · Views: 2
I copied Bob's Patrol on the left window, which is a blade that rotates down into a slot cut into the window sill. I put a very slight angle on the slot so the window latch tends to stay closed....rather than vibrate open. The blade is close to the round window frame stock and makes for a neat clean snag free install.
 
Back at it after Osh!
Mission shift?
I've decided to go bare bones. No Alternator, so no Adsb required. Pulled the GRT EFIS, Trig TY22 Transponder/ADSB out/in.
So, about a 12 pound reduction and 10k worth of stuff!
The calculations on hourly electric consumption is around 1 amp. I have a small solar panel with controller that produces 20watts/hr going in the skylight.
panel will consist of AV30e, Trig TY91, GRT 4000 eis, magnetic compass, 2.25" airspeed indicator, Ipad Mini 6, and my cellphone.
Working on wiring now!
 

Attachments

  • 20250808_134100.jpg
    20250808_134100.jpg
    2.2 MB · Views: 1
  • 20250808_135138.jpg
    20250808_135138.jpg
    2.3 MB · Views: 1
I would perhaps consider keeping any provisions for ADS-B (while avoiding the actual installation of alternator, boxes, etc.)... would be very surprised if the UAS/AAM industries - fairly deep pockets there - do not continue to press for universal ADS-B equipage to address their need to cost-share their separation assurance/anti-collision problem with other NAS users. ACAS-xu is already baked in terms of standards work, and the universal ADS-B equipage 'safety/security' argument is plausible cover for further rule making activity. Just saying.
 
Last edited:
I would perhaps consider keeping any provisions for ADS-B (while avoiding the actual installation of alternator, boxes, etc.)... would be very surprised if the UAS/AAM industries - fairly deep pockets there - do not continue to press for universal ADS-B equipage to address their need to cost-share their separation assurance/anti-collision problem with other NAS users. ACAS-xu is already baked in terms of standards work, and the universal ADS-B equipage 'safety/security' argument is plausible cover for further rule making activity. Just saying.

The thing is, I can add all these items later, but if I start with them, I can't remove them and currently operate under class b & c . Most of my flying, 99 percent, is outside the mandated adsb airspace anyhow.
 
Exactly what I am saying... you have apparently already done some of the work figuring out how to get ADS-B in the plane, so if the provisions (bracket tabs, antenna mount, etc.) that are the hard part of retrofit are already done, you get the benefit of exemption from the rule with reduced time and/or cost to compliance if the regulatory environment changes. Sanity may prevail and ADS-B continues to be an airspace rule with exemptions and onus on UAV/AAM to stay clear of piloted aircraft. If not, a change in policy to move to portable units for non-electric aircraft would be my pref, but you'll be good either way.
 
Lots of small details this week, pushing to have a flyin aircraft in 6 weeks ? ??
 

Attachments

  • 20250918_071900.jpg
    20250918_071900.jpg
    2 MB · Views: 3
  • 20250918_171815.jpg
    20250918_171815.jpg
    2.2 MB · Views: 3
  • 20250916_220231.jpg
    20250916_220231.jpg
    2.2 MB · Views: 2
  • 20250917_194518.jpg
    20250917_194518.jpg
    2.5 MB · Views: 2
  • 20250917_194513.jpg
    20250917_194513.jpg
    2.6 MB · Views: 2
  • 20250916_220330.jpg
    20250916_220330.jpg
    2.3 MB · Views: 2
  • 20250917_171508.jpg
    20250917_171508.jpg
    1.7 MB · Views: 2
I almost wish I would have kept my original simple panel, but have never flown with glass so decided to jump in and give it a try. I'm a couple weeks away from my DAR inspection so no turning back now.
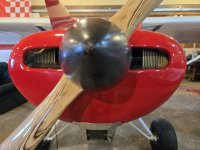
 
I almost wish I would have kept my original simple panel, but have never flown with glass so decided to jump in and give it a try. I'm a couple weeks away from my DAR inspection so no turning back now.

Last year I owned a Aeronca 65TC, flew it to Osh and back then sold it. That's when I started thinking, I flew all that way with basic instruments an my Foreflight. It was a great trip. Took me a few months to make the decision to revamp the panel. Happy I did.
 
More items off the "short list". Less parts laying around the hangar!
 

Attachments

  • 20250921_201355.jpg
    20250921_201355.jpg
    2 MB · Views: 2
  • 20250922_145027.jpg
    20250922_145027.jpg
    2.2 MB · Views: 2
  • 20250920_160321.jpg
    20250920_160321.jpg
    2.2 MB · Views: 2
  • 20250921_201437.jpg
    20250921_201437.jpg
    2.3 MB · Views: 2
  • 20250919_180849.jpg
    20250919_180849.jpg
    2.3 MB · Views: 2
  • 20250921_201410.jpg
    20250921_201410.jpg
    2.2 MB · Views: 2
Boot cowl going on, windscreen an trim are done, just need to install. Engine baffles an small details next week! Hopefully first Engine start mid month.
 

Attachments

  • 20251001_212324.jpg
    20251001_212324.jpg
    3 MB · Views: 2
Boot cowl complete! Windscreen on,now to paint the bottom Windscreen fairing.
 

Attachments

  • 20251006_200225.jpg
    20251006_200225.jpg
    2.8 MB · Views: 2
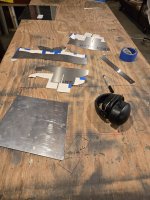
One would think with all these tools out, aluminum shavings and chips, more would be done. Oh well, one piece at a time!
 

Attachments

  • 20251016_170827.jpg
    20251016_170827.jpg
    2.4 MB · Views: 2
  • 20251016_183948.jpg
    20251016_183948.jpg
    2.7 MB · Views: 2
  • 20251016_184000.jpg
    20251016_184000.jpg
    2.6 MB · Views: 2
  • 20251016_183938.jpg
    20251016_183938.jpg
    3.3 MB · Views: 2
  • 20251016_184016.jpg
    20251016_184016.jpg
    2.7 MB · Views: 2
Progress is sometimes measured in mm of posterboard. Lol. Tomorrow i convert these to aluminum!
 

Attachments

  • 20251017_152819.jpg
    20251017_152819.jpg
    2.6 MB · Views: 1
  • 20251017_145707.jpg
    20251017_145707.jpg
    2.2 MB · Views: 1
  • 20251017_142348.jpg
    20251017_142348.jpg
    2.4 MB · Views: 1
  • 20251017_151627.jpg
    20251017_151627.jpg
    2 MB · Views: 1
  • 20251017_151621.jpg
    20251017_151621.jpg
    2 MB · Views: 1
Lots to building baffles from scratch, almost done tho
 

Attachments

  • 20251101_191458.jpg
    20251101_191458.jpg
    2.2 MB · Views: 3
  • 20251101_141653.jpg
    20251101_141653.jpg
    2.3 MB · Views: 3
  • 20251101_191451.jpg
    20251101_191451.jpg
    2.4 MB · Views: 2
  • 20251101_191436.jpg
    20251101_191436.jpg
    2.8 MB · Views: 2
  • 20251027_192529.jpg
    20251027_192529.jpg
    3 MB · Views: 2
  • 20251027_194221.jpg
    20251027_194221.jpg
    3 MB · Views: 2
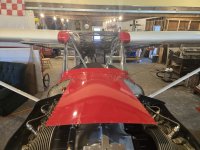
Third attempt at the carb cowl. I really don't like the square shape on a curved cowl. Just me i guess
 

Attachments

  • 20251102_205406.jpg
    20251102_205406.jpg
    2.4 MB · Views: 1
  • 20251102_205351.jpg
    20251102_205351.jpg
    2.6 MB · Views: 1
It is definitely a tricky spot! On our first plane I used the Vans FAB. I got the scoop from an RV builder and made new composite material to interface that with the aluminum of the cowl. If you want more curves, an option is to make up what you want by carving foam, then laying up composite material on your carved foam. This is a way to build whole cowls, just think of how much easier it will be to just make an intake scoop!
 
It is definitely a tricky spot! On our first plane I used the Vans FAB. I got the scoop from an RV builder and made new composite material to interface that with the aluminum of the cowl. If you want more curves, an option is to make up what you want by carving foam, then laying up composite material on your carved foam. This is a way to build whole cowls, just think of how much easier it will be to just make an intake scoop!

I hope to fab one from aluminum, a few curves, but main goals are weight reduction and maintenance friendly, want to be able to remove the scoop from lower cowl for oil changes. With the O200 I don't see how the RV fab would be a good solution. So, off I go. ?
 
Well, I scrapped last night's efforts this morning. ? Compromise is a necessity whe completion is priority!
It has curves, very subtle tho. Will hopefully finish up tomorrow.
Goals were met, its fairly light and will be attached with screws to allow easy access to lower inner cowl for oil change.
 

Attachments

  • 20251103_203455.jpg
    20251103_203455.jpg
    2.2 MB · Views: 2
  • 20251103_203505.jpg
    20251103_203505.jpg
    2.1 MB · Views: 2
  • 20251103_203510.jpg
    20251103_203510.jpg
    2.2 MB · Views: 2
  • 20251103_203517.jpg
    20251103_203517.jpg
    2.1 MB · Views: 2
  • 20251103_203547.jpg
    20251103_203547.jpg
    2.4 MB · Views: 2
  • 20251103_203600.jpg
    20251103_203600.jpg
    2.4 MB · Views: 2
Boy, I like how that turned out. Very Nice. I see you fabricated several peices. I often do the same. Its so much easier to rivet two parts together than to fabricate one part with multiple bends positioned in exactly the right places.
 
Today I installed the rubber seal on baffles, so calling that part ✔️.

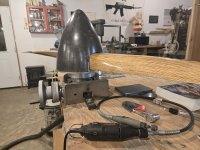
Now, confession time. Two weeks ago while finishing up the cowl i realized there wasn't enough space for a spinner back plate ?.....
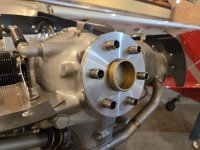
Crap, what to do? I took some measurements, needed .40" more to clear the backplate. Called Sam at Saber mfg. Ordered extended drive lugs, upsized bolts to 7/16", got a .40" engine to prop spacer, while at it increased the face diameter to 6" for better clamping pressure. Had to fabricate a press to get the old lugs out, it never ends ?

All that done.
Short list gettin shorter!!!
 

Attachments

  • 20251109_192929.jpg
    20251109_192929.jpg
    2.2 MB · Views: 2
  • 20251109_192935.jpg
    20251109_192935.jpg
    2.8 MB · Views: 2
  • 20251109_192953.jpg
    20251109_192953.jpg
    3.2 MB · Views: 2
Calling the firewall forward done! Hope to run the engine next week. Just have to paint a few things, set timing, fuel flow test. If that goes well. AW inspection will be scheduled. Yee Haw! ?
 

Attachments

  • 20251112_175554.jpg
    20251112_175554.jpg
    2.6 MB · Views: 2
  • 20251112_175546.jpg
    20251112_175546.jpg
    2.5 MB · Views: 2
  • 20251112_175532.jpg
    20251112_175532.jpg
    2.6 MB · Views: 2
  • 20251112_175524.jpg
    20251112_175524.jpg
    2.5 MB · Views: 2
  • 20251112_175517.jpg
    20251112_175517.jpg
    2.5 MB · Views: 2
  • 20251112_175511.jpg
    20251112_175511.jpg
    2.6 MB · Views: 2
Windscreen fairings done ✔️!
 

Attachments

  • 20251115_101706.jpg
    20251115_101706.jpg
    2.3 MB · Views: 2
  • 20251115_101435.jpg
    20251115_101435.jpg
    2.4 MB · Views: 2
  • 20251115_101652.jpg
    20251115_101652.jpg
    2.4 MB · Views: 2
  • 20251115_155603.jpg
    20251115_155603.jpg
    2.6 MB · Views: 2
  • 20251114_153629.jpg
    20251114_153629.jpg
    3 MB · Views: 2
Cowl parts painted ✔️ , all but nose bowl installed. Should be able to do that tomorrow. Then prop goes on. Yee Haw
 

Attachments

  • 20251121_175310.jpg
    20251121_175310.jpg
    1.9 MB · Views: 2
  • 20251121_175323.jpg
    20251121_175323.jpg
    2.1 MB · Views: 2
  • 20251121_175739.jpg
    20251121_175739.jpg
    2.4 MB · Views: 2
  • 20251121_175654.jpg
    20251121_175654.jpg
    2.5 MB · Views: 2
  • 20251121_175705.jpg
    20251121_175705.jpg
    2.6 MB · Views: 2
  • 20251121_175733.jpg
    20251121_175733.jpg
    2.5 MB · Views: 3
Props On!
I'll cut the spinner later, after AW cert is done.
covering ailerons and painting them now.
 

Attachments

  • 20251124_183208.jpg
    20251124_183208.jpg
    2.5 MB · Views: 1
  • 20251124_161637.jpg
    20251124_161637.jpg
    2.9 MB · Views: 1
Door paint complete!
covering the ailerons, then paint later this week if all goes well. Short list is shorter?
 

Attachments

  • 20251207_153952.jpg
    20251207_153952.jpg
    2.3 MB · Views: 1
  • 20251207_135751.jpg
    20251207_135751.jpg
    2.7 MB · Views: 1
Paint going on aileron #1, should have them painted and installed before Christmas!
waiting to see what day the DAR can come out after new year. Hope to be flying by end of January!
short list is real short!!!!!
 

Attachments

  • 20251217_173224.jpg
    20251217_173224.jpg
    1.5 MB · Views: 0
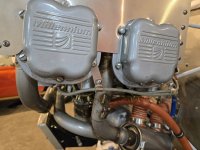
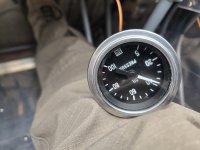
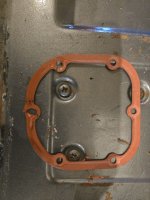
I replaced the oil pressure gauge with a mechanical one, old school, and it works! Had to pull right baffle off to see what's leaking on the 3 valve cover. Was a torn gasket, thats 2 of 4, ugg. Sure wish they'd been more careful assembling, cost me an hour of work! Ran engine to verify gauge operation and check for leaks. All good now! Yee Haw. More to come
 

Attachments

  • 20251228_105036.jpg
    20251228_105036.jpg
    2.3 MB · Views: 0
  • 20251228_080509.jpg
    20251228_080509.jpg
    3.4 MB · Views: 0
Spinner cut is done, tomorrow is fasteners and fillits. Hopefully the DAR will call this week and get the airworthiness cert done too! 20260112_200121.jpg 20260112_200140.jpg
 

Attachments

  • 20260112_182941.jpg
    20260112_182941.jpg
    2.8 MB · Views: 1
There are not many LSA's flying in the USA. I suspect performance will be spectacular!!

For those who don't know, Propman is a retired professional Prop Fabricator. Your Prop looks longer than most to me (I could be mistaken, often am.) I'm curious what performance aspect you designed the prop to achieve. I also am curious to hear about your engine & how the package performs.
 
Excellant! Always thought the LSA would be a really fun airplane. Would love to have one to go along with my 4-place if I could afford to.
 
There are not many LSA's flying in the USA. I suspect performance will be spectacular!!

For those who don't know, Propman is a retired professional Prop Fabricator. Your Prop looks longer than most to me (I could be mistaken, often am.) I'm curious what performance aspect you designed the prop to achieve. I also am curious to hear about your engine & how the package performs.

Several years ago I sent a prop to Bob and he tested it on his LSA. With that data I designed this one for cruise performance, im sure it'll do well in climb also. It's 76" diameter with 44" of pitch. My calculations say I should see 1200-1500 fpm climb at gross with a WOT around 125-130 mph @ 2700 RPM. The engine is from Bob built by Mike. Hopefully over the next month I can do the Task Based flight testing and share results with everyone.
 
Awesome! That design needs desperately more completions to boost its image. It may be the best kept secret in the utility EAB arena.
 
I agree, low cost of operation, good useful load 1500lbs designedgross wt, and fantastic short field capabilities.
 
Me and the LSA have around 40 quality hours burning up gas and time! Enjoying it more each flight. Took it down for a few maintenance and finish items the past weeks.
Had to rework the fuel sight gauges due to cracking around the fittings. Not sure the cause, I was very careful in tapping the tubes and to not stress during assembly. There weren't any when I began flying.

Rearranged the panel, again🙄

Painted the spinner, finally 😆

Added a heat shield on one exhaust pipe, it was heating up a small spot on cowl.

Replaced the GRT EIS4000 with an WAPSI aero. I'll report on this later after some flight time.

Getting the wingtips prepped for paint. Next week's job is painting them.

Sure hope to make Byrds in September.

Oh, adjusted and repainted the prop to get a bit more rpm for climb performance. Now seeing 2350 at 6000ft DA and 1000fpm at gross
 

Attachments

  • 20260822_144210.jpg
    20260822_144210.jpg
    508.5 KB · Views: 6
  • 20260821_184759.jpg
    20260821_184759.jpg
    371.4 KB · Views: 7
  • 20260820_220117.jpg
    20260820_220117.jpg
    409.3 KB · Views: 7
  • 20260816_092155.jpg
    20260816_092155.jpg
    643.5 KB · Views: 6
  • 20260803_204129.jpg
    20260803_204129.jpg
    523.3 KB · Views: 6
Back
Top