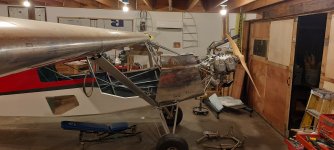
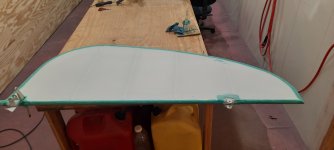
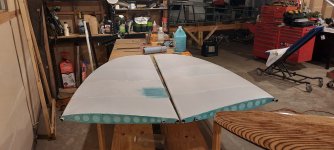
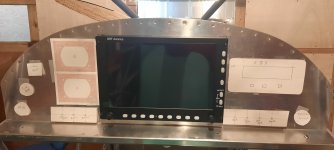
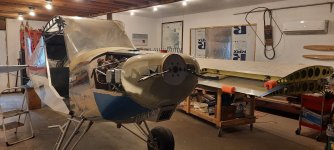
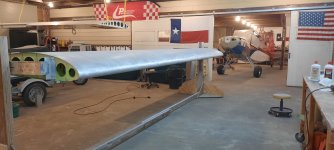
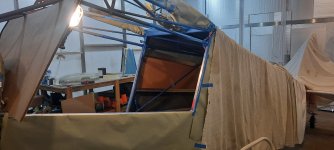
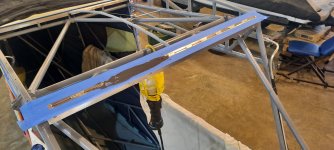
Back in the Game

Any time spent with a hole saw or a Uni-bit, is quality time! It pays off in satisfaction years down the road, every time you look at a part you spent a few more minutes on lightening, it has for me anyway. I have holes in my S-7S where no one else has, my thinking is the kit company stamps the part out, and they are done. That doesn't mean you can't put holes in it! The fun part is being smart about it of course. Also, when your plane comes out heavier than you wanted, (a given...) it helps a lot to know you did all you can to keep it light as possible.
 
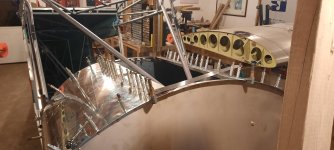
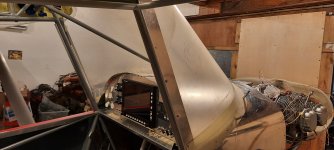
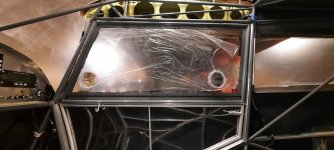
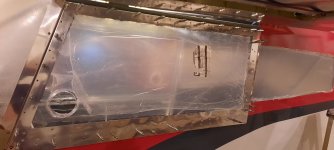
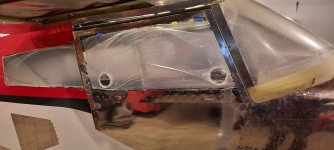
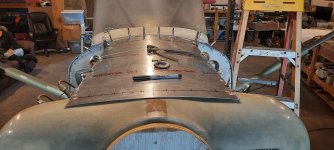
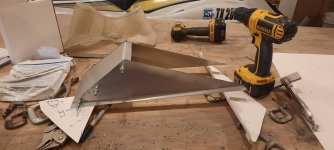
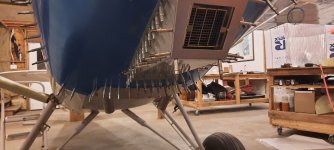
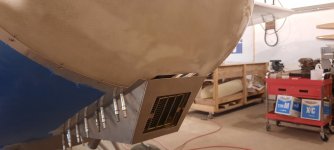
Well, here's a point where I add some weight, been debating this with myself for a while. Gonna install a small cargo "hatch" for two reasons. 1. Make servicing ELT and controls that are behind the cargo area easier 2. Loading things behind the rear seat will be easier also.
I call it a hatch because not putting hinges, using quarter turn fasteners. Seems the lightest and clean aerodynamically. But still quick to open
 

Attachments

  • 20220219_182037.jpg
    20220219_182037.jpg
    1.2 MB · Views: 1
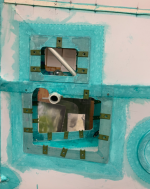
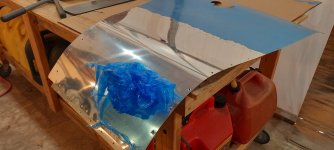
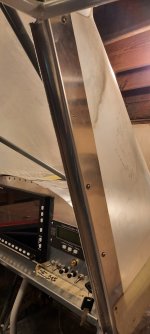
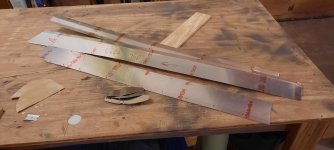
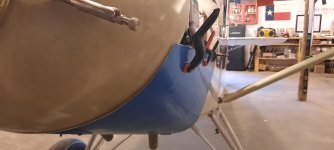
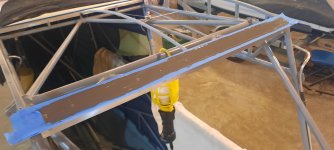
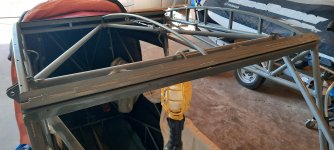
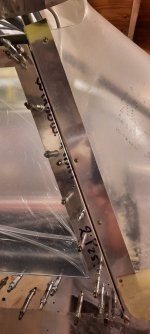
The Hatch opening mostly done. Need to deburr and rivet. .025 was used for the outer ring and .020 to form the angle pieces. Two tabs were welded for lower attach point, aft attach is an existing tab for rear baggage closure and upper is simply drilled to stringer.
I'll weigh it before installing permanent just so I know what it cost me, other than a day of work an a few scraps of metal.
My initial thought is to use Dzus fasteners for the cover. Any other ideas are welcome.
 

Attachments

  • 20220220_175637.jpg
    20220220_175637.jpg
    1 MB · Views: 1
  • 20220220_175708.jpg
    20220220_175708.jpg
    978.9 KB · Views: 1
One suggestion.

When I shrank my fabric, it wanted to "roll" the bottom of the window frame out. I needed to reinforce it so(since the fabric was on I wasn't going to weld) used an Adel clamp on the diagonal tube that is roughly at the center of the window frame tied to a small aluminum bracket connected into the stringer that runs under the window frame.

I would suggest welding another "stringer standoff" to the diagonal tube at roughly the center of the window frame to better support the stringer against the tension of the fabric.
 
Thanks for the heads up, I've already riveted the frames on. So will look at it and come up with some sort of attachments without welding.
 
I recently installed my tail inspection frames and covers. Your cargo opening looks similar in design. Your material is exactly what I used for the frame and cover. Follow Stewarts Systems advice and attach your frame to your fabric from the inside after the first shrink to 250. After the glue cured an X is cut and fabric pushed through the frame, wrapped around and glued from the inside. The frame gets encapsulated.

If you choose to install quarter turn fastener receptacle after you cover & wrap, you eliminate obstructions from allowing fabric to adhere solid without those obstructions. After this photo was taken I riveted (squeezed) 4 tinnerman nut plates in each corner of the lower frame. It worked out nicely.

I also applied a zinc chromate coating to these frames. The AL gets roughed for a Stewarts Glue mechanical bond. I wonder if the AL might corrode over time and loose glue adhesion. So I roughen it, clean it, Chromate it, then glue it.

Click image for larger version  Name:	Screen Shot 2022-02-21 at 1.45.04 PM.png Views:	1 Size:	569.3 KB ID:	72955
 
Last edited:
One of the mods I did on both of my S-7 builds, was a aft baggage door, no regrets. It allows me to get into the area behind the baggage area, where I can keep light gear like a mattress pad, pillow, anything light but bulky. I also put a "ski hatch" in the plywood bulkhead at the rear of my baggage compartment, good for carrying 10' long PVC conduit, or a 78" Prince prop, both which I've done. Good advice on the fabric tension pulling things out of whack, as usual any mods lead to extra work!
 
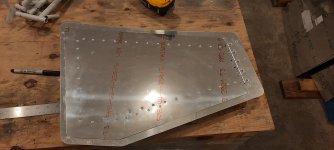
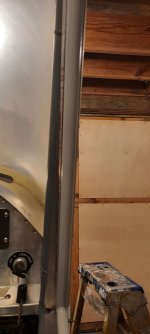
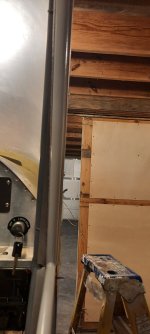
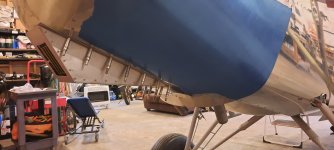
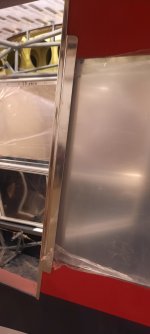
Ok, got it done except for attachment and camloc fasteners, After seeing how much Camlocs are I elected to hinge it. Now we'll call it a door
 

Attachments

  • 20220221_204949.jpg
    20220221_204949.jpg
    1.1 MB · Views: 1
  • 20220221_205250.jpg
    20220221_205250.jpg
    1.4 MB · Views: 1
  • 20220221_205300.jpg
    20220221_205300.jpg
    1.2 MB · Views: 1
  • 20220221_203849.jpg
    20220221_203849.jpg
    1 MB · Views: 1
Last edited:
The dorsal fin area on any plane has always given me cold sweats, real visible too! But they have always come out OK just pretty challenging compared to most other areas.
 
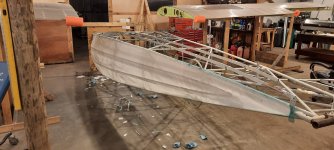
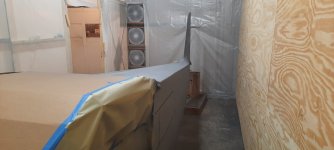
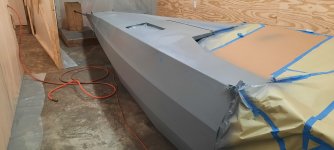
Fuselage is covered, finally! Ekobond to seal the weave has been applied, shot the 2 cross coats of ekofill. Now to listen to some music while I sand for the next week.
 

Attachments

  • 20220709_113141.jpg
    20220709_113141.jpg
    1.2 MB · Views: 1
  • 20220818_195955.jpg
    20220818_195955.jpg
    1.2 MB · Views: 1
  • 20220818_195930.jpg
    20220818_195930.jpg
    1.1 MB · Views: 1
More ecofill, more sanding. Hopefully some color in a week. Oh yeah, ironing a few edges down too.
 

Attachments

  • 20220825_110200.jpg
    20220825_110200.jpg
    840 KB · Views: 1
  • 20220825_110233.jpg
    20220825_110233.jpg
    1.1 MB · Views: 1
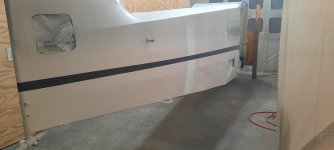
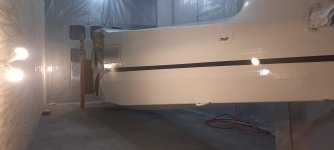
Got the bottom painted white. Gray stripe shot today. Red will be shot in a couple days
 

Attachments

  • 20220916_210220.jpg
    20220916_210220.jpg
    717.8 KB · Views: 2
  • 20220916_205656.jpg
    20220916_205656.jpg
    799.9 KB · Views: 2
  • 20220916_195746.jpg
    20220916_195746.jpg
    841.9 KB · Views: 1
  • 20220916_195509.jpg
    20220916_195509.jpg
    975.9 KB · Views: 0
For those of us flying completed aircraft...., watching your progress is a reminder on how much work ANY airplane is to build! Note to self: "Be careful, don't wreck it, you've forgotten how much work it was to build!" Coming up on 3000 hours flight time on my 2007 S-7S build.
 
Red on, then reshot the gray because the edges didn't come out good. Second go worked thankfully
 

Attachments

  • 20220922_171331.jpg
    20220922_171331.jpg
    1.2 MB · Views: 1
  • 20220922_165539.jpg
    20220922_165539.jpg
    1,007.3 KB · Views: 1
  • 20220922_171350.jpg
    20220922_171350.jpg
    1.2 MB · Views: 1
  • Like
Reactions: LWR
Beautiful. I think you've posted on YouTube. If so, I've spent the better part of a year looking for your updates like I'm somehow responsible for knowing where you are on your project haha. Love it
 
Made some time to install the Leading edge protection on the prop , balanced and good sealing clear coat. I decided to start with 76" diameter and 46" pitch. This will yeild approx 123mph at 2600rpm tas. Now I need to hang the engine (-:
 

Attachments

  • 20221018_132917.jpg
    20221018_132917.jpg
    1.1 MB · Views: 0
  • 20221018_132946.jpg
    20221018_132946.jpg
    1.1 MB · Views: 0
Boot Cowl progress. Hopefully a couple more days and I'll be hanging the engine.
 

Attachments

  • 20221109_182740.jpg
    20221109_182740.jpg
    918.7 KB · Views: 2
  • 20221109_182746.jpg
    20221109_182746.jpg
    850.9 KB · Views: 2
  • 20221109_182759.jpg
    20221109_182759.jpg
    1.2 MB · Views: 2
  • 20221109_182810.jpg
    20221109_182810.jpg
    1.4 MB · Views: 2
A few more pieces of the puzzle done. Got the top boot cowl sorted and drilled, and some of the bottom. Few more hours of fabrication then I'll be installing nut plates and rivets. I made the inner piece removable for future maintenance
 

Attachments

  • 20221110_152344.jpg
    20221110_152344.jpg
    1.3 MB · Views: 2
  • 20221110_152315.jpg
    20221110_152315.jpg
    1.2 MB · Views: 2
Last edited:
Just a few more nut plates and boot cowl is done all but paint.

Sometimes it seems as if removing the plastic covering from the sheet aluminum takes longer than making the part. Lol

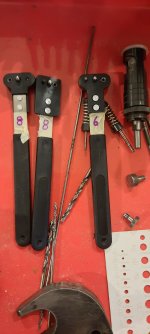
And finally,, if you haven't bought the nut plate jigs yet, do it now. I can't believe I waited this long to get these.
 

Attachments

  • 20221119_165252.jpg
    20221119_165252.jpg
    851 KB · Views: 1
  • 20221119_163229.jpg
    20221119_163229.jpg
    1.1 MB · Views: 1
  • 20221119_161908.jpg
    20221119_161908.jpg
    1.4 MB · Views: 1
Wings mounted one more time before paint. This gives me the opportunity to finish all details like skylight, wing fuselage intersection fairings, windscreen etc. Hopefully the next couple months will produce an airworthy craft.
 

Attachments

  • 20221125_184155.jpg
    20221125_184155.jpg
    1.2 MB · Views: 1
  • 20221125_184058.jpg
    20221125_184058.jpg
    1.4 MB · Views: 1
Getting the exhaust sorted out.
 

Attachments

  • 20221202_200839.jpg
    20221202_200839.jpg
    827.3 KB · Views: 1
  • 20221202_200851.jpg
    20221202_200851.jpg
    785.1 KB · Views: 1
  • 20221202_203254.jpg
    20221202_203254.jpg
    844.5 KB · Views: 1
PropMan

The timing of post #95 is impeccable! I installed my exhaust yesterday and for the life of me could not figure out the way to attach the stabilization thingy-ma-bobs (with the blue hose), your photo gives me hope.

Thanks
 
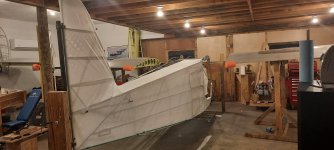
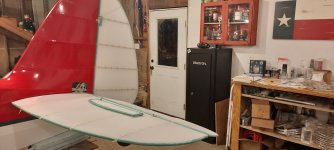
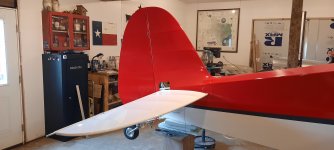
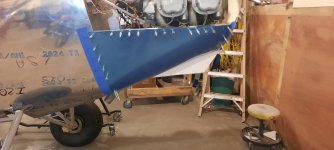
While waiting on a few things for the engine install I decided to finish up the fabric work. Covered the seats with heavy fabric, now working on tail surfaces. Looks like a couple weeks to get thru paint, we'll see
 

Attachments

  • 20221220_185012.jpg
    20221220_185012.jpg
    1 MB · Views: 1
  • 20221220_154711.jpg
    20221220_154711.jpg
    1.2 MB · Views: 1
  • 20221219_201521.jpg
    20221219_201521.jpg
    1.1 MB · Views: 1
  • 20221219_201456.jpg
    20221219_201456.jpg
    1.1 MB · Views: 1
  • 20221220_154704.jpg
    20221220_154704.jpg
    1.2 MB · Views: 1
The couch in the background says it all, that's the way a shop should look! A buddy lives in his hangar in a nearby town, totally outlaw of course, and when I see his latest project (a very prolific builder) it always cracks me up to see: a drill press, next to a metal brake, next to a micro wave, next to a hydraulic press, next to a waffle iron, you get the idea. You've inspired me to move an unused sofa chair out of the basement and put it in the shop, tomorrow. if nothing else the shop cats will appreciate it. You are getting there, looking good.
 
Glad I can add inspiration. Lol
Half of my hangar is conditioned all the time, I find when the climate is comfortable much more work is accomplished. Unless I need a nap
 
Got the bottom side of h stabs covered, lots of distractions with this arctic blast that came thru, plus Christmas.
 

Attachments

  • 20221223_200436.jpg
    20221223_200436.jpg
    1.3 MB · Views: 1
Spent an hour refreshing my memory on stitches, then 4 hours stitching. All but right side HS done and ready for tapes
 

Attachments

  • 20230106_194229.jpg
    20230106_194229.jpg
    1.2 MB · Views: 1
  • 20230106_132233.jpg
    20230106_132233.jpg
    798.6 KB · Views: 1
I SO not wanted to rib stitch, but in the end it was easy and adds a cool retro look rather than the rivet look.
 
Finish tapes all done on HS, elevators and rudder. Sealed the fabric with ecobond. Time to spray ecofill then paint
 

Attachments

  • 20230116_192043.jpg
    20230116_192043.jpg
    763.2 KB · Views: 1
  • 20230116_191132.jpg
    20230116_191132.jpg
    890.6 KB · Views: 1
  • 20230116_190924.jpg
    20230116_190924.jpg
    850.3 KB · Views: 1
  • 20230109_075831.jpg
    20230109_075831.jpg
    1.1 MB · Views: 1
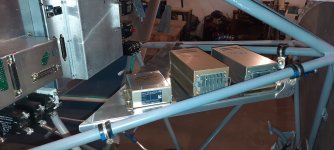
Got the tail parts primed a week or so ago then it got too cold to paint. Sorted out the mounting for my Trig equipment. Constructed so removal of the front two bolts allows it to swing down for maintenance
 

Attachments

  • 20230129_184956.jpg
    20230129_184956.jpg
    863.5 KB · Views: 2
  • 20230211_101436.jpg
    20230211_101436.jpg
    1.4 MB · Views: 2
  • 20230211_101415.jpg
    20230211_101415.jpg
    1.3 MB · Views: 2
Last edited:
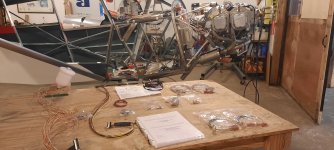
Sorting out wires
 

Attachments

  • 20230323_203635.jpg
    20230323_203635.jpg
    1.5 MB · Views: 2
  • 20230322_211109.jpg
    20230322_211109.jpg
    1.7 MB · Views: 2
  • 20230322_194336.jpg
    20230322_194336.jpg
    1.2 MB · Views: 2
Just when I get rolling on one part I realize something else needs to be done to complete the first task. Lol
Wiring stopped to get baffles done so I can terminate engine monitor wires properly, then I realize the cowl needs to be done for the baffles. It's a vicious cycle. But will be done SOON!
 

Attachments

  • 20230713_174300.jpg
    20230713_174300.jpg
    1.4 MB · Views: 1
  • 20230713_174250.jpg
    20230713_174250.jpg
    927.4 KB · Views: 1
That cowling has taken me about 2-3 months when you figure in all the little details involved. The low pressure lip was 25+ hours. I am glad I am “nearly” done with the cowl, just a note, it takes a lot of planning.
 
Working on Windshield
 

Attachments

  • 20230824_170159.jpg
    20230824_170159.jpg
    1.3 MB · Views: 2
  • 20230824_170145.jpg
    20230824_170145.jpg
    1.3 MB · Views: 2
  • 20230824_170138.jpg
    20230824_170138.jpg
    1.4 MB · Views: 2
  • 20230824_170124.jpg
    20230824_170124.jpg
    884.5 KB · Views: 2
  • Like
Reactions: Nev
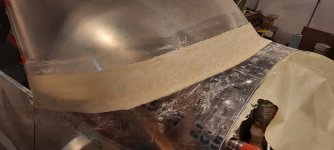
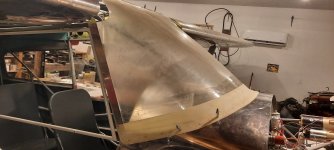
I Hate fiberglass work. Took all day to make the lower Windshield trim. But it's done except for final trim, filler and paint.
 

Attachments

  • 20230825_112810.jpg
    20230825_112810.jpg
    1.2 MB · Views: 1
  • 20230825_140848.jpg
    20230825_140848.jpg
    1.2 MB · Views: 1
  • 20230825_140856.jpg
    20230825_140856.jpg
    1.3 MB · Views: 1
  • 20230825_190939.jpg
    20230825_190939.jpg
    869.9 KB · Views: 1
  • 20230825_191951.jpg
    20230825_191951.jpg
    1.3 MB · Views: 1
  • 20230825_192000.jpg
    20230825_192000.jpg
    1.3 MB · Views: 1
Almost forgot, Edging trim came in, finished the tail fairigs yesterday also.
 

Attachments

  • 20230826_103403.jpg
    20230826_103403.jpg
    754.8 KB · Views: 1
  • 20230826_103348.jpg
    20230826_103348.jpg
    1.1 MB · Views: 1
  • 20230826_103329.jpg
    20230826_103329.jpg
    966.5 KB · Views: 1
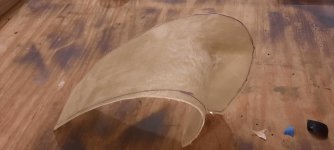
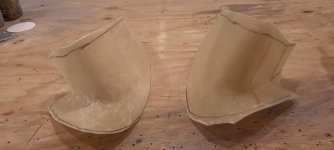
More windscreen trim. Vertical side pieces. I bent them so a lip is formed for the window frame rest in the lip. Will add edge trim or foam as needed
 

Attachments

  • 20230914_191556.jpg
    20230914_191556.jpg
    1.3 MB · Views: 1
  • 20230914_191609.jpg
    20230914_191609.jpg
    1.3 MB · Views: 1
  • 20230914_191618.jpg
    20230914_191618.jpg
    1.1 MB · Views: 1
  • 20230914_191633.jpg
    20230914_191633.jpg
    1.2 MB · Views: 1
  • 20230914_191653.jpg
    20230914_191653.jpg
    1.2 MB · Views: 1
  • 20230914_191718.jpg
    20230914_191718.jpg
    1.3 MB · Views: 1
Side window time! I had the left window partially fitted. Finished the front vertical trim forming on the left then started on the right side. Cut the Plexiglass, trimmed all the small pieces that back up the glass then , cut outside trim. Measured 30 times? then drilled the assembly in the workbench.
checked fit, trimmed to fit , then bent front vertical piece to fit
 

Attachments

  • 20230927_200425.jpg
    20230927_200425.jpg
    1.3 MB · Views: 1
  • 20230927_200435.jpg
    20230927_200435.jpg
    1.3 MB · Views: 1
I chose to use rivets for window trim and Plexiglass attachments. Trim is an assortment of ccc32 and and 426ad3 where possible. The plexi is sandwiched between aluminum trim and fastened with aacq44, an all aluminum pulled rivet. The interior is painted a smoke gray, exterior will be painted to match fuselage later
 

Attachments

  • 20231017_194819.jpg
    20231017_194819.jpg
    927.3 KB · Views: 1
  • 20231018_185510.jpg
    20231018_185510.jpg
    856.6 KB · Views: 1
  • 20231018_185454.jpg
    20231018_185454.jpg
    1.3 MB · Views: 1
Spent half a day turning perfectly good aluminum sheet into scrap. Happens sometimes
 

Attachments

  • 20231020_173510.jpg
    20231020_173510.jpg
    900.5 KB · Views: 1
I've been working on wing fairings for what seems like a year, reality, couple weeks. Almost done tho, decided to make the front to windscreen out of s-glass. For a better fit.
 

Attachments

  • 20231108_184339.jpg
    20231108_184339.jpg
    832.3 KB · Views: 1
  • 20231108_112518.jpg
    20231108_112518.jpg
    1.3 MB · Views: 1
  • 20231108_184241.jpg
    20231108_184241.jpg
    1.2 MB · Views: 1
  • 20231101_192722.jpg
    20231101_192722.jpg
    1.3 MB · Views: 1
  • 20231025_144621.jpg
    20231025_144621.jpg
    1.3 MB · Views: 1
Got a pair of leading edge fairings after a couple days effort. Amazing how much work it takes to make form fitting parts
 

Attachments

  • 20231110_134044.jpg
    20231110_134044.jpg
    962 KB · Views: 1
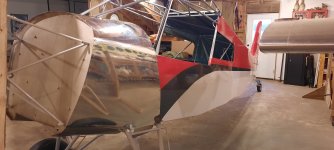
20231120_162115.jpg Lots of challenges with this cowl. Currently working on the lower portion. The lower side support angle is twisted an needs a curve in it for a nice transition to the nose. One piece at a time is how to eat an elephant. Lol
 

Attachments

  • 20231120_162204.jpg
    20231120_162204.jpg
    756.9 KB · Views: 0
  • 20231120_162135.jpg
    20231120_162135.jpg
    1.3 MB · Views: 0
  • 20231120_162122.jpg
    20231120_162122.jpg
    793.3 KB · Views: 0
More lower cowl work. Got he support angles shaped, positioned the lower skin and started to drill
 

Attachments

  • 20231121_192942.jpg
    20231121_192942.jpg
    726.7 KB · Views: 1
  • 20231121_193005.jpg
    20231121_193005.jpg
    826 KB · Views: 1
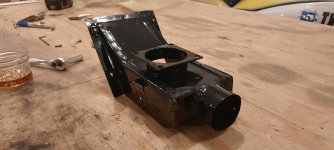
I learned recently the carb heat inlet to the airbox must be relocated to the rear of the box. Today I hacksaw the part off, welded onto the back and riveted on a cover of the old position
 

Attachments

  • 20231127_112231.jpg
    20231127_112231.jpg
    971.9 KB · Views: 1
  • 20231127_112239.jpg
    20231127_112239.jpg
    941.6 KB · Views: 1
  • 20231127_193343.jpg
    20231127_193343.jpg
    816.7 KB · Views: 1
  • 20231127_193438.jpg
    20231127_193438.jpg
    793.1 KB · Views: 1
Lower cowl airbox cover mock up and fab
 

Attachments

  • 20231128_164918.jpg
    20231128_164918.jpg
    801.3 KB · Views: 1
  • 20231128_164927.jpg
    20231128_164927.jpg
    781.2 KB · Views: 1
  • 20231130_140012.jpg
    20231130_140012.jpg
    989.8 KB · Views: 1
  • 20231130_140020.jpg
    20231130_140020.jpg
    913.5 KB · Views: 1
Lower cowl parts are fabricated and drilled in place. Time to debur, dimple and rivet together
 

Attachments

  • 20231219_182605.jpg
    20231219_182605.jpg
    1.5 MB · Views: 1
  • 20231219_182620.jpg
    20231219_182620.jpg
    1.5 MB · Views: 1
  • 20231219_182631.jpg
    20231219_182631.jpg
    1.5 MB · Views: 1
Cowl doors fitting. Time to drill fasteners and buck rivets. Almost to final trimming too.
 

Attachments

  • 20240104_160214.jpg
    20240104_160214.jpg
    1.5 MB · Views: 2
  • 20240104_160204.jpg
    20240104_160204.jpg
    1.4 MB · Views: 2
Prop Man;

I'm curious about the curved radius on your cowl doors. The fabrication of them is in my near future. Did you form that radius into the door, and if so did you use a slip roller or maybe by hand over a cylinder?
 
Brooks, it's all by hand. I slowly bend where needed. Step back and look at it, then bend more. Slow and tedious work. The most difficult part was the angle that supports lower cowl. It bends and twist. That one has to be hammered ever so slightly.
 
A couple of pieces of PVC pipe to bend over (I think i used 4 and 6 inch diameter) doesn't hurt but I did it mostly by hand as well. Go slow and "creep up on it".
 
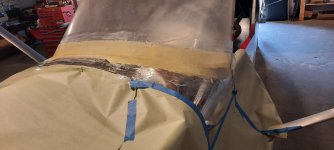
I decided to paint the interior fabric with a light coat of gray, two rolls of masking tape later. It's ready for paint
 

Attachments

  • 20240325_101747.jpg
    20240325_101747.jpg
    816.5 KB · Views: 2
  • 20240325_101733.jpg
    20240325_101733.jpg
    805.4 KB · Views: 2
  • 20240325_101753.jpg
    20240325_101753.jpg
    1.3 MB · Views: 2
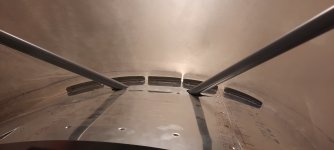
The skylight to windscreen channel is not weather tight, has welds every couple inches. So I mixed up some proseal, neatly applied and painted the piece.
light weight simple
 

Attachments

  • 20240326_124714.jpg
    20240326_124714.jpg
    1.4 MB · Views: 1
  • 20240326_125251.jpg
    20240326_125251.jpg
    760.9 KB · Views: 1
  • 20240326_171931.jpg
    20240326_171931.jpg
    1.1 MB · Views: 1
  • 20240326_172350.jpg
    20240326_172350.jpg
    1.2 MB · Views: 1
On my plexi windshield/Lexan skylight junction, I used a product called Lexal (maybe Lexel), and 16 years later it's still perfect. Available in crystal clear (and it is) or white, caulking gun tube or smaller sqeeze tubes, specifically designed for bonding various types of plastic to each other. I used it after a tip from a fellow builder, and it's been my goto adhesive since then. It stays semi flexible, and any Ace Hardware store stocks it along with their other caulk, but don't let that dissuade you, (I'd order it from Spruce if I had to) it's a great product for many things!
 
I second that! Lexel is amazing stuff. I hadn't thought about using it on the BH since I am not to that stage yet but I have used it to seal leaking automotive windshields, body seams, headlights, and a multitude of other applications.
 
I followed your advice. I adjusted the pipe diameter by wrapping it to the diameter to provide my desired radius. This is method worked better than rolling it. Faster, easier, more sure of end result.
 
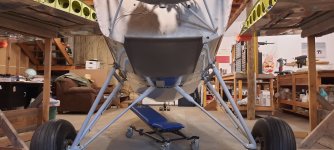
Got the gear covered, painted and installed. Haven't made much progress other than that. Been building a 2500ft strip to replace the 1300ft one I had to move due to development of my airpark lots.
 

Attachments

  • 20240609_184722.jpg
    20240609_184722.jpg
    1 MB · Views: 0
Back
Top