Deburring holes

Frank

Well-known member
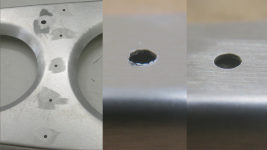
It was suggested to me that deburring drilled holes should not be done with a deburring wheel (2024 T3). This is important consideration because I still have a LOT of deburring to do on the wings and elsewhere. I plan to etch and paint parts before assembly, if that mitigates any problems.


But here are the comments: "The alclad has been removed with the deburring wheel. Putting a fastener(dissimilar metals) through the hole will cause corrosion in the area over time.” And even though I will use solid aluminum rivets on aluminum parts, "It is not the aluminium itself that is the problem but the alloys used.”

Bottom line, can I continue to deburr with the Scotchbrite wheel and pads, or should I strictly use deburring tools?
Click image for larger version  Name:	Screen Shot 2021-09-27 at 2.14.32 PM.png Views:	0 Size:	1.64 MB ID:	68507
 
I doubt there is much galvanic corrosion between different aluminum alloys. They usually all fall within a 250mV delta in the galvanic series. On the other hand the whole point of alclad is to sandwich a fatigue resistant alloy between two thin layers of corrosion resistant alloys. Sanding off the outer layers makes the piece more corrosion-prone.
 
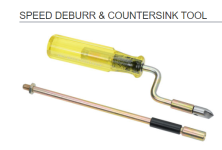
I use a this tool in a cordless screwdriver. Works like a champ. One revolution only. Got mine from Clveland Tool: https://www.cleavelandtool.com/products/3-hex-deburring-tool
Lee

1700_Image1_300x300.jpg
 
Strictly use the proper tools. :-) The holy Bible of AC-43 Deburring controls cracking. ;-(
 
Last edited:
Preponderance of opinion (Facebook groups Bearhawk Builders Support and Aviation Sheet Metal) is that one should not deburr holes with the abrasive wheel. The corrosion issue may or may not rear its ugly head. Expert opinion varies slightly. Using Stewarts Ekoprime on these parts will certainly help in this regard. Nobody said my parts are ruined, just that is not good practice to remove excess material just to get a smooth edge to the hole.

Also, a sharp drill bit should be used with a back-up block whenever possible. It’s true I did force the drill through in many instances.

So I will proceed to clean these parts with detergent, then etch with Ekoetch, then prime with Ekoprime. Then assemble with rivets.

For the next round of drilling and deburring I’ll change methods. I have a basic bit and deburr tool from AS. To me it seems the ideal deburring bit will have a flatter angle than I have tried so far.

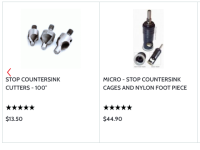
I like the suggestion to use a countersink guide which might offer dependable control over the bevel, which was my problem with both countersink and ‘dog leg’.
 

Attachments

  • photo10131.png
    photo10131.png
    45.6 KB · Views: 0
This tool is compatible with all the avery countersinking bits. This is useful when the stop cage is too bug. Extension also mounts into a drill chuck decently well. Good for countersinking hard to reach areas.
 
I use the same thing, and many of the old-time A&Ps I worked with on CAF aircraft did as well. One or two turns does the trick.
 
I use a drill bit that is couple or three sizes bigger then the hole I am deburring. Simple cheap effective
 
Using a drill bit to deburr holes should be done with your fingers and not in a drill so you can control the pressure applied to the aluminum so that you don’t remove too much material. Use a bit that has some use but isn’t overly sharp or dull. Put the bit into a handle so it’s comfortable to use. Drill the holes to fractional sizes and up to #’d sizes at assembly. You shouldn’t use a #’d drill for a hole that will be dimpled. The hole will be much larger afterwards. Just some little things that might increase the quality of your build.
 
Last edited:
I doubt anyone will buy the product I am about to share due to expense and cheaper alternatives. At the same time, you scratch builders will always think about this time saving tool when doing a lot of deburring.

https://www.yardstore.com/consumabl...-in-and-out/new/texas-in-out-deburr-tool-3-32

The in and out deburring tool is expensive but I'd still get at lease the 3/32" size. The cutting blade is replaceable wear item. Chuck it up in a drill and simply run it thru the hole to deburr.
 
Last edited:
The 3/32 in/out blades are extremely delicate, and a bit of a pain to replace. They are also pretty expensive for what you get.
 
I use a small 4v electric screwdriver that has a pivot head. It rotates slow enough for precise control. The one I use is from Skil, and it's less than $25 bucks. For really tight spaces, I bought a 105 degree adapter. It worked well to get the underside of all the tank cover holes.
 
I saw a really talented machinist deburr holes with a extremely sharp tool he made that looked like a wood chisel. He was able to remove the burr by placing the cutting edge on the material surface and rocking the tool left and right removing the burr without scraping the material around the hole. It was wonderful to watch. Way beyond my meager skills.
 
Another vote for the in-out tool on a cordless drill
https://cogsdill.com/products/debur...RvRQBUFcPVPwDkaWKQjOSkIeS_h0ME8saAiRZEALw_wcB

TJSlice is correct in that the 3/32 version is slight and I did break a blade learning how to use it. But replacement blades are cheap. I got a handful of replacement blades thinking i would break them periodically but i never have broken one since.
Replacing the blade is fussy IF you have to retain the ability to go through thick material and deburr the opposite side. But if you're working with sheet metal the blade retaining pin doesn't have to be perfectly flush with the shaft.

So for me the issues with the tool are overcome-able and the ability to deburr both sides of the hole in seconds, and to do so when space is tight to get a tool on the other side, is invaluable. Massive time saver. Here's our tongue-in-cheek video of the process https://youtube.com/clip/Ugkx4hcGdwKMrsXXpQiSZg9FCyUV_s2m27m4?si=9POa8dyRlM_Edv3c
 
What others said re: the in-and-out... save them for stuff like the holes at the end of the aileron and flap ribs where it can be tough to get even an offset shop made deburring tool in there - that's really where they shine, and a couple blades should do those couple hundred holes without issue.
 
Back
Top