Early Christmas

dramsey

Bearhawk 5
Received the kit today. Thanks to my neighbors who helped unload. Ready to get started. Click image for larger version  Name:	IMG_0076.jpg Views:	35 Size:	2.78 MB ID:	87085

First impressions: What an amazing packing job! Those wing crates are hell for stout and there is approximately zero chance they are moving in route. Things were for the most part were labelled very well. And the other observation is that the kit form today is definitely better than what it was when the instructions were written. At the end of our first date she appears to be a keeper. I will say she is a little heavy though…well I resemble that remark too.
 
Last edited:
Congrats on the new arrival! Let the adventure begin!

I am looking to get a Model 5 myself. What was the lead time for yours? Trying to figure out timing and such.
 
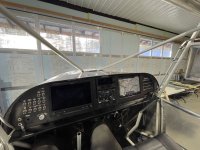
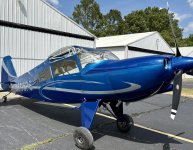
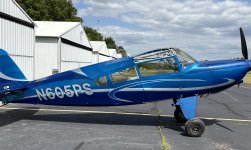
IMG_2287.jpg Well its been a long time since I have posted anything as I went through the humbling process of building my 5 kit. Its taken way longer than I anticipated. The single biggest issue was firewall forward as 2 things collided. I had some issues with clearances in converting the rear intake of my K series engine to a forward intake. And that delayed the start of the cowl which was my single biggest time consumer. Vetterman refused to build me an exhaust for my angle valve engine because of clearances with the stock Bearhawk cowl. So we reached an agreement that I would build a custom Carbon fiber cowl with at leat 2 inches of curvature to fit his exhaust. He certainly makes a nice exhaust.

My cowling could be better but overall I think i am okay with it. I first built a carbon fiber plenum to help with the cooling issues that many report.Then I wrapped the engine/ plenum and boot cowl with 4 layers of stretch wrap, covered with pour foam and spray foam, carved with an electric turkey knife, sanded, filled with drywall spackling, sanded, coated with mold release, put on 6 layers of carbon fiber, cut it loose, installed piano hinges, a remote oil door, cut out two cowl flaps, and spent a ridiculous amount of time sanding,filling, sanding, filling, priming, sanding, priming, sanding what seemed like forever but was a 5 month process. Photos of the outcome attempted but continuous error messages that the image sizes are too long so i cut off part of the images and finally got a few accepted. IMG_2307.jpg
 

Attachments

  • IMG_2302.jpg
    IMG_2302.jpg
    2.2 MB · Views: 0
mike meador made a 180degree elbow but the elbow and engine intake flange essentially rested on the type 2 motor mount cross bar. I had a machine shop machine/weld a 1” extension on the intake and now my clearances are all good.
 
Beautiful job. If I was going to pick a few upgrades to kits, a really nice composite cowl would be in my top 5.
 
Thanks, its probably a good thing that Clint at Vetterman sort of forced my hand. Admittedly, it was on my list of considerations when I started building. i am probably more comfortable with composites than aluminum. my neighbors make fun of me for avoiding riveting. Every plane I have built or helped build had a composite cowl..
 
I am comfortable with composites as well, but I hate sanding the stuff. I just do small stuff. No composite cowl for me.
 
Back
Top