I’m almost done with my boot cowl and I’m unhappy with the way that the forward edges rest against the firewall flange. I need to close the excess gap and Virgil mentioned using a metal shrinker. I’m about to buy one but before I do I just thought it’d ask if there was another way to do this? Anyone have experience with using one of these tools? I’m worried about shrinking the outside cowl and then the attachment holes no longer aligning. I rolled the aft edges that sat flush against the formers and it went well. I don’t think rolling the edges with such an advanced curve would work. As always, thanks for the advice in advance.

You are using an out of date browser. It may not display this or other websites correctly.
You should upgrade or use an alternative browser.
You should upgrade or use an alternative browser.
Metal Shrinking Advice
- Thread starter Allen B
- Start date


DBeaulieu
Patrol Q/B Kit #79
I may be out to lunch and looks can be deceiving...but, I think a bit of massage to that firewall flange, along with eventual fasteners will bring that together quite well. Maybe a bit of shimming if you think it needs it. Are you planning on riveting the boot cowl to the flange or screws? That will make a difference as well

Have-Purple
C18
I’m also working on my boot cowl and am noticing some puckering too. My boot cowl is going to be split into a lower 2/3 which is going to be removable with countersunk #8 screws and a fixed upper 1/3 underneath the canopy. I got the idea from NOEMA and his XHawk Patrol build. I haven’t cut the aluminum yet to split it, but I am hoping that doing that with take some of the “tension” out of it.
I appreciate that the kit comes with precut pieces, but I am starting to wish it wasn’t all predrilled. Worst case in both our scenarios, is a new piece of aluminum.
I appreciate that the kit comes with precut pieces, but I am starting to wish it wasn’t all predrilled. Worst case in both our scenarios, is a new piece of aluminum.

Hi Allen, shrinking is exactly what you need there, and you are right, bending the edge isn't going to help. The hard part is that shrinking on 2024-T3 is not easy, and some folks consider it not safely shrinkable. It will require some practice and possibly some modification to the tool. If you do decide to try, absolutely practice on lots of scrap material before you practice on real parts, and keep in mind it is a very subtle change you are trying to accomplish.
These aluminum sheets have been heat treated, which gives them their required strength, but that also makes them more susceptible to cracks and problems caused work hardening. Also, the teeth on the shrinker are very coarse and will leave marks in the soft aluminum, which you will need to remove. Doing so will also remove the alclad and necessitate two-side finish application before final assembly.
There was a time where more gentle aluminum-oriented teeth were available for purchase, I think from Kent White, but he has died and I'm not even positive it was him that was offering them. If you could find some, it might be worth the investment.
Another option is to stick 150-ish grit aluminum oxide sandpaper between the aluminum sheet and the shrinker teeth. This will buffer the sharp teeth against the aluminum and reduce the amount of post-shrinkage dressing that will be required, but the sandpaper will be consumed over time so keep an eye on it.
When it comes to using the machine, use light pressure with each pull, and move the material frequently to a new spot. You are wanting to make a whole bunch of tiny shrinks, vs a few big shrinks. This will allow you to get the desired shrinkage movement while minimizing localized work hardening. The part of the metal that actually gets shrunk, at least on my tool, is about a quarter inch- whatever the gap is between the teeth when they are fully open. Don't be distracted and think that the shrunk area is as wide as the whole teeth- like 2", indicated by the tooth-mark damage to the sheet. To fully diversify the shrinking zone, you only need to move to a new spot as wide as the jaws open tooth gap (1/4", not 2"). Let me know if that doesn't make sense and I'll try and draw a picture.
Also, mark on the boot cowl where your actual bubbles are, and only shrink those zones. Don't shrink the full edge of the sheet. If you are doing it well, you should probably be installing and removing the sheet a few times as you go, testing the fit. This is definitely a sneak-up-on-it situation because of the negative impacts of the shrinking (damage+work hardening), and if you over-do it, the piece will still not fit well, in a different way.
These aluminum sheets have been heat treated, which gives them their required strength, but that also makes them more susceptible to cracks and problems caused work hardening. Also, the teeth on the shrinker are very coarse and will leave marks in the soft aluminum, which you will need to remove. Doing so will also remove the alclad and necessitate two-side finish application before final assembly.
There was a time where more gentle aluminum-oriented teeth were available for purchase, I think from Kent White, but he has died and I'm not even positive it was him that was offering them. If you could find some, it might be worth the investment.
Another option is to stick 150-ish grit aluminum oxide sandpaper between the aluminum sheet and the shrinker teeth. This will buffer the sharp teeth against the aluminum and reduce the amount of post-shrinkage dressing that will be required, but the sandpaper will be consumed over time so keep an eye on it.
When it comes to using the machine, use light pressure with each pull, and move the material frequently to a new spot. You are wanting to make a whole bunch of tiny shrinks, vs a few big shrinks. This will allow you to get the desired shrinkage movement while minimizing localized work hardening. The part of the metal that actually gets shrunk, at least on my tool, is about a quarter inch- whatever the gap is between the teeth when they are fully open. Don't be distracted and think that the shrunk area is as wide as the whole teeth- like 2", indicated by the tooth-mark damage to the sheet. To fully diversify the shrinking zone, you only need to move to a new spot as wide as the jaws open tooth gap (1/4", not 2"). Let me know if that doesn't make sense and I'll try and draw a picture.
Also, mark on the boot cowl where your actual bubbles are, and only shrink those zones. Don't shrink the full edge of the sheet. If you are doing it well, you should probably be installing and removing the sheet a few times as you go, testing the fit. This is definitely a sneak-up-on-it situation because of the negative impacts of the shrinking (damage+work hardening), and if you over-do it, the piece will still not fit well, in a different way.
I made everything removable with #6 screws. It’s all complete. These holes I used for the nutplates were factory drilled. I didn’t choose the spacing. I suppose I could add a few more nutplates to allow the metal to lay down smooth? Do you think that would be a better option than shrinking? I never thought about shimming but that could work as well. Perhaps just rivet some aluminum stock where the gap is?
Thanks sir. How do you feel about shimming? It’s such a minor cosmetic issue the idea of some extra aluminum between the cowl and firewall seems significantly easier? Or perhaps the easiest option is just to add a few more nutplates where needed?Hi Allen, shrinking is exactly what you need there, and you are right, bending the edge isn't going to help. The hard part is that shrinking on 2024-T3 is not easy, and some folks consider it not safely shrinkable. It will require some practice and possibly some modification to the tool. If you do decide to try, absolutely practice on lots of scrap material before you practice on real parts, and keep in mind it is a very subtle change you are trying to accomplish.
These aluminum sheets have been heat treated, which gives them their required strength, but that also makes them more susceptible to cracks and problems caused work hardening. Also, the teeth on the shrinker are very coarse and will leave marks in the soft aluminum, which you will need to remove. Doing so will also remove the alclad and necessitate two-side finish application before final assembly.
There was a time where more gentle aluminum-oriented teeth were available for purchase, I think from Kent White, but he has died and I'm not even positive it was him that was offering them. If you could find some, it might be worth the investment.
Another option is to stick 150-ish grit aluminum oxide sandpaper between the aluminum sheet and the shrinker teeth. This will buffer the sharp teeth against the aluminum and reduce the amount of post-shrinkage dressing that will be required, but the sandpaper will be consumed over time so keep an eye on it.
When it comes to using the machine, use light pressure with each pull, and move the material frequently to a new spot. You are wanting to make a whole bunch of tiny shrinks, vs a few big shrinks. This will allow you to get the desired shrinkage movement while minimizing localized work hardening. The part of the metal that actually gets shrunk, at least on my tool, is about a quarter inch- whatever the gap is between the teeth when they are fully open. Don't be distracted and think that the shrunk area is as wide as the whole teeth- like 2", indicated by the tooth-mark damage to the sheet. To fully diversify the shrinking zone, you only need to move to a new spot as wide as the jaws open tooth gap (1/4", not 2"). Let me know if that doesn't make sense and I'll try and draw a picture.
Also, mark on the boot cowl where your actual bubbles are, and only shrink those zones. Don't shrink the full edge of the sheet. If you are doing it well, you should probably be installing and removing the sheet a few times as you go, testing the fit. This is definitely a sneak-up-on-it situation because of the negative impacts of the shrinking (damage+work hardening), and if you over-do it, the piece will still not fit well, in a different way.
Last edited:
To Dave's point above, some holes in the firewall flange get "boot cowl only" fasteners, and some get "cowl+boot cowl" fasteners. In the photo you only have the "boot cowl only" fasteners in place, and it may be that by the time you get your "cowl+boot cowl" fasteners into the mix, it will be a non-problem. If you shim, you'll just be adding more gaps at the end of the shims.
I found that I wanted an elastic sealant at this junction to prevent under-cowl stuff (oil, hot air, CO, etc) from getting into the cabin. This is one of the reasons why I used rivets to attach the boot cowl to the flange, in between the holes where the cowl fasteners reached all the way through the cowl, boot cowl, and flange. It was going to be a semi-permanent joint.
Adding shims might also just make the finished joint look more lumpy.
I found that I wanted an elastic sealant at this junction to prevent under-cowl stuff (oil, hot air, CO, etc) from getting into the cabin. This is one of the reasons why I used rivets to attach the boot cowl to the flange, in between the holes where the cowl fasteners reached all the way through the cowl, boot cowl, and flange. It was going to be a semi-permanent joint.
Adding shims might also just make the finished joint look more lumpy.
Perhaps I’ll pump the brakes on this and reevaluate once I get the engine cowling on. After reading what Jared wrote about shrinking I’m not too sure that’s something I want to explore until I’ve seen the final boot cowl+cowl assembly. I’m mainly worried about fumes from the engine compartment coming into the cabin. Thanks again for the help.

Steve W
Well-known member
Take your cowl off. Use a long straight edge from the fuse formers to the firewall and manipulate the fire wall flange to lay flat against the straight edge. Use a 1-1.5” hard wood block with a slit cut into one end. (Some call it a Bob block something). You can use a tight bungie or ratchet strap with protection to bring the assembly tighter against the straightened flange for final drilling. Make sure the firewall stays straight. I usually do this with a wooden former inside the firewall to support it through this process.
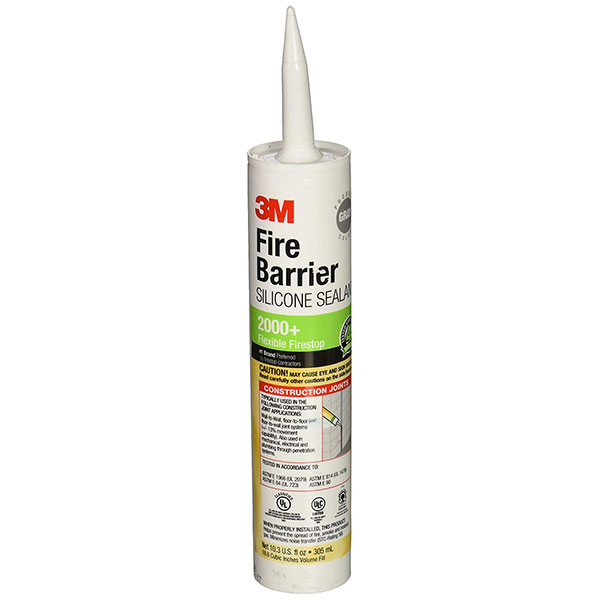
You can run a bead of something like this along the inside corner once you are fully assembled:
 www.aircraftspruce.com
3M™ Fire Barrier 2000+ 10.3 Oz | Aircraft Spruce ®
3M™ Fire Barrier 2000+ 10.3 Oz For sealing or joining seams; it is applied like standacaulk but will expand under direct flame to insulate. Flammable.
www.aircraftspruce.com
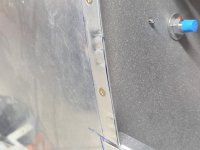
I gently tickled a few flutes between the screws to flatten the bulges. These will be covered by the cowl. If you open the firewall flange to fill the gaps, remember that you are then changing the angle from the nosebowl to that flange and there may be additional fitting issues.
Attachments
johnhansen
Well-known member
Any reason NOT to apply the fire barrier caulk to prevent any fumes from entering the cockpit? No matter how tight you get the gap, there's always some microscopic air gaps that would allow fumes to enter, right? I'm assuming that most folks just live with that, but after chasing engine compartment smells in my C182 for years, I ended up sealing everything with the 3M fire caulk and problem solved.