

 Tweet
Tweet
Hi everyone,
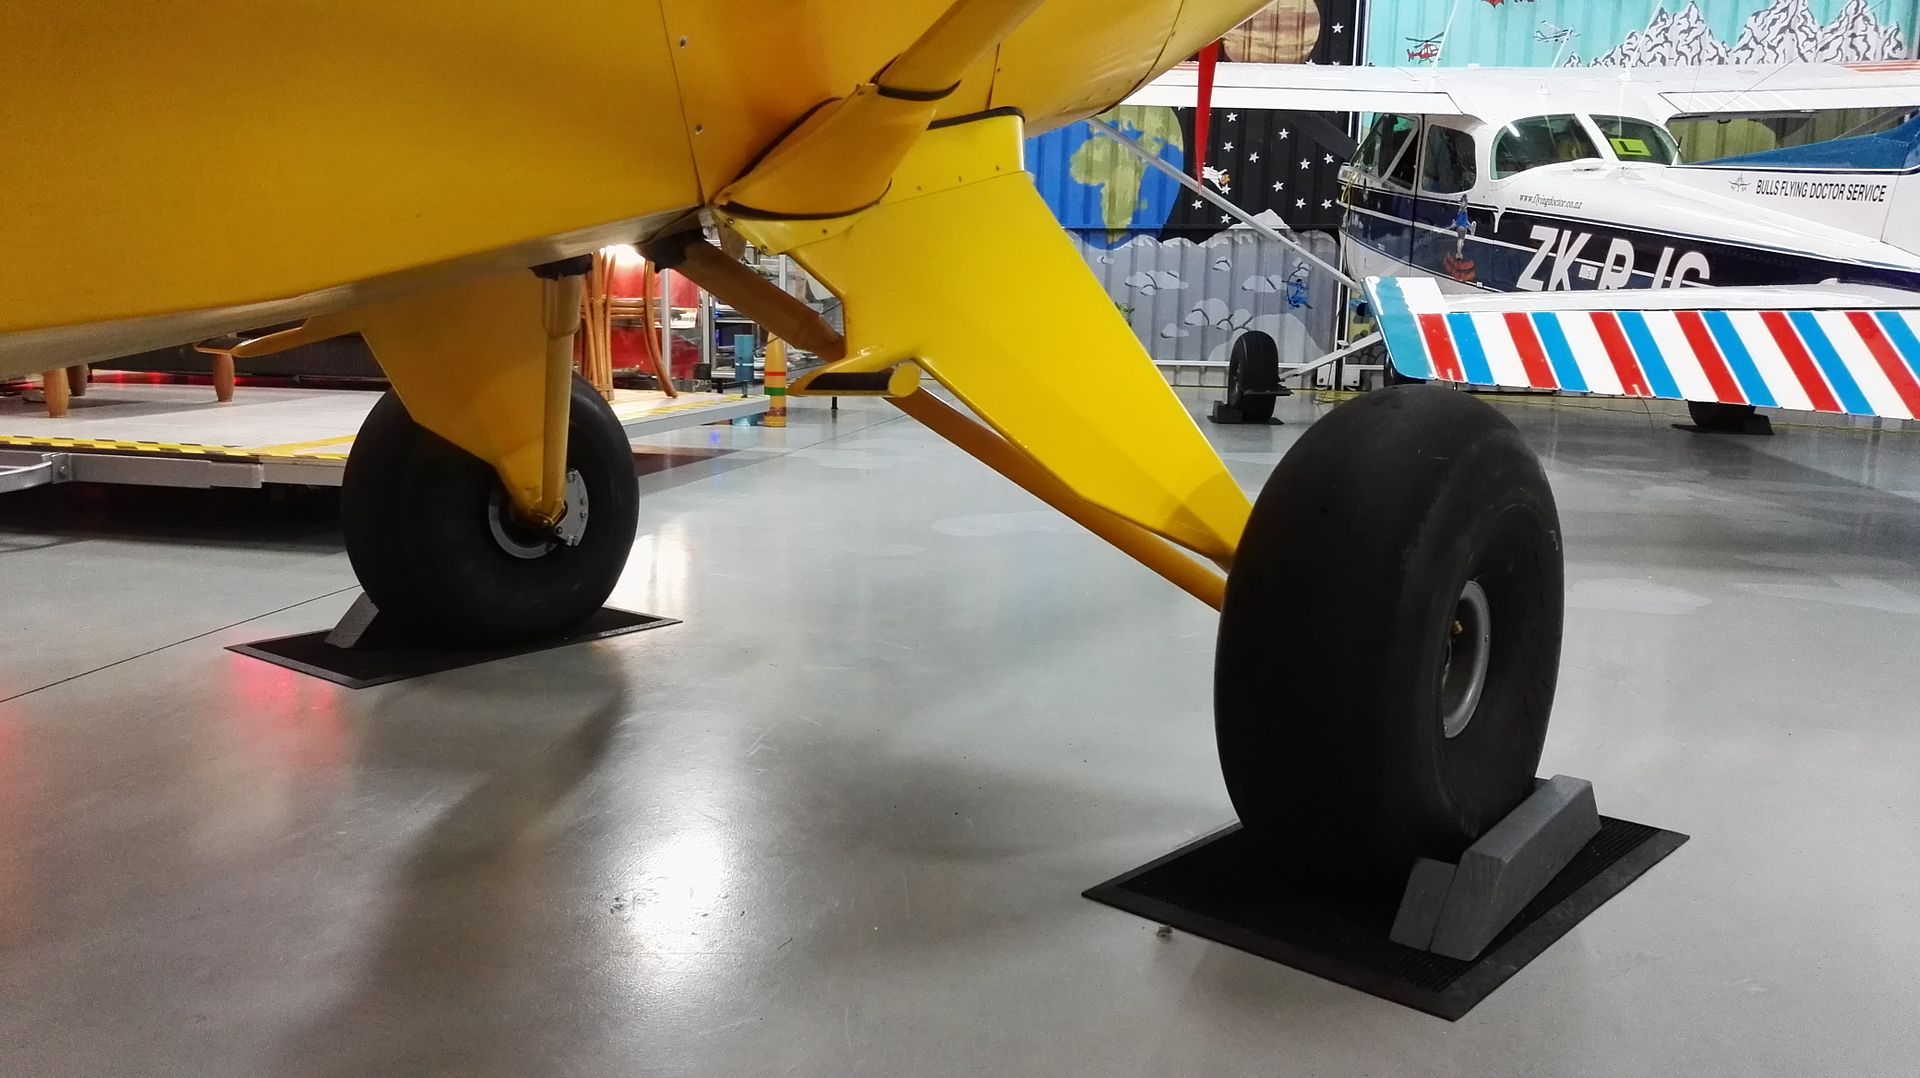
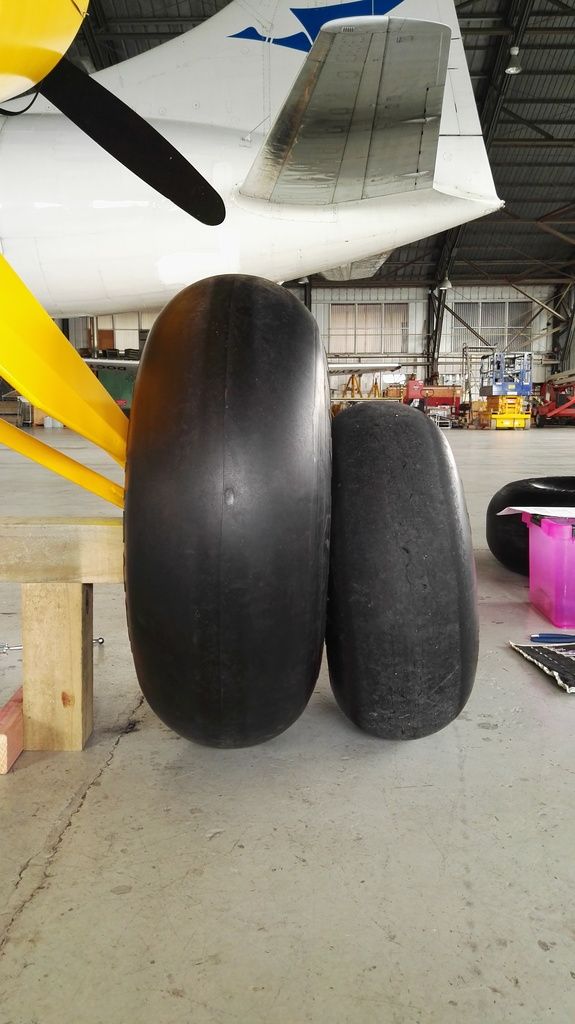
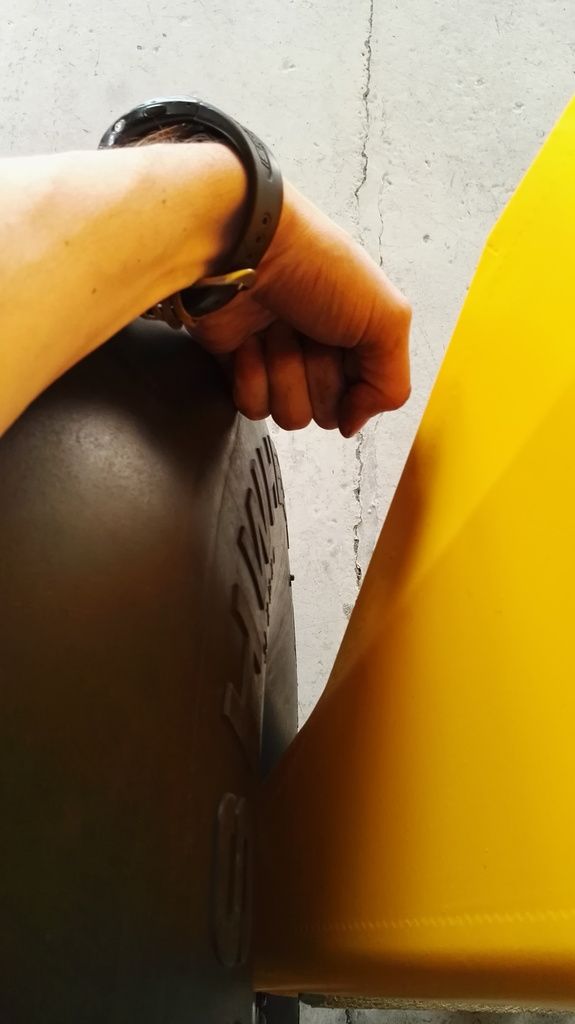
Over the weekend I modified my gear leg fairings to allow me to mount tires larger than 26" Goodyear's. This is something I could have done much more easily during the build, but I knew I was a few years' flying experience away from needing them - so I elected to put it off until that time. That time is now.
In hindsight, the extra work involved was not worth the saving during the build. About 75% of the job is unnecessary rework. I think that any Bearhawk which could end up on Alaskan Bushwheels should have this mod included during the build. What's more, although 26" Goodyear's fit just fine without this mod, if you do much side-hilling at lower tire pressures, or landing on curved surfaces - then your tires are going to rub on the stock fairings occasionally. So this mod is a useful addition in either case.
My starting point was to discuss with other's who've got some experience, and refer to Bob's engineering notice of July 2009:
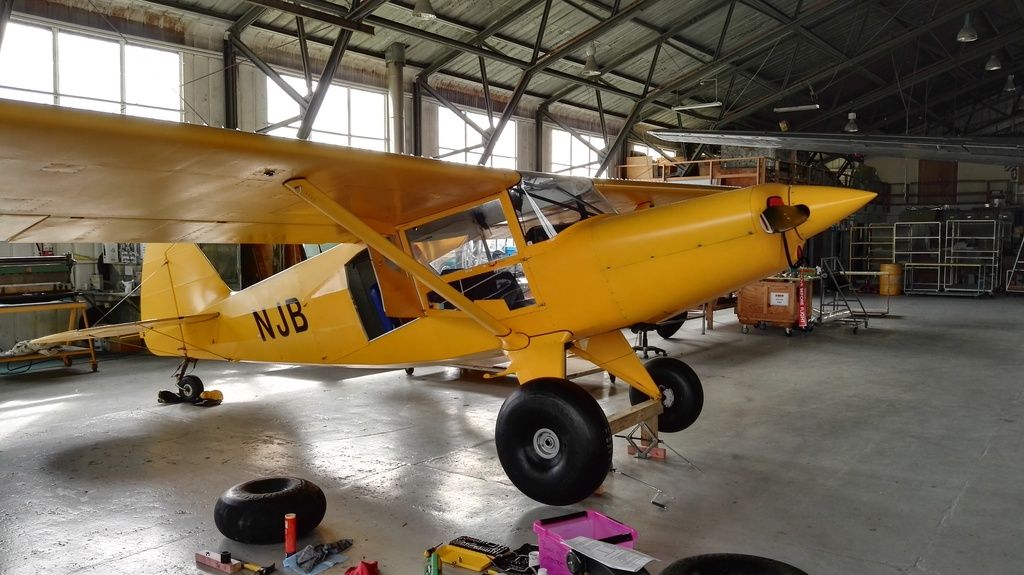
Seeing as my Bearhawk is going on 31's, on advice I decided to increase the clearance. [I will report back on how the fit 31's and what the measurements are].
To increase the clearance, I moved all the T3 tubing further up the T21 by a few inches (refer to the link above).
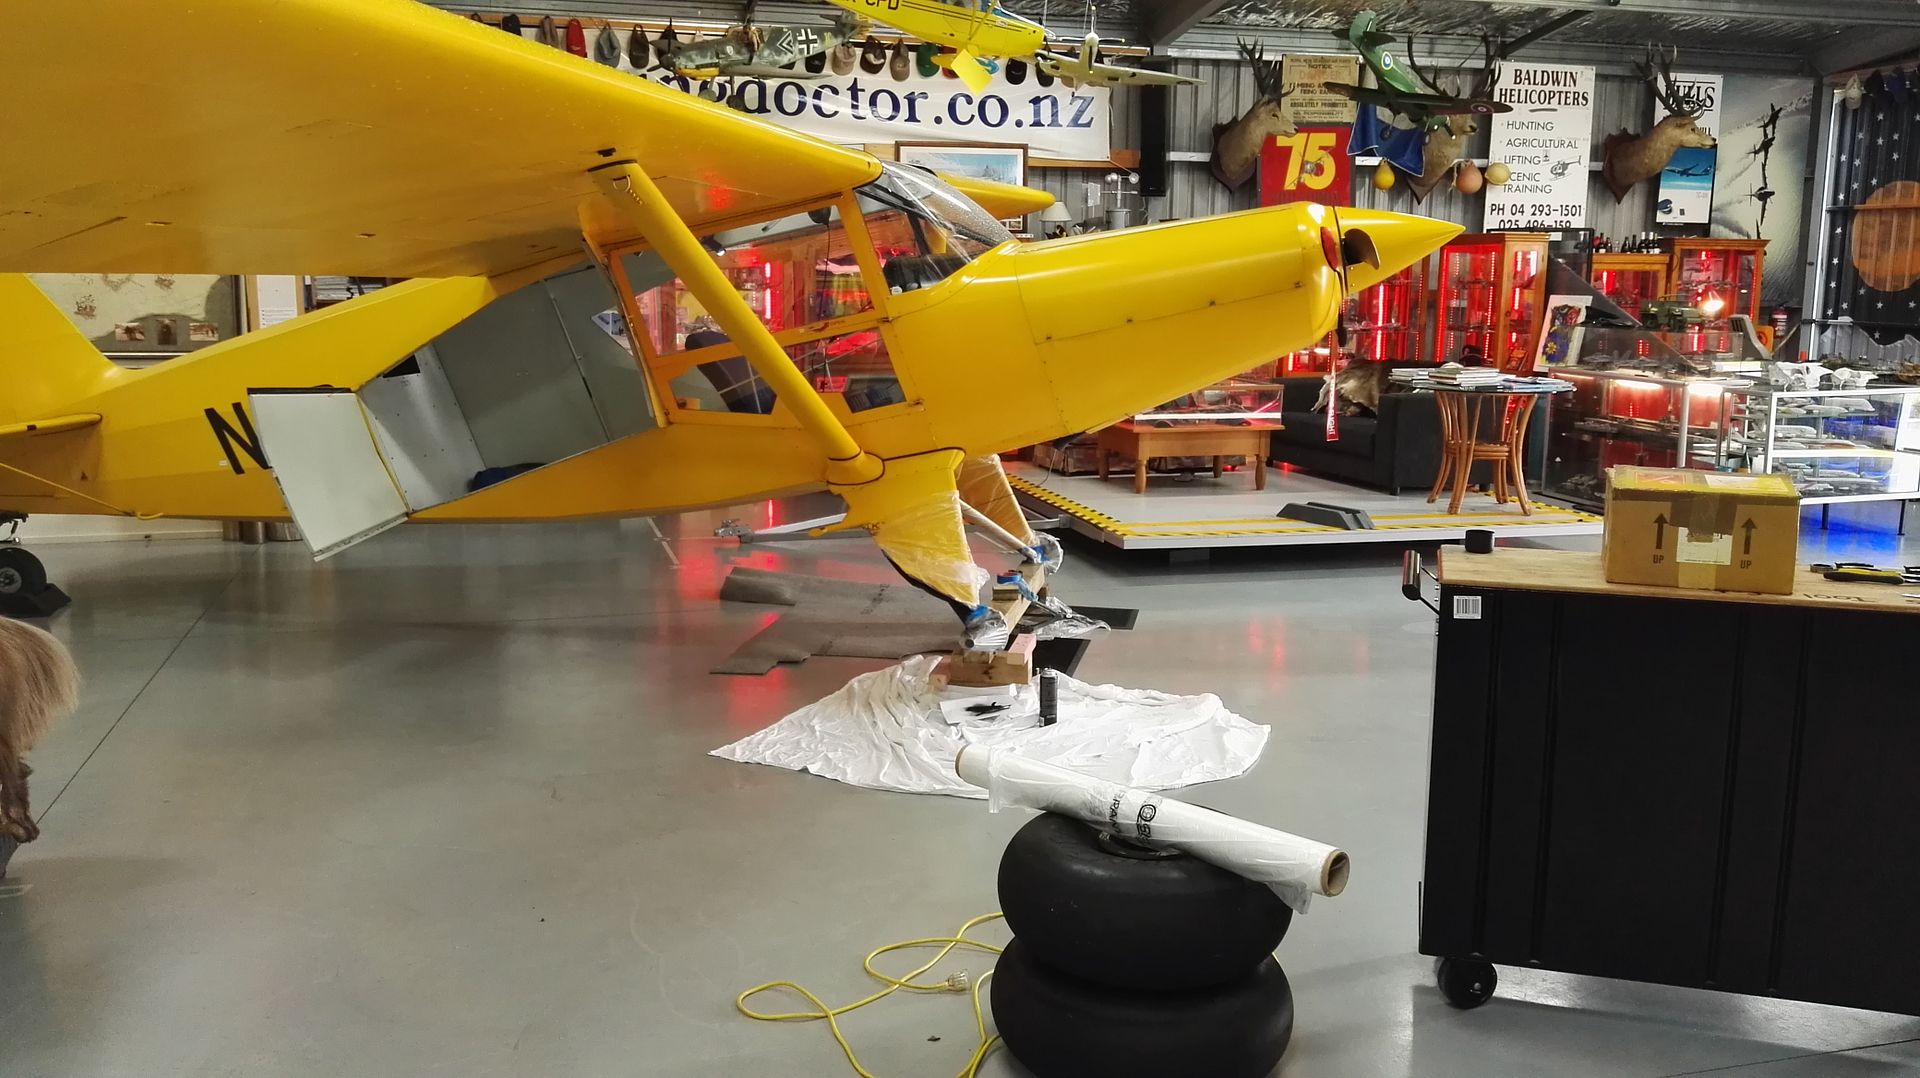
I flew over to a friend's nearby hanger to use his welding equipment and skills. I blocked up the aircraft with a couple of jacks and a brace-post (it's a >$100,000 aircraft sitting on an $8 post, the irony isn't lost on me). Then came the committal to the job, by cutting into my labour-of-love fabric & paint job from a few years ago. Mine's no prize, but the cut represented undoing a lot of work.
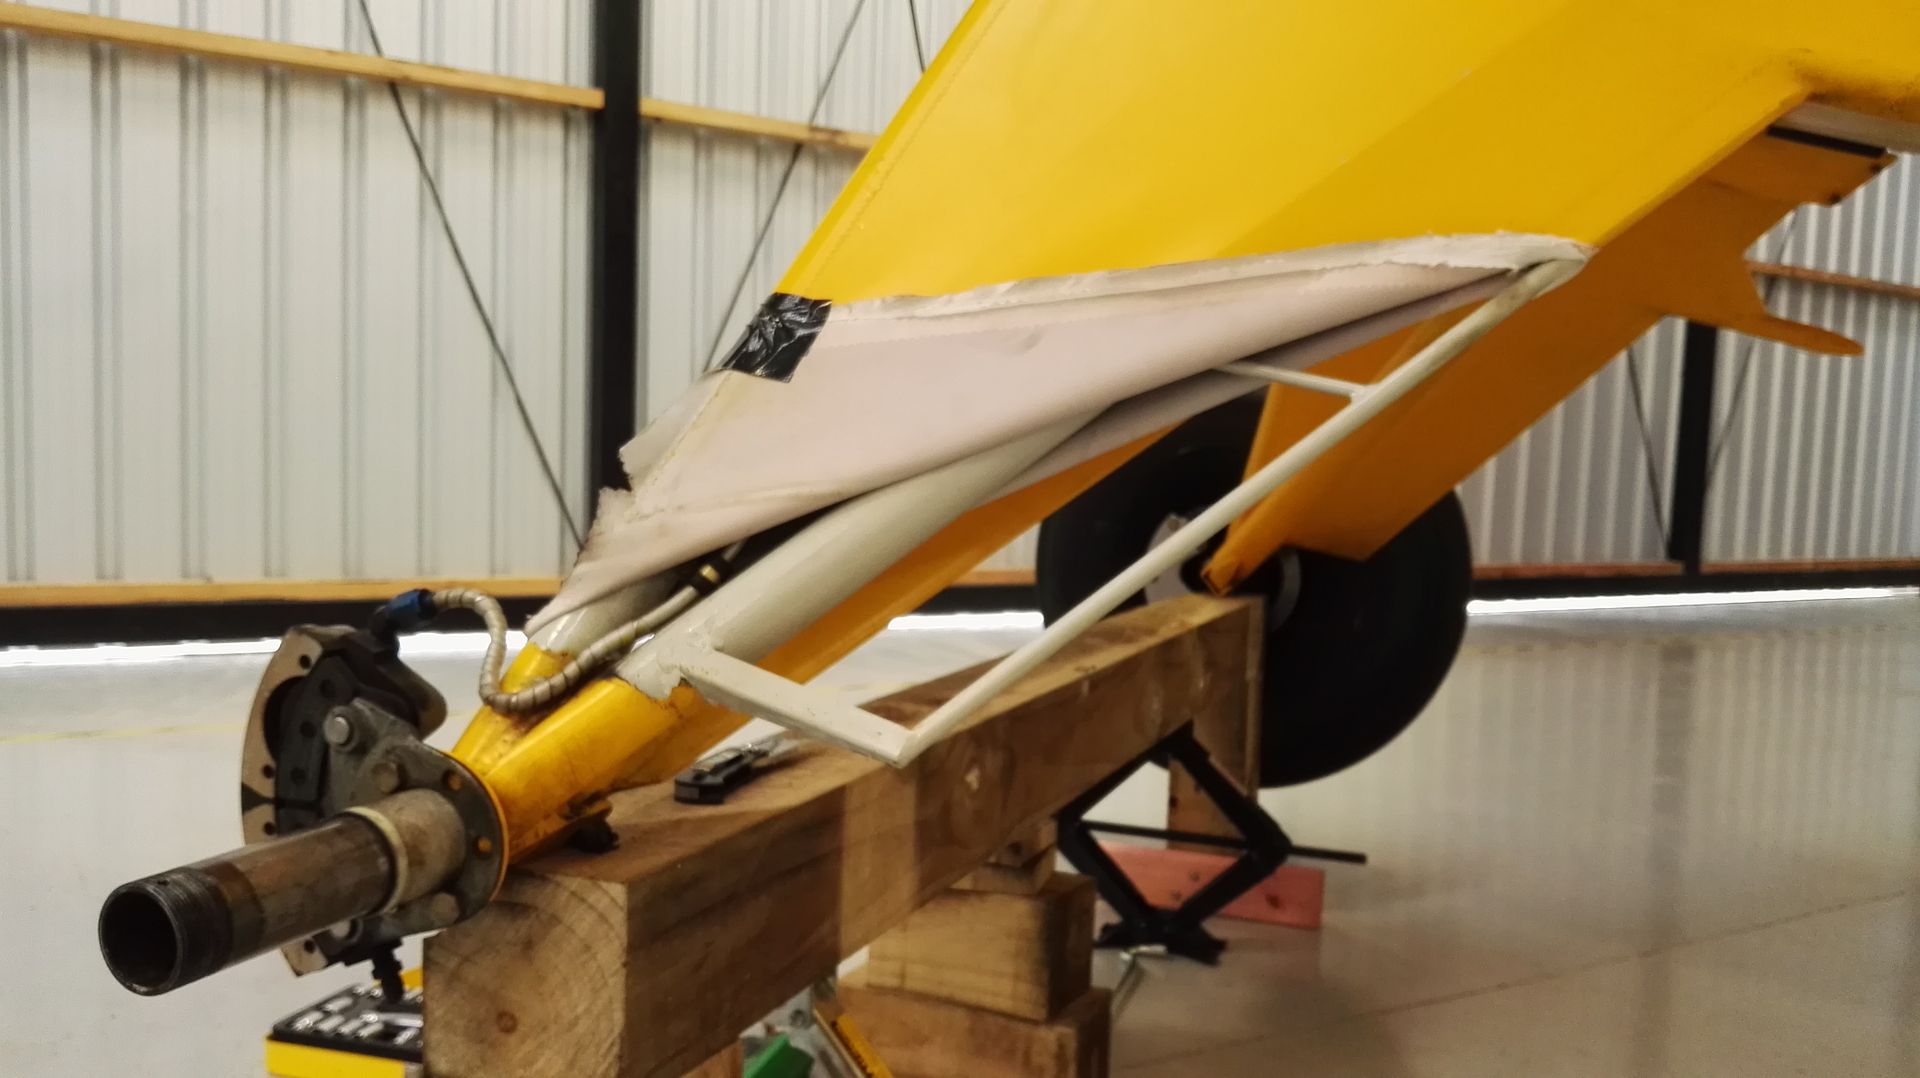
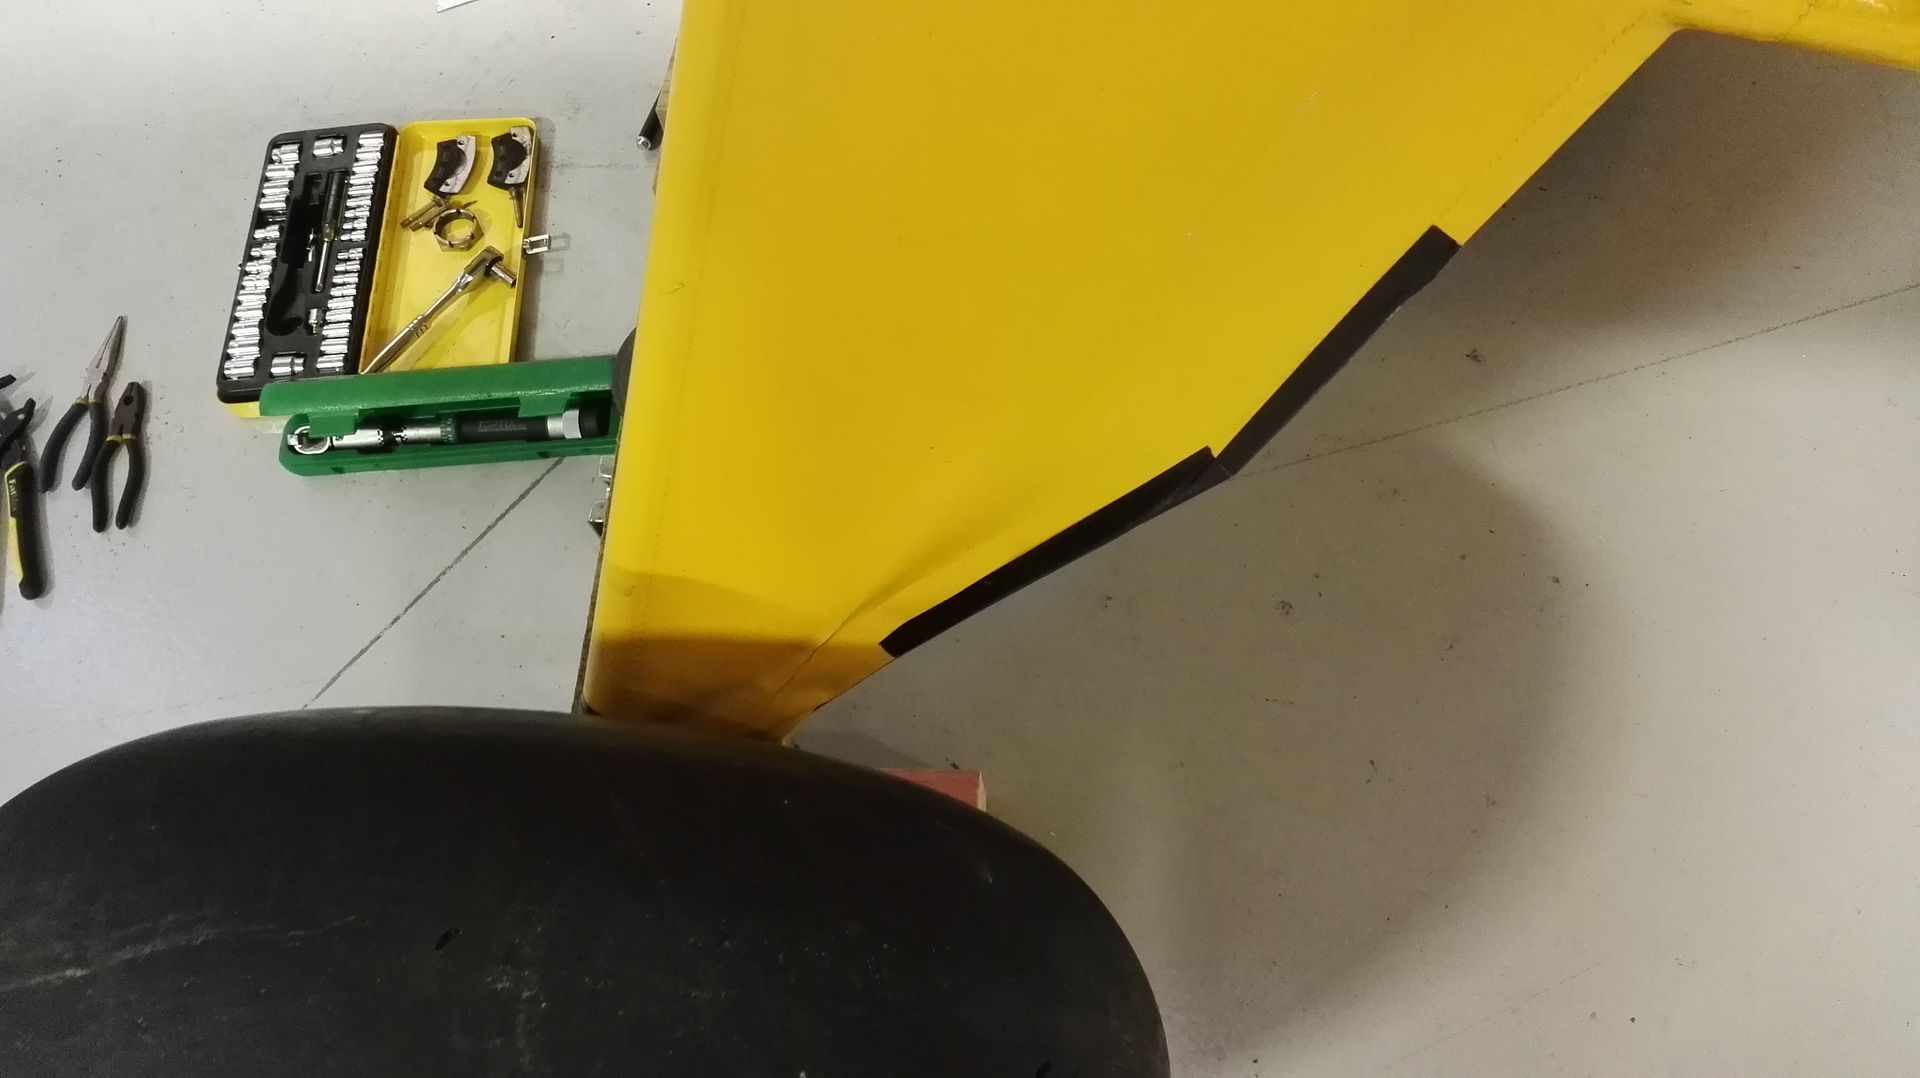
Then it was out with the hacksaw and Dremmel cutting disc to remove the original fairing. A 15 minute job.
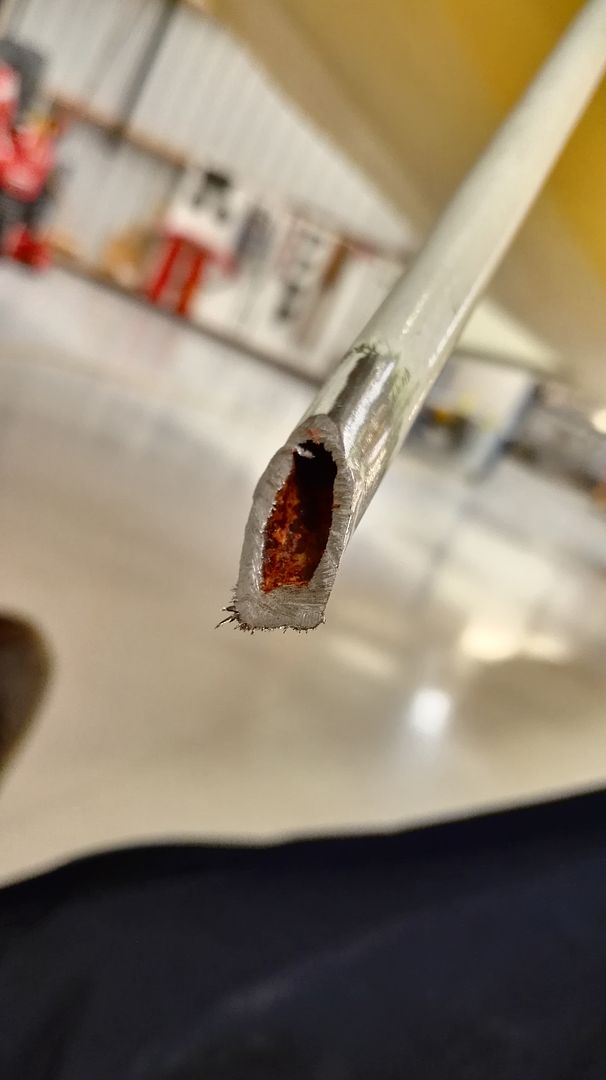
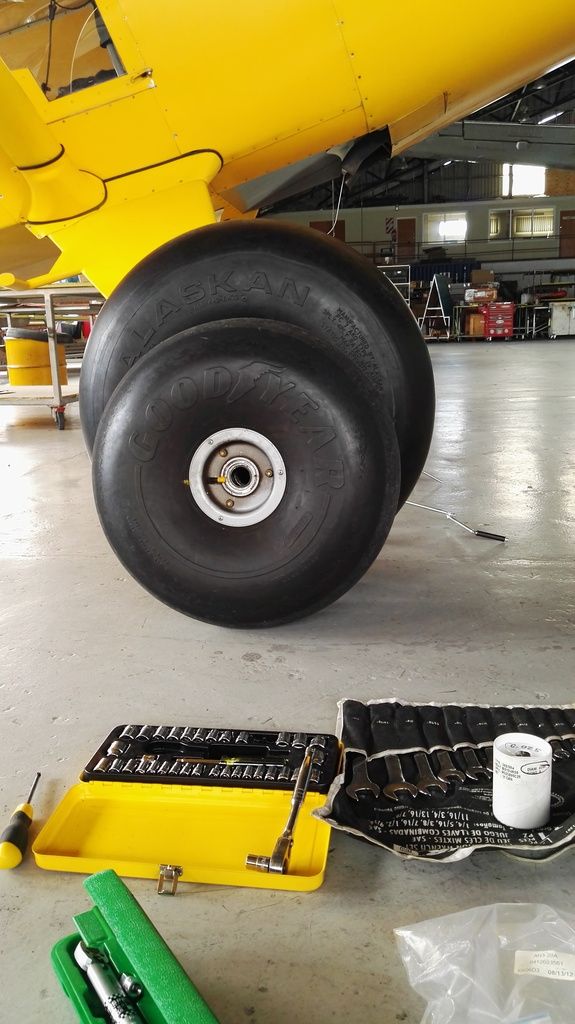
This T3 tube is open to the air, which is humid and salty in NZ. You might not like what you see..... the way to prevent / treat this rust is to inject a small syringe of linseed oil. During flight it wicks its way around the tube and eventually wicks onto every surface, protecting it. Some people pre-treat their tube fuselage's this way.
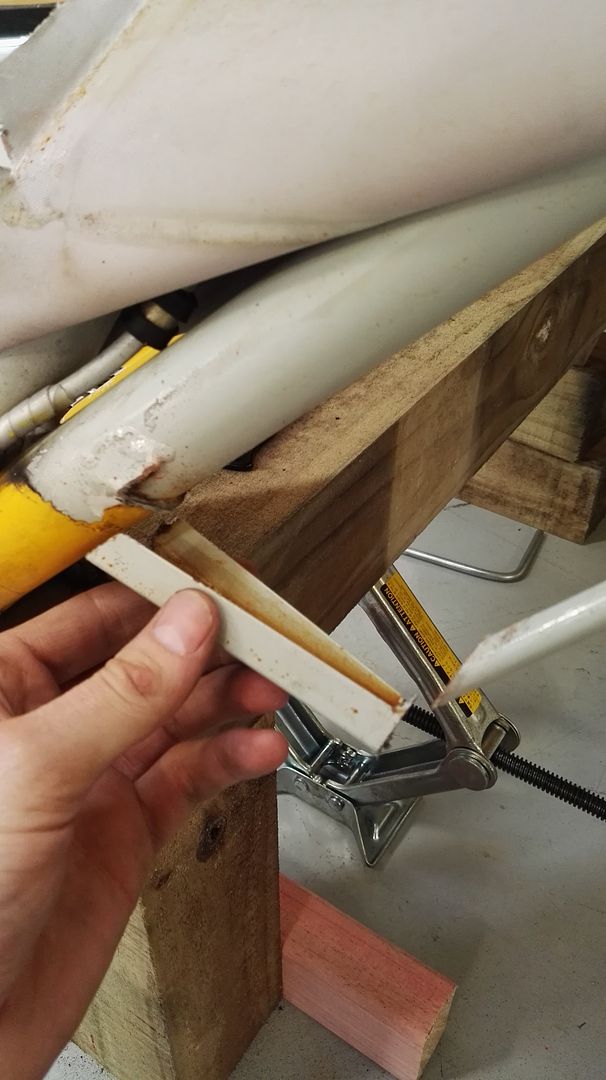
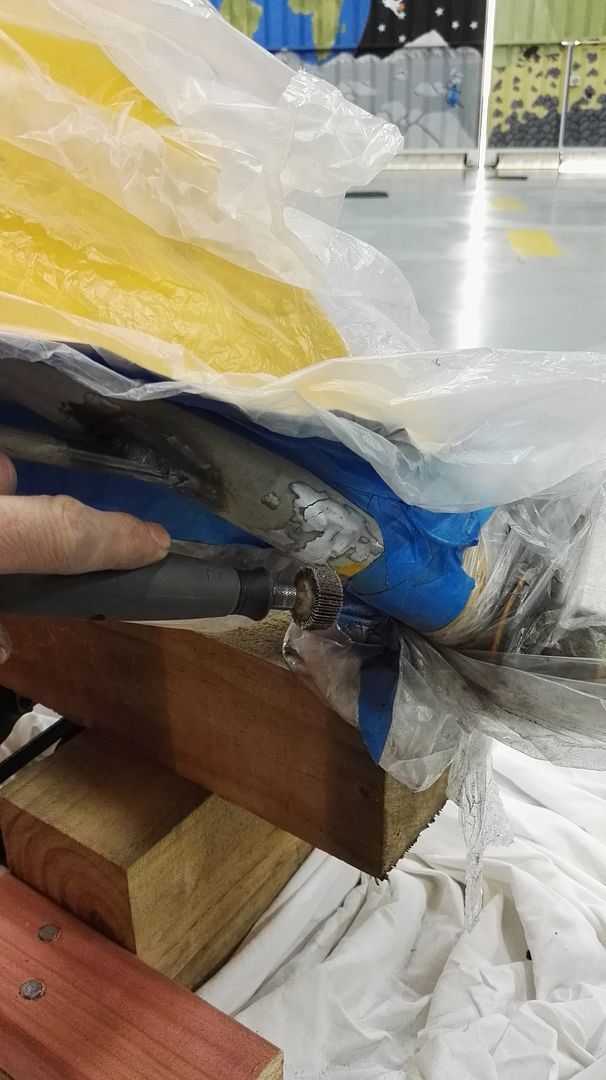
Next was to cut and shape the tube to fit, per the instruction, and remove the paint pre-welding. This probably took an hour per side, including filing back the bulk of the original triangular fairing end.
​​​​​​​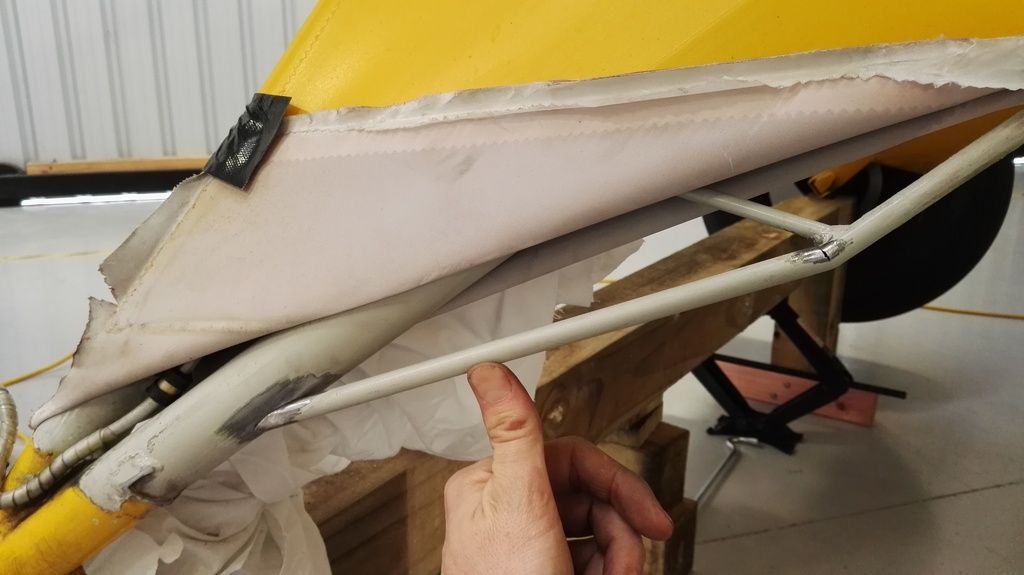
Then came the welding. We used GTAW [TIG] to avoid setting fire to the existing fabric, which was hard to peel back any further than is shown. The welds are only small and cool slowly, so I am not concerned about heat treatment.
​​​​​​​
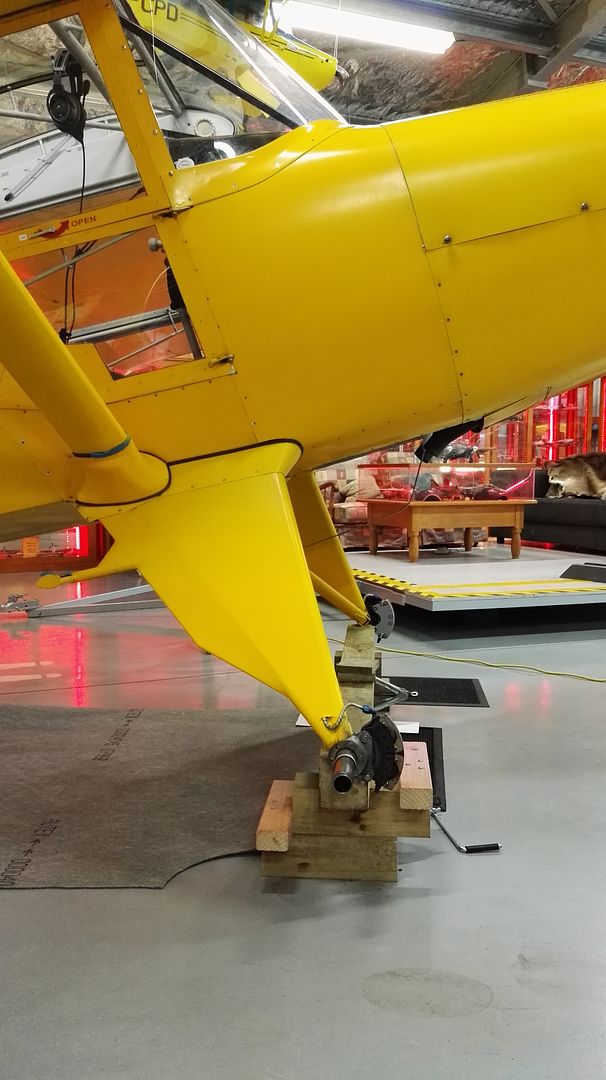
Seeing as my fabric and painting supplies were at my hanger, we taped up the welded job and I flew the plane the few miles home to complete the job. Of course this fabric is purely cosmetic / fairing, so it was no trouble doing the maintenance ferry flight with just tape. I was amazed how little it flapped about and how well it held together. Clearly the fairing works.
​​​​​​​
Back on the blocks at my hanger, the next job was to mask off the areas for painting and fine tune the cut parts with a sanding disc. I didn't want to leave any file marks as possible crack-initiation sites. I also didn't take the old weld back perfectly flush. Grinding flush is proven to weaken the parent metal below it's original condition.
​​​​​​​
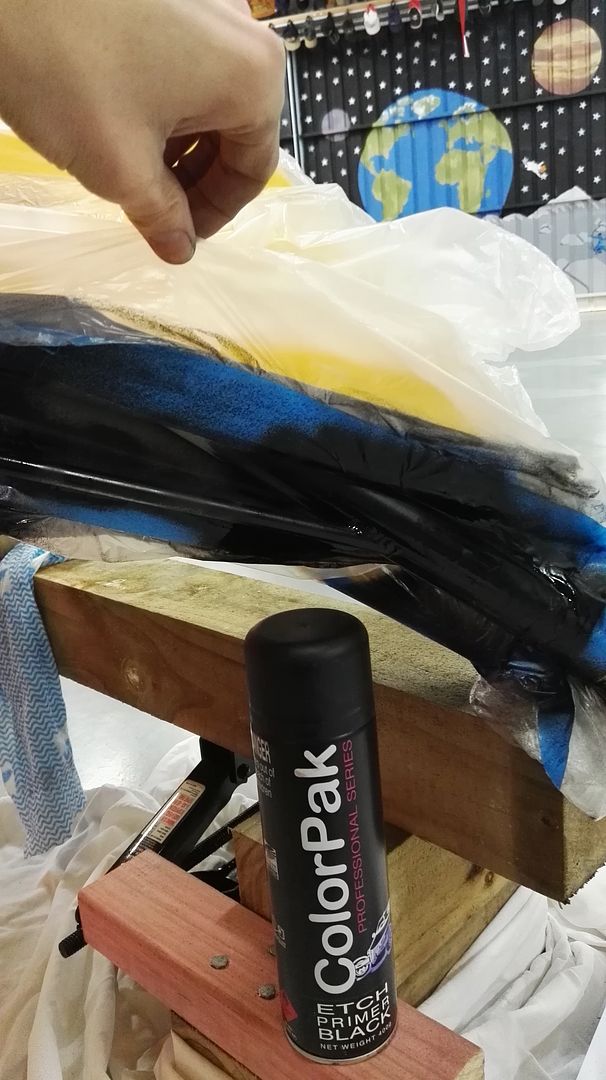
Then came priming the metal parts. I just used the etch primer which I had on-hand, seeing as it's all getting covered it Polytack and Polybrush next anyway. Probably chewed up another couple of hours work there, mostly in the masking and sanding.
​​​​​​​
A first look at the shape of things to come.
​​​​​​​
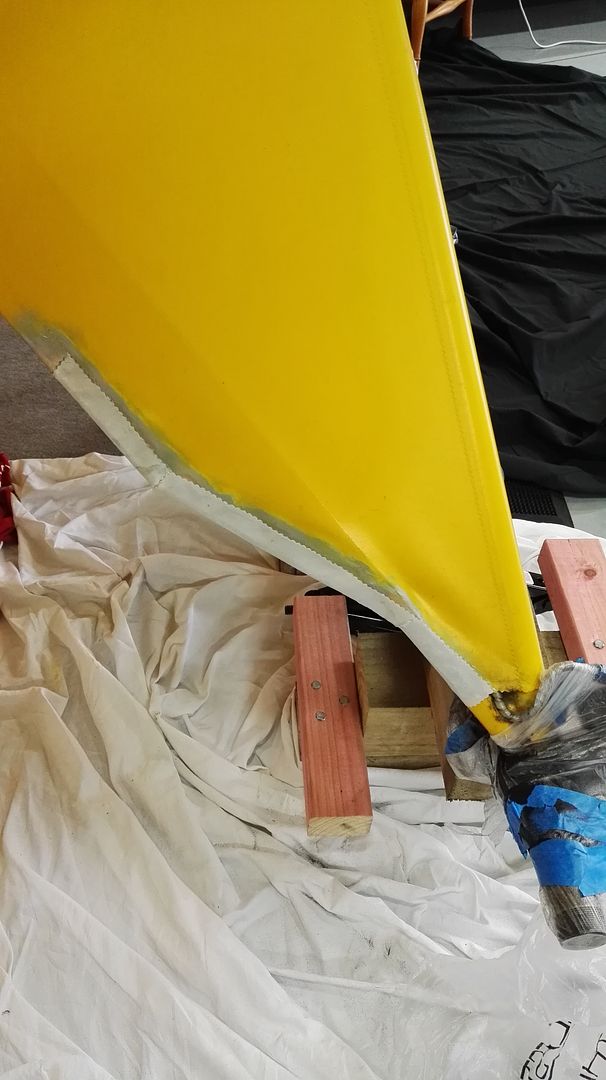
Then came re-closing the original fabric. I contemplated redoing the whole covering job... but like I say, our plane is no prize-winner, it's a bush plane. A highly painted and polished covering job has no place here. I ended up removing more paint than is shown here, to re-shrink the existing fabric to tighten up the whole arrangement. It worked out nicely. The whole job was quite fiddly though, and probably took a couple more hours including letting the Polytack glue dry.
​​​​​​​
Then came the time consuming bit, the coating system. I did "ram it and jam it" a little, much to LeRoy's satistfaction (only those who know the Polyfiber manual will get this one). I was able to cram all the coatings onto the small surface in just a day and a half (by working late into the night, and heating the parts after spraying).
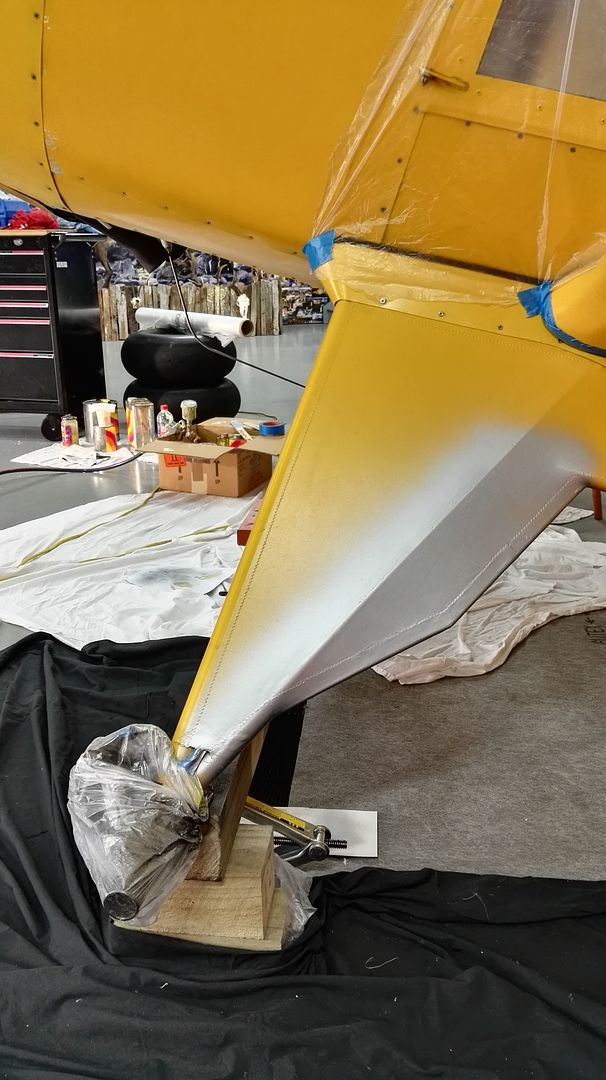
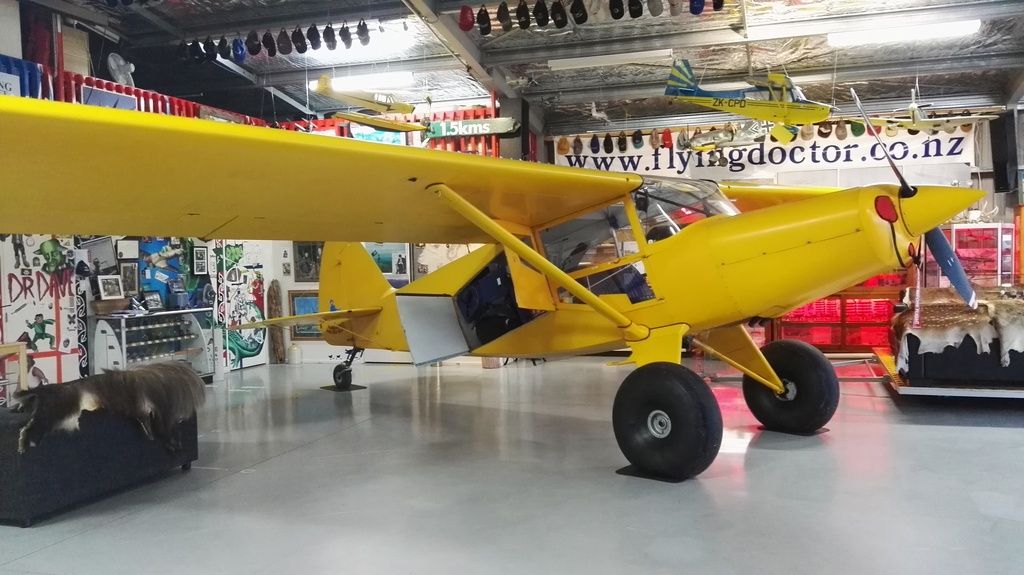
The final colour coat is great fun. The silver and white undercoat show all the imperfections so clearly, but the yellow is great at hiding them, hahahaha!! Jokes aside, I am pretty comfortable with the way it turned out, given the function of our plane.
​​​​​​​
And to avoid the 12 image limit....
Over the weekend I modified my gear leg fairings to allow me to mount tires larger than 26" Goodyear's. This is something I could have done much more easily during the build, but I knew I was a few years' flying experience away from needing them - so I elected to put it off until that time. That time is now.
In hindsight, the extra work involved was not worth the saving during the build. About 75% of the job is unnecessary rework. I think that any Bearhawk which could end up on Alaskan Bushwheels should have this mod included during the build. What's more, although 26" Goodyear's fit just fine without this mod, if you do much side-hilling at lower tire pressures, or landing on curved surfaces - then your tires are going to rub on the stock fairings occasionally. So this mod is a useful addition in either case.
My starting point was to discuss with other's who've got some experience, and refer to Bob's engineering notice of July 2009:
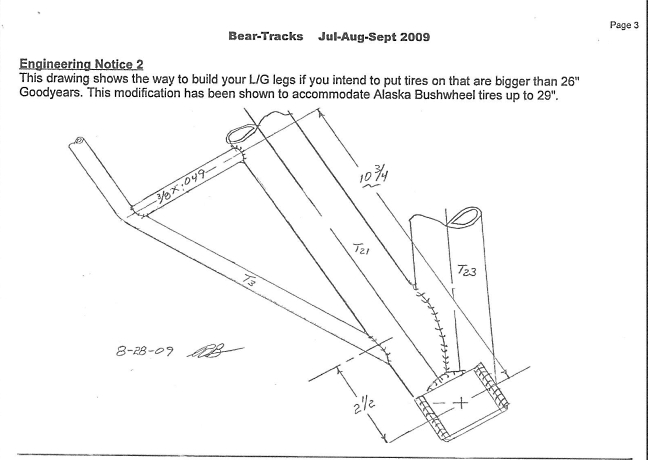
Seeing as my Bearhawk is going on 31's, on advice I decided to increase the clearance. [I will report back on how the fit 31's and what the measurements are].
To increase the clearance, I moved all the T3 tubing further up the T21 by a few inches (refer to the link above).
I flew over to a friend's nearby hanger to use his welding equipment and skills. I blocked up the aircraft with a couple of jacks and a brace-post (it's a >$100,000 aircraft sitting on an $8 post, the irony isn't lost on me). Then came the committal to the job, by cutting into my labour-of-love fabric & paint job from a few years ago. Mine's no prize, but the cut represented undoing a lot of work.
Then it was out with the hacksaw and Dremmel cutting disc to remove the original fairing. A 15 minute job.
This T3 tube is open to the air, which is humid and salty in NZ. You might not like what you see..... the way to prevent / treat this rust is to inject a small syringe of linseed oil. During flight it wicks its way around the tube and eventually wicks onto every surface, protecting it. Some people pre-treat their tube fuselage's this way.
Next was to cut and shape the tube to fit, per the instruction, and remove the paint pre-welding. This probably took an hour per side, including filing back the bulk of the original triangular fairing end.
​​​​​​​
Then came the welding. We used GTAW [TIG] to avoid setting fire to the existing fabric, which was hard to peel back any further than is shown. The welds are only small and cool slowly, so I am not concerned about heat treatment.
​​​​​​​
Seeing as my fabric and painting supplies were at my hanger, we taped up the welded job and I flew the plane the few miles home to complete the job. Of course this fabric is purely cosmetic / fairing, so it was no trouble doing the maintenance ferry flight with just tape. I was amazed how little it flapped about and how well it held together. Clearly the fairing works.
​​​​​​​
Back on the blocks at my hanger, the next job was to mask off the areas for painting and fine tune the cut parts with a sanding disc. I didn't want to leave any file marks as possible crack-initiation sites. I also didn't take the old weld back perfectly flush. Grinding flush is proven to weaken the parent metal below it's original condition.
​​​​​​​
Then came priming the metal parts. I just used the etch primer which I had on-hand, seeing as it's all getting covered it Polytack and Polybrush next anyway. Probably chewed up another couple of hours work there, mostly in the masking and sanding.
​​​​​​​
A first look at the shape of things to come.
​​​​​​​
Then came re-closing the original fabric. I contemplated redoing the whole covering job... but like I say, our plane is no prize-winner, it's a bush plane. A highly painted and polished covering job has no place here. I ended up removing more paint than is shown here, to re-shrink the existing fabric to tighten up the whole arrangement. It worked out nicely. The whole job was quite fiddly though, and probably took a couple more hours including letting the Polytack glue dry.
​​​​​​​
Then came the time consuming bit, the coating system. I did "ram it and jam it" a little, much to LeRoy's satistfaction (only those who know the Polyfiber manual will get this one). I was able to cram all the coatings onto the small surface in just a day and a half (by working late into the night, and heating the parts after spraying).
The final colour coat is great fun. The silver and white undercoat show all the imperfections so clearly, but the yellow is great at hiding them, hahahaha!! Jokes aside, I am pretty comfortable with the way it turned out, given the function of our plane.
​​​​​​​
And to avoid the 12 image limit....
Comment