Bearhawk Aircraft Bearhawk Tailwheels LLC Eric Newton's Builder Manuals Bearhawk Plans Bearhawk Store

Announcement

Collapse
No announcement yet.

Kit #60

Collapse
X
 
  • Filter
  • Time
  • Show
Clear All
new posts

  • #16
    Originally posted by TJ_Slice View Post
    as suggested on the Facebook group, I will have to rethink my rear attachment system. As it stands now, I won’t be able to cover or paint the tail. I’ll cross that bridge when I get to it.
    I thought the same thing when I saw your photo. Consider adding the proper diameter 4130 tubing to thot bottom of your rear fitting so that it slide into the tail wheel spring receptacle. Then use the bolt hole in the rudder post for the top rudder hinge to receive the top of your rear fitting. Your handy with the 3d printer. I'm not and so I see a tab welded to one side of your rear fitting will probably be all it needs....an angle might be better than a flat tab though. your real close! Make it so the area it covers at the top is minimal and I think you'll be fine. If your rudder's top hinge covers the entire area up your golden.

    Keep the ideas simple to lower the fuselage CG. I bet it tips over right now and wants to be up-side-down. Any weight will do: experiment. I used John Deere 40 pound suite case weights on my snow removal garden tractor. I fabricate a :10 minute bracket out of 2x4's to recieve a single JD suitecase weight to solve the problem. So keep it quick and simple.
    Screenshot 2025-03-13 at 9.45.32 PM.png
    Last edited by Bcone1381; 03-13-2025, 09:03 PM.
    Brooks Cone
    Southeast Michigan
    Patrol #303, Kit build

    Comment


    • #17
      Thanks for the suggestions. It’s actually very stable right now, just a tad bottom heavy. It will gently return to upright of you let it go. It’s easy to rotate it with one hand and clamp it down with the other.

      Comment


      • #18
        I encountered my first real mistake about 10 days ago. I made a 3D printed jig to locate the center of the cargo door rods in my door formers. The bottom worked out perfect. Using the jig, I drilled a 3/32" hole right in the center, and took the formers to my drill press to final size the hole. When doing the top former, I promptly drilled the wrong hole.

        After exploring the options, I decided to buy a new former. It wasn't an expensive mistake, but now I have to wait for the new former to be manufactured in Mexico. Virgil said it would probably be about 30 days. I took the former, and mounted it top center on my workbench, just as a reminder.

        reminder.jpg


        Comment


        • #19
          I decided to move on to Stringers next. Initially, I tried bending them by hand, but quickly moved on from that. I used a couple of pieces of scrap 1/2" x 4" x 4' wood I had laying around. I cut a radius into one of them, and temporarily screwed them into my workbench. They formed a channel to hold the stringers, and I bent them that way. It was much easier, and worked out well. I was able to bend a little, move and inch or so, and bend some more until I got the shape I wanted. I found the upper side stringers to be the hardest ones to bend.

          The are currently only drilled to 3/32". I plan on priming the stringers where they meet the saddles.
          Attached Files

          Comment


          • #20
            I got the rudder pedal assembly, and the control column assembly mounted. I was a bit concerned about drilling the holes, as they are 3/16". It turned out to be no big deal, it just takes a long time to drill the required 8 holes in steel. I have been using a product called Lubri-cut. It is a waxy paste that you dip the drill bit into. The shavings stick to the paste, so I would drill for a while, then wipe the drill bit clean and reapply the Lubri-cut.

            The rudder pedal assembly is easy to clamp in place. I used vice-grips with some small rubber pieces to firmly clamp them in place, and then match drill the opposite holes in the fuselage. I then used the hardware to attach the assembly, and then drilled the other 2 holes.

            The control column assembly is a bit trickier. It attaches to 2 brackets that have a C-channel bend in them. I found that a needle nose vice grips worked well on those. I only had one, so I purchases another one specifically for that.

            The absolutely crucial part about this step is getting the assemblies firmly clamped in place. You don't want them moving when you drill them.

            I followed up by installing the upper brake pedals and master cylinders.

            Of course, I has to do a trial fit of the control sticks too.
            Attached Files

            Comment


            • #21
              I didn't have too much time this weekend to work on the Bearhawk. The problem with the spring is stuff starts to grow, and I have to deal with that.

              I did get in my first visit from my EAA chapter's technical advisor. He had some great input and advice. It's always good to get a second pair of eyes on the project.

              I wasn't quite sure if the .025 brackets for the door formers was quite enough for the two on the forward doors, so I ordered some .050 aluminum from Aircraft Spruce. The rear plates and cargo door mending plate strengthened up everything very well. There was still a little bit of give on the forward door sills, so I fabricated the angles out of .050 aluminum. It's overkill, and you could probably go without them all together, but I like the way everything feels now.

              The only other thing I did was file the back end of the top side formers to get rid of anything sharp.

              Attached Files

              Comment


              • #22
                No pictures because it's nothing exciting, but I drilled out all of the floor and rear bulkhead tabs to 3/32". Lot's more drilling left on those for the nutplates.

                Comment


                • #23
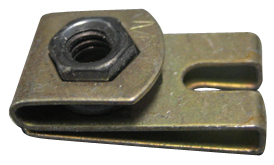
                  I like to use these things on tabs instead of nutplates.

                  Other suppliers may have a better price.

                  Comment


                  • TJ_Slice
                    TJ_Slice commented
                    Editing a comment
                    I'm definitely going to keep that as an option, but the kit contains the hardware for nutplates on all of those. It's going to be a lot more work.
                Working...
                X