
You are using an out of date browser. It may not display this or other websites correctly.
You should upgrade or use an alternative browser.
You should upgrade or use an alternative browser.
BearHawk 5 school of construction
- Thread starter Sir Newton
- Start date

way_up_north
Builder
can you include a link to the picture or video you are referring to ,,,of the Macho BH5 oil panning...thanks
way_up_north
Builder
was this a recent change to the B-wing ..is it in the safety/changes notices..for those of us who would like to check if our plans reflect the change or not...thanks

Sir Newton
New member
Hola, I have been working on the fabrication and installation of skin stiffeners. Everything is moving along nicely. Couple pics for those of you who are interested. Any questions. That's what PM's are for. Cheers
Attachments


Sir Newton
New member
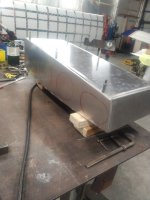
Greetings to all Bearhawkers. After I finish off the skin stiffeners I fell down the rabbit hole of final fit up & welding out the fuel tanks. Lots of little dessions had to be made about the fuel system logic so I welded in all the right tank fittings in the correct spots. I attached a picture or two of my RH aux tank. Building the tanks are a little bit tricky. If you have any questions on the how. Get after it & ask. The welding is fun! Been awhile since I struck an arc.
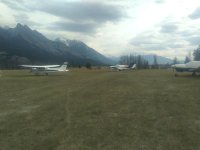
And some of CYQU pilots found time to fly out to Jasper National Park. Really good flight and a good time.
And some of CYQU pilots found time to fly out to Jasper National Park. Really good flight and a good time.
Attachments



Sir Newton
New member
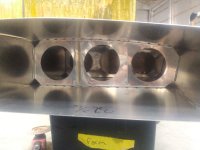
These fuel cells are biult tough as nails. Today I fit up the RH main tank. I hope to get after welding it up tomorrow.
Sir Newton
New member


Sir Newton
New member
Just some more cheerleading here. Finished welding out the RH main. For the welding nerds that read this post I averaged 1.7 inches per minute counting 2" per rivet on this tank. Just need to cut/weld in the appropriate sized NPT fittings and a bubble test & wammo finished RH tanks. Also got the fit up done on LH tanks this afternoon they still need the rivets bucked & then welding. Tuesday my 4130 tubing is arriving. I need to decide to finish off the riveting on the skins or to start fabricating the fuselage. 90% complete. 90%to go. Have good weekend.
Attachments


Sir Newton
New member
NCLSA183
I now understand you & your comment on this post commenting on AC-43.
I now understand you & your comment on this post commenting on AC-43.
Sir Newton
New member
I want to share more information about layout & drilling caps strips with anyone who is reading these posts. It is very important when stack drilling multiple layers to make sure the entire stack is level. I am mean perfectly level use celecos to hold the caps strips assembly together. Drill in groups, front & back cap strips together lined up as they will be riveted on to the spar cap. Develop a system to keep track of which strip goes where! Keep your cutting tools & drill bits sharp. Doing this right means everything will line & your rivets will simply slide into the assembly with proper tolerances.
Sir Newton
New member
NCLSA183
You should see me Two Step. ROTFL
You should see me Two Step. ROTFL
Brian Mason
New member
Looks real good, Bud. Wish I was there to watch.
Sir Newton
New member
Some simple cheerleading about the BH5 project. Finished of fabricating 4 fuel tanks & all the tank strapping tighten turn buckles. Finished up fitting RH wing bottom skins. Recieved all my 4130 tubing. Fuselage fabrication will begin after I skin & rivet my LH wing. My post are going to be fewer & fewer, as I start to go off book with the project. Not wanting to russle feathers with the brass on the forum & get myself banned.
Attachments


Nev
Quick-build 4-place B #25
My post are going to be fewer & fewer, as I start to go off book with the project.
Please keep posting, I'm very interested in what you're doing. Fantastic progress !

Gerhard Rieger
Active member
They look great, tight fit though. If I can do it again I would make them a tad smaller. Mine is exactly like yours

Bcone1381
Finished Patrol
I'd like to validate what Nev has written. Your a fabricator....you fabricators get stuff done....
Your scratch building faster than I can Quick Build and doing it right. We don't want design, strength, or safety compromises. I think Feathers get ruffled by compromises the erode best practices. You might consult with Jared about your off book ventures to see what the boundaries/allowances are and if your have some ideas that would benefit the design, streamline the build, or be a blessing to the group.
Your scratch building faster than I can Quick Build and doing it right. We don't want design, strength, or safety compromises. I think Feathers get ruffled by compromises the erode best practices. You might consult with Jared about your off book ventures to see what the boundaries/allowances are and if your have some ideas that would benefit the design, streamline the build, or be a blessing to the group.

Going off book won't get you banned. It might get some pushback to help clarify that it is non standard. Grounds for banning include off topic partisan politics, toxic nastyness, etc.
Sir Newton
New member

Redneckmech
BH Five Scratch Build
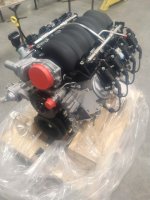
That doesn't look like a Lycoming!
All joking aside, the auto conversions intrigue me. Did you go with an Autopsru or Robinson V8 drive? The installed weight I have seen for the LS3 is a roughly 100-150lb more than the 0-540 but I am wondering if it would affect the CG in a good way. I have read several reports of the 4-place running out of CG well before running out of gross weight and having more weight on the nose would help with that. Out of curiosity, have you run the numbers on the BH5 yet?
I have thought a 300-320HP turbo-normalized V6 may hit the sweet spot between power and installed weight but there really is not much on the market that fits in the category. I will likely have plenty of time to think about it while building and perhaps that niche will get filled in the meantime.
Keep up the posts! I have really appreciated the information you have shared!
- Bill
All joking aside, the auto conversions intrigue me. Did you go with an Autopsru or Robinson V8 drive? The installed weight I have seen for the LS3 is a roughly 100-150lb more than the 0-540 but I am wondering if it would affect the CG in a good way. I have read several reports of the 4-place running out of CG well before running out of gross weight and having more weight on the nose would help with that. Out of curiosity, have you run the numbers on the BH5 yet?
I have thought a 300-320HP turbo-normalized V6 may hit the sweet spot between power and installed weight but there really is not much on the market that fits in the category. I will likely have plenty of time to think about it while building and perhaps that niche will get filled in the meantime.
Keep up the posts! I have really appreciated the information you have shared!
- Bill

Westward_Flyer
Member
I’m really hoping that the Corsair power ls3 conversion is a success and well proven when I start my build in about 5 years. I love the LS3 and am rooting for anyone that is brave enough to try the conversion!
Sir Newton
New member
" I have seen for the LS3 is a roughly 100-150lb more than the 0-540 " I have only one question. Where do you get your numbers from? Fairly big broad statement you made! Are you familiar with Lycoming 580 verse the 540? I am. I do not want to come across as being aggressive, However. You want to talk smack lets not start pulling numbers out of the air. A complete weight is not possible until a propeller has been decided upon. It is nice to see someone is paying attention to the pictures we post!
Last edited:
Redneckmech
BH Five Scratch Build
That is a valid question! I feel that I may have come across as condescending in my post when that was certainly not my intention, I am far from talking smack about your engine choice and in fact I am tempted to go the same direction. My primary source of data has been from the kitplanes 2021 Engine buyers guide which lists typical weights for each engine type, the AutoPSRu website, and various forums in order to get an actual wet weight for the Lycoming since all they list are dry weights. The Auto PSRU LS3 is listed as 580lb installed which does include radiators, engine mount, and a lot of the accessories that are not included on the Lycoming so that gap will definitely close somewhat.. The EPI link has breakdown with installed weights which are are much closer to the AutoPSRU claimed weight than I had been guessing them at initially so it may end up being a wash although the CG of a comparable weight will be somewhat further forward when the gearbox is taken into account.
My apologies if I came across as questioning your choice of powerplant as that could not be further from my intent.
https://www.kitplanes.com/2021-engine-buyers-guide/
https://autopsrus.com/ls3-fwf-packages/
http://www.epi-eng.com/aircraft_engine_conversions/evaluating_a_conversion.htm
My apologies if I came across as questioning your choice of powerplant as that could not be further from my intent.
https://www.kitplanes.com/2021-engine-buyers-guide/
https://autopsrus.com/ls3-fwf-packages/
http://www.epi-eng.com/aircraft_engine_conversions/evaluating_a_conversion.htm
Last edited:
Westward_Flyer
Member
Just to add some data points, by my calculations IO 540
wet weights range from 520-605.
This is important because when making comparisons most people use dry weights, which is misleading since Lycomings have a ton of weight in fluids.
Ls3 393 pounds complete dry weight, weighed a new crate motor with everything but oil filter and flex plate.
All fluids together on an ls3 is about 40 pounds.
On the Corsair power website FAQ: For the C172 complete kit with additional battery the average EOW increases about 140 lbs and CG moves forward about 2”.
-I believe this is compared to the io 320 but may be the 360.
Some LS1 weights just for comparison, I think it’s useful to compare dry and wet weights as well as weights of successful completed conversions.
LS1 dry weight: 355
TOTAL, COMPLETE, FULLY DRESSED, FULLY OILED, crate ls1 from GM 383#s, with oil, intake, coil packs, Water pump, pan, filter etc sans only exhaust manifolds and clutch.
Bud warren’s ls1 wet weight with Psru 493
wet weights range from 520-605.
This is important because when making comparisons most people use dry weights, which is misleading since Lycomings have a ton of weight in fluids.
Ls3 393 pounds complete dry weight, weighed a new crate motor with everything but oil filter and flex plate.
All fluids together on an ls3 is about 40 pounds.
On the Corsair power website FAQ: For the C172 complete kit with additional battery the average EOW increases about 140 lbs and CG moves forward about 2”.
-I believe this is compared to the io 320 but may be the 360.
Some LS1 weights just for comparison, I think it’s useful to compare dry and wet weights as well as weights of successful completed conversions.
LS1 dry weight: 355
TOTAL, COMPLETE, FULLY DRESSED, FULLY OILED, crate ls1 from GM 383#s, with oil, intake, coil packs, Water pump, pan, filter etc sans only exhaust manifolds and clutch.
Bud warren’s ls1 wet weight with Psru 493
Last edited:
Sir Newton
New member


triumphantduke
Model 5 QB #16
Seems like the LS3 keeps ending up at the top of my decision matrix as well -with the assumption of being able to keep it simple - I’m curious to know which sub you went with or are planning with - Autopsru or Robinson V8 drive or the one from moosemods.com? And really any other details on your mind like the engine mount or g-limit considerations - things that I can use to help myself or others design for the LS3 with the model 5
Last edited:
Brian Mason
New member
Yer gonna need a bigger hangar, lol.
Sir Newton
New member
Happy new year Bearhawkers. Been rounding up all different firewall forward parts. For simplicity I ordered a 84" 4 blade electric inflight magnum IVO propeller. Control surfaces are well underway. Enjoying every minute of this project. I included a picture of the starter being weighed. It's lighter than a skyteck starter.
Attachments


Nev
Quick-build 4-place B #25
Just for info, my 4 place with a Bravo wing came in with a CG at 8.3 inches. I've nearly finished flight testing now, and it seems it would be very difficult for me to get the aircraft loaded to the aft CG, even with 4 large adults, full fuel, and bags. Probably it would be best around 9.5 inches empty. The handling is fine, but I think going one inch aft might give better trim range on the forward limit where mine tends to run out. I think there might be a CG datum change between the A & B model wings. Just something to keep in mind.
Sir Newton
New member
Nev, I have never came across any information on the B wings c/g. Your flight testing information is greatly appreciated.
I am using a 10.5 aft leading-edge as aerodynamic center of lift in my calculations. Moving away from the recommended engine installation is a major deal. I simply would not suggest it to anyone who is not certain of their understanding & ability to be safe & successful.
I am using a 10.5 aft leading-edge as aerodynamic center of lift in my calculations. Moving away from the recommended engine installation is a major deal. I simply would not suggest it to anyone who is not certain of their understanding & ability to be safe & successful.
Sir Newton
New member
Nev, I really like you. In your videos it is easy to tell that you are a seasoned professional who imho is qualified to instruct.
You may find it interesting to know the BH5 fuselage is 15" longer then the BH4. Firewall to tail post is 204" in the BH5 design. As well the prototype is flying around with counter weights in single pilot operations.
Where some people see problems I see opportunities my friend!
You may find it interesting to know the BH5 fuselage is 15" longer then the BH4. Firewall to tail post is 204" in the BH5 design. As well the prototype is flying around with counter weights in single pilot operations.
Where some people see problems I see opportunities my friend!
Sir Newton
New member
Bill, We definitely could use a different engine other than an LS3. 100% However! The LS3 is the single most modifiable engine because of all the amazing aftermarket support GMC promotes. As far as the posting goes you may noticed that my posting frequency has dropped off. I don't want to be responsible for any craziness. The facts of the situation is not everyone should be building their own airplane. Hopefully this doesn't apply to me! Lol
Sir Newton
New member
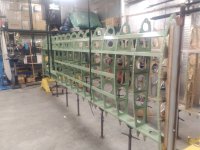
Greetings, Sharing is caring. With everything we are all experiencing because of things going on in our communities. Our projects are a healthy distraction from it all!  There was talk about adding skin stiffeners to the B wing in response to the EAA photo of oil canning. This is how I applied the various solutions to my wings. Attached are photos of my stiffeners before skinning. 0.025 x 1.75 double staggered rows of 426AD3 rivets.
There was talk about adding skin stiffeners to the B wing in response to the EAA photo of oil canning. This is how I applied the various solutions to my wings. Attached are photos of my stiffeners before skinning. 0.025 x 1.75 double staggered rows of 426AD3 rivets.Attachments



Sir Newton
New member
Greetings fellow aviators, I'm enjoying everyone's post on the various threads in our community. Thank you for taking the time. So today is my day to post. The engineering on the firewall forward is basically complete to the point it can be completed to in the concept of pen to paper. I have been satisfying my busy hands with assembly of the flaps. Today I'm fitting and drilling gussets to the 0.032 spar. Flaps lol more work then you would think, imho I took some pictures for anyone who could use the visual version of the story. Cheers
Attachments


Sir Newton
New member
 work work!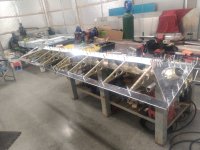
triumphantduke
Model 5 QB #16
looks awesome! thank you for the steady posts, assisting others in getting their bearhawk "fix" 
Sir Newton
New member
100% fyi, I'm at 104 hrs on the flaps to date.
Sir Newton
New member


Sir Newton
New member
Not a single comment on the propeller? Common on guys tell me what you think. I have no clue how this will turn out. However the prop is lite, really lite under 30 lbs.
Last edited:
triumphantduke
Model 5 QB #16
I'm not "learned" enough to comment, but looks cool! I'm curious to learn from others what the pro cons are for electric adjustable vs regular oil pressure driven governor, although that might just open a can of worms haha
I'm just munching on my popcorn looking forward to how it turns out!
Sir Newton
New member
You guys are awesome, electric vs hydraulic Cost, electric are more expensive. I really like buttery popcorn.
Sir Newton
New member
Greetings Bearhawkers
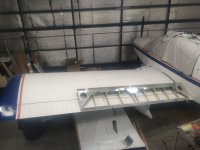
It is just a great day today! It is my pleasure to report that LG/RH flaps have been completed. Pictures attached, they need a complete primer application still. However they are complete and straight, that is all that matters today. I set a flap on the wing of my PA-28-140 for an interesting comparison.
Best Regards
It is just a great day today! It is my pleasure to report that LG/RH flaps have been completed. Pictures attached, they need a complete primer application still. However they are complete and straight, that is all that matters today. I set a flap on the wing of my PA-28-140 for an interesting comparison.
Best Regards
Attachments


Sir Newton
New member
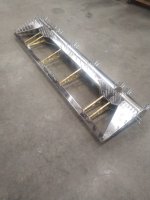
Greetings, attached some pictures of the RH aileron in colecos. Needs to be deburred & dimpled yet. LH is basically at the same stage of construction. Nothing but fun here in the Communist Republic of Canada.
Attachments


Sir Newton
New member
Hey, do not wait 5 years to start if you plan to scratch build.
Sir Newton
New member
Greetings great warriors of the Bearhawk Nation lol, just a chipper update from a fellow builder. I am finally starting the riveting on Ailerons. There is some man hours in the fabrication of parts, fitting, deburring, dimpling, alodine, final assembly of these control surfaces. Anyways it Friday have a great weekend!
lol, just a chipper update from a fellow builder. I am finally starting the riveting on Ailerons. There is some man hours in the fabrication of parts, fitting, deburring, dimpling, alodine, final assembly of these control surfaces. Anyways it Friday have a great weekend!Attachments


Sir Newton
New member
Does anyone want to surrender the part number for the Model 5 Windshield from LP Plastics?
As far as I can tell the windshield is for a Cessna C-182 thickness of 3/16 A part# would make life easier for the scratch builders.
As far as I can tell the windshield is for a Cessna C-182 thickness of 3/16 A part# would make life easier for the scratch builders.
Mark Goldberg
Bearhawk Aircraft
I am going by memory now so this # is not to be trusted. But I think the part # is 338. Actually - if you look at the C182 windshields at LP AeroPlastics - there is only ONE C182 windshield that is 3/16". All the rest are 1/4". Mark
geraldmorrissey
New member
Hey Sir Newton, we have massive Canada goose formations flying around here in Seattle at pattern altitude. Plus we have hawks, ducks, crows and other flying critters. Bet you have them too. That thicker windshield could be a big plus.
Gerry
Patrol #30
Gerry
Patrol #30
Sir Newton
New member
Awesome ! Thank-you Mark
PT#338 CL
PT#338 CL
Sir Newton
New member
Gerald You have great what if points. As you get to know me you will find that I do not always default to the safest option.
Helps understand the LS3 install
Helps understand the LS3 install
Sir Newton
New member
Greetings fellow Bearhawkers
This is an important endorsement of Bob & R&B Aircraft from a very satisfied builder. (me)
Today I received lift struts & flap springs. Along with some very important ID tags! Simply very pleased & I felt like telling someone. The shipment was professionally packed up like a professional design the packaging.
Cheerios to all
This is an important endorsement of Bob & R&B Aircraft from a very satisfied builder. (me)
Today I received lift struts & flap springs. Along with some very important ID tags! Simply very pleased & I felt like telling someone. The shipment was professionally packed up like a professional design the packaging.
Cheerios to all
Attachments

Sir Newton
New member


Sir Newton
New member
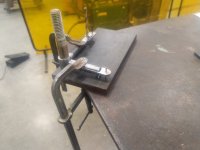
Good Day follow BH builders, I read everything I could find on internal corrosion protection of 4030 tubing. It is encouraged in AC43 to use boiled Linseed Oil. After a review of the ALL the products I could find including long term engine preservation oils. IMHO, In the case of 4130 tubing. Linseed is still the best choice at $10 a liter. I plan to inject any part that I can with it. Bell cranks got a few drops & then I sealed the hole with weld. It does not take much oil. The oil naturally spreads and crawls its way around everything. I simply tested it by dipping some linseed oil on the fab table. Within a day it spread like a fugus over the table. I see why the old generation chose to use it. Anyways.. I can ramble on about details. After fabricating these tiny little bell cranks, I realized that these little parts are fairly challenging to fab & weld. Needing something to take pictures of & post, I included pictures of a simple jig I designed to get the job done quickly & accurately. Be sure to use backers in all the bushings during welding. The backers are not just heat sinks! There purpose is to simply take up the space so air has a more difficult time getting into contact with the interior surface of the bushings during welding. Alrighty time to get back to work. PM's are open for anyone who requires a more detailed explanation of my ramblings. Cheers ta all
Attachments
-
 IMG_20220407_153946.jpg1.3 MB · Views: 0
 -
 IMG_20220407_160541.jpg1.2 MB · Views: 0
 -
 IMG_20220407_144356.jpg1.5 MB · Views: 0
 -
 IMG_20220405_122008.jpg1.4 MB · Views: 0
 -
 IMG_20220405_122021.jpg1.2 MB · Views: 0
 -
 IMG_20220331_151148.jpg1.2 MB · Views: 0
 -
 IMG_20220407_144628.jpg1.1 MB · Views: 0
 -
 IMG_20220407_144602.jpg1.2 MB · Views: 0
Sir Newton
New member
The odd picture out is the weight of my completed Aileron on the scale 11 lbs 4.3 Oz No fabric.
Last edited:
Sir Newton
New member
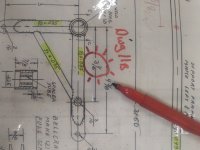
Oh almost forgot, this is actually beneficial information if you read my ramblings about BH. In the attached photo DWG 11B. There is a measurement circled in RED! At 1st glance a fabulous BH fabricating warrior may see 3"7/16 When in the real BH fabricating world this measurement is 3"1/16. Pay Attention! It freaking matters! Thank me later
Attachments
Last edited:
way_up_north
Builder
Good Day follow BH builders, I read everything I could find on internal corrosion protection of 4030 tubing. It is encouraged in AC43 to use boiled Linseed Oil. After a review of the ALL the products I could find including long term engine preservation oils. IMHO, In the case of 4130 tubing. Linseed is still the best choice at $10 a liter. I plan to inject any part that I can with it. Bell cranks got a few drops & then I sealed the hole with weld. It does not take much oil. The oil naturally spreads and crawls its way around everything. I simply tested it by dipping some linseed oil on the fab table. Within a day it spread like a fugus over the table. I see why the old generation chose to use it. Anyways.. I can ramble on about details. After fabricating these tiny little bell cranks, I realized that these little parts are fairly challenging to fab & weld. Needing something to take pictures of & post, I included pictures of a simple jig I designed to get the job done quickly & accurately. Be sure to use backers in all the bushings during welding. The backers are not just heat sinks! There purpose is to simply take up the space so air has a more difficult time getting into contact with the interior surface of the bushings during welding. Alrighty time to get back to work. PM's are open for anyone who requires a more detailed explanation of my ramblings. Cheers ta all
Your post reminds me of what my grandfather taught me… while watching him wind up an old clock… I asked him what was the cotton balls in a small tray on the bottom of the clock for
he explained that you put oil on the cotton balls… close the door to the clock… the oil slowly atomizes over time and coats all the gears in the clock..
I appreciate the time and effort you put in to post online.. I’ll be following your fuselage construction with great interest

triumphantduke
Model 5 QB #16
Oh almost forgot, this is actually beneficial information if you read my ramblings about BH. In the attached photo DWG 11B. There is a measurement circled in RED! At 1st glance a fabulous BH fabricating warrior may see 3"7/16 When in the real BH fabricating world this measurement is 3"1/16. Pay Attention! It freaking matters! Thank me later
Yes, I'm enjoying to what I can glean before building. The answer might be obvious for some... but would you please elaborate on the "7" vs a "1" ? Just vertically down there's another one.
Last edited:
Sir Newton
New member
3"7/16 is a type O & is wrong. At the very least it is poor penmanship. 3"1/16 is the correct distance for the arc required to stroke the aileron.
Last edited:
triumphantduke
Model 5 QB #16
ah okay, thank you. I was scratching my head thinking I might need to re-review fonts for GD&T.
Sir Newton
New member
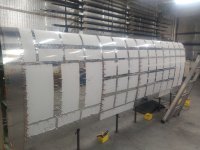
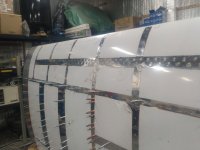
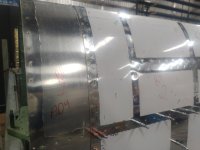
Hola fellow BearHawkers, Happy to report & post pictures in what is turning out to be a serious education in aircraft riveting. YES I said riveting. Myself & my partner in life (wife) are growing closer in understanding one & other because of this task in the rabbit hole of building a plane Combined time of 29hrs to date, we have progressed fairly well imho. We have riveted RH under side of all the nose ribs & have started down the topside of the nose ribs forward of the main spar. Riveting this area is BUCKETS of fun! oh you just wait & see. I have included a few pictures for the lookie loos that enjoy the visual experience. Well.. if you have made it this far in my echo chamber of a post. I have some heart felt advice for ya. While building your scratch built nose ribs keep in mind that you have to get around the lighten hole flanging with a bucking bar! Over flanging will require you to be able to build custom bucking bars. Nothing to be afraid of, just prepared for is all. I have noticed the depth of flanging on the factory kit ribs with greater understanding now. Other then that Pound Your Rivets with Pride... on that note. adios
Combined time of 29hrs to date, we have progressed fairly well imho. We have riveted RH under side of all the nose ribs & have started down the topside of the nose ribs forward of the main spar. Riveting this area is BUCKETS of fun! oh you just wait & see. I have included a few pictures for the lookie loos that enjoy the visual experience. Well.. if you have made it this far in my echo chamber of a post. I have some heart felt advice for ya. While building your scratch built nose ribs keep in mind that you have to get around the lighten hole flanging with a bucking bar! Over flanging will require you to be able to build custom bucking bars. Nothing to be afraid of, just prepared for is all. I have noticed the depth of flanging on the factory kit ribs with greater understanding now. Other then that Pound Your Rivets with Pride... on that note. adiosAttachments



Frank
New member
As an LSA builder we nevertheless inhabit the same gene pool. So I have to ask about gusset and trailing edge flanges. One reason would be to disguise gusset edges. But maybe it's more esthetic to feature the edges? Though now I zoom in it looks like the edges are somewhat rolled? Cleveland edge forming tool? Sorry to be a pain but I am just approaching that step now!
Last edited:
Sir Newton
New member
100% we are of the same tribe. I added pictures of the tooling used. It is a bead roller with a 5/16 radius die set. I tipped every edge so the fabric wouldn't have an edge to rub against. The edges have a more finished look. I did the same on all the exposed edges on my wing skins as well
way_up_north
Builder
I was taking a close look at this spot on my plans… on mine there is spot at the top of the one.. but much lighter… on my plans it looks like a “1” and not a “7”
If my plans looked like yours I would have seen a “7”…. Thank you for bringing to our attention
If my plans looked like yours I would have seen a “7”…. Thank you for bringing to our attention
Sir Newton
New member
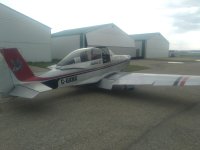
Greetings, Long time no posting. Did I ever get distracted from posting. I am still working on the BH5 at least 5-15 hrs per week. However I am sharing a picture of my distraction. I got a little drinkie with some of the older pilots on the airfield. & by the end of the evening I bought a Mustang 2 ... lol, Anyways, Now I am flying around in the solution to my next mid life crisis. Rotflol.
Attachments


Sir Newton
New member
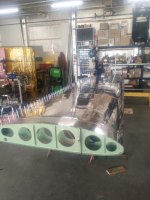
Fellow builders, I have had a very exciting spring & summer this year. The BH5 project has not taken the back seat completely. I am sure to schedule time every week to get something completed. This helps me stay current on the project. Both my wings are out of the riveting jig now. All the linkages & ail/flap hinges have been fit up. Now I am ready to final fit flaps & ailerons to the wings. Make any adjustments that may need to be made. So the wings & control surfaces look professionally biult & fit.
If anyone is planning Abbotsford Airshow 2022 & would like to meet up. I will be on site for the weekend. Cheers to all. May all your winds be tailwinds.
If anyone is planning Abbotsford Airshow 2022 & would like to meet up. I will be on site for the weekend. Cheers to all. May all your winds be tailwinds.
Attachments


way_up_north
Builder
tis a thing of beauty
Sir Newton
New member
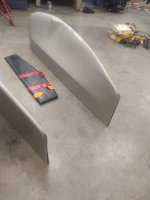
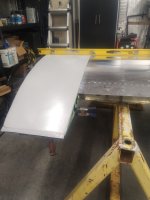
Good day! to the good members of the Bearhawk community. Allow me to post a product review for Carbon Concepts mobel B wing tips. I recieved my wing tips in good order. The fit & finish on the workmanship is 100% The tips come all trimmed up in light grey primer ready to be installed. The trailing edge of the tip is left open to allow a prefect fit to the wing. I happened to have a wing up on fab stands for a quick test fit. The fit is 100% imho. Have a look at the attached photos.
Attachments
-
 16684640035213267464969680732821.jpg1.3 MB · Views: 0
 -
 16684640393993134773836287971213.jpg1.6 MB · Views: 0
 -
 16684640699488270545784326058037.jpg1.6 MB · Views: 0
 -
 16684648107676652775200157156175.jpg1.6 MB · Views: 0
 -
 16684653684378475458971739625854.jpg1.5 MB · Views: 0
 -
 16684670313837876050280343001530.jpg1.4 MB · Views: 0
 -
 16684670914987965318536414646408.jpg1.6 MB · Views: 0
Last edited:
Sir Newton
New member
Yes they do. All off 18"
My photos do not do them justice.
My photos do not do them justice.

kestrel
Offering Bearhawk rides
For confirmation and clarity. Do they add 18" per side more than the stock tips? Is the total wingspan 3 feet longer than with the stock tips? They don't look that long.
Other possibilities are that they extend 18" beyond the bare wing or they are 18" long but don't quite extend the span from the bare tip that far because there is overlap on the tip rib.
Other possibilities are that they extend 18" beyond the bare wing or they are 18" long but don't quite extend the span from the bare tip that far because there is overlap on the tip rib.
Sir Newton
New member
For confirmation & clarity ..lol
I have never seen a stock tip. So I can not speak to that. However, Yes they add full 18" measured at the leading edge. Not counting the engagement onto the wing. So that is a full 36" to the overall wing span.
I have never seen a stock tip. So I can not speak to that. However, Yes they add full 18" measured at the leading edge. Not counting the engagement onto the wing. So that is a full 36" to the overall wing span.
Last edited:
Sir Newton
New member
I was also going to say that in one of my pictures there is a 4ft level on top of the wing. You can use that as a measuring stick to verify how big those tip really are.
Sir Newton
New member
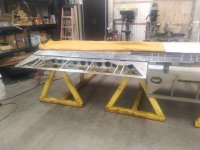
Hey ya all, 2023 is almost here & I am not flying my BearHawk as planned back in July of 2020. All though it has been a good year for being evolved in aviation. I got distracted with the purchase of a Mustang 2. Of course the mustang needed work so I had to get that done & then learn to fly it 18hrs & 105 lands & take offs now. My 1st conventional gear airplane, it lands at 80mph 60% power. You land it like your trapping on a aircraft carrier. Needless to say I now consider myself a fully checked out tail wheel pilot. However always room for improvement. The BH Model B wings are both very close to completion now. I really want to make the BH a priority. I am getting set up to fit & weld the fuselage. Being a welder by trade this is very much my wheel house. Posted some pictures of my ailerons & flaps mounted on the LH wing. I was pleased with the trailing edges lining up nearly perfectly. Bob sure did a good job of the wings prints. Follow his measurements & all works out great. Ok that is it for my rambling. C ya sometime. Cheers
Attachments




Sir Newton
New member
Greetings, We are making big plans to attend 2023 SUN n FUN !!
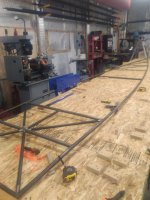
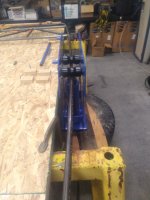
Yesterday I completed the fitting & tacking stage on my BH5 lower frame. I used a hydraulic bender to make the bends up to the tail section. Drilled #20 communication holes between every tube on both ends. Through a quick down hand MIG pass on the covered sides of each joint. Everything went really smoothly. With a close inspection you may be able to pick out some mods. Starting the upper frame today & Looking forward to the end of March.
Yesterday I completed the fitting & tacking stage on my BH5 lower frame. I used a hydraulic bender to make the bends up to the tail section. Drilled #20 communication holes between every tube on both ends. Through a quick down hand MIG pass on the covered sides of each joint. Everything went really smoothly. With a close inspection you may be able to pick out some mods. Starting the upper frame today & Looking forward to the end of March.
Attachments



Sir Newton
New member
Greetings to the builders who follow my online ramblings. It was a good week for the BH5 project. Got to work & tacked up the upper frame with some added personality. Next we tear apart the cheap 7/16 OSB table & fabricate a quick jig using the horses to mate these halves together. Yes I somehow forgot OR plan old missed ordering tubing for Station "O" I need to fire the project manager. It has been ordered & I was promised a cost effective speedy delivery. lol :-( Posted some pictures for the curious observers. Sharing is caring freinds. Sun N Fun 2023 I will be the guy with the smile on my face.
Attachments


Sir Newton
New member
Today was going to be a putz around tear down my make shift layout table, drink beer & clean the hangar day. I promptly got very side tracked with cleaning & through together a down & dirty fuselage jig. I only roughly lined up the upper & lower frames. Quickly realizing how big the BH5 cabin is going to be. It is massive! The weather in northern Alberta is turning for the worst so I will be able to dial the two frames in & mate them up. Then we will be rolling rolling. Welding that is cheers
cheersAttachments


Bcone1381
Finished Patrol
With a close inspection you may be able to pick out some mods. Starting the upper frame today & Looking forward to the end of March.
I'm not able to pick up your modifications, but am curious what they are.
Redneckmech
BH Five Scratch Build
I'm not able to pick up your modifications, but am curious what they are.
I will leave it to him to provide the details if he so desires but I would say Sir Newton is planning to maximize the cargo area and payload

I was able to spot as least some of them since I also have BH5 plans but they are subtle changes that would be difficult to otherwise pick out.
Last edited:
way_up_north
Builder
Really nice pictures your progress , appreciate you taking the time to post them
Sir Newton
New member
No official comment ;-)
Sir Newton
New member
If figured I would just add a comment about this really shoddy frame mating JIG turned out.
It is working surprisingly awesome. I fiddled around getting everything leveled up & centered up. took a couple of hours & everything is inside of 2mm of error. I set the tail post & then finished cutting & copping vertical T-9 tubes for H-J, & G-K
It is working surprisingly awesome. I fiddled around getting everything leveled up & centered up. took a couple of hours & everything is inside of 2mm of error. I set the tail post & then finished cutting & copping vertical T-9 tubes for H-J, & G-K
Redneckmech
BH Five Scratch Build
To echo way_up_north, keep on posting! Seeing your progress has helped me stay focused on my project and I have enjoyed spotting the subtle changes that you have implemented.
Sir Newton
New member
That is the main purpose. I call it cheerleading ourselves on.
Sir Newton
New member
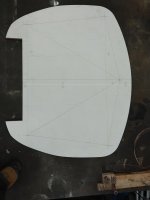
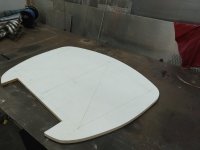
Greetings Bearhawkers, I am posting a couple of pictures of a pattern I built for BH5 firewall, yes kind of boring. But I have the file saved now. Basicly I scanned the print into CAD and upscaled the print to real life scale 1/1 & printed it our on a 36" plotter printer. Today I am finishing off the last of the fusealge general fitting station C-S. & Then over the weekend I am planning to setup to weld my fusalge out. cheers to everyone
Attachments

triumphantduke
Model 5 QB #16
how good are those welds gonna be?
Sir Newton
New member
They will be marvalous
Good to hear from ya Mr Duke
Good to hear from ya Mr Duke
Sir Newton
New member
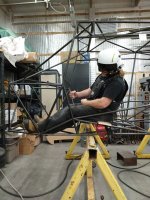
Celebrate with me. Just like that ! My imagination gets the better of me & I find myself making airplane nosies. lol
Started Jan 2023 finshed main fusalge fitting May 28. Took 1 month off for traveling & attanding Sun N Fun.
Now the grunt work begins. Welding this construction out. Welding is NOT my favorite task :-(
Started Jan 2023 finshed main fusalge fitting May 28. Took 1 month off for traveling & attanding Sun N Fun.
Now the grunt work begins. Welding this construction out. Welding is NOT my favorite task :-(
Attachments
Last edited:
Sir Newton
New member
Greetings to the good men of this forum.
Nearly 12 months to the day. I have started back on the BH5 fuselage project. Welding has officially started. Yay ! ! ! If there's one thing in life I could do without is welding. Posted some not so super secret pictures of my fuselage Feel free to ask what ever questions you may be curious about.
Nearly 12 months to the day. I have started back on the BH5 fuselage project. Welding has officially started. Yay ! ! ! If there's one thing in life I could do without is welding. Posted some not so super secret pictures of my fuselage
Feel free to ask what ever questions you may be curious about.Attachments
-
 17154741248941346050912064989122.jpg1.7 MB · Views: 0
 -
 17154743969189096760376624096115.jpg2 MB · Views: 0
 -
 17154744611855943042059743628516.jpg2.1 MB · Views: 0
 -
 17154745033574736118037975810484.jpg2.1 MB · Views: 0
 -
 17154745345181070212600157062223.jpg2.1 MB · Views: 0
 -
 17154745591495756541290304602260.jpg2.1 MB · Views: 0
Last edited: