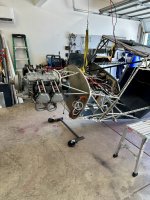
Companion Progress Thus far

Mark Dickens

Companion QB
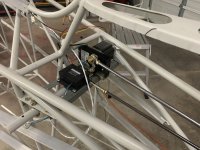
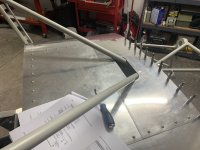
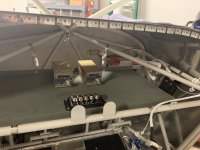
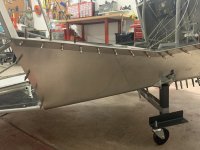
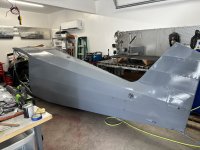
I guess someone needs to update progress on their Companion project. I received my QB on June 12 and as of today, I have installed the stringers, floor boards, tail, control cables, pitch servo, trim servo, firewall, control sticks, pedals, fuel line, and electric fuel pump. Landing gear, and brakes are next, waiting on multiple shipments from Spruce. I basically ran out of parts over the holiday or it would be sitting on its gear today, I think. Here's a few photos to make it more interesting:

IMG_1204.jpg
IMG_1205.jpg
 
Thanks, but it's all going to slow down when I get to fabric since I know less than nothing about that. I'm going to spend some quality time at the Stewart Systems workshop at Oshkosh. Plus I'm not in love with the floorboards so there will be some "redo" on them. I'm just getting the easy part done
 
Just a quick update. the boot cowl is almost done. I am working on the left door extension and had to buy a new piece of 025 because I mis-cut what I had. I'm extending the "optional" piece under the door sill back to the rear door former. I am not sure why that piece is only supplied with 1/2 the metal it should have but I am adding to it with a riveted seam. Looks fine. I'm also doing a load of wiring in prep for fabric. I must be a real nerd because I really enjoy the wiring part. Fabric on the other hand has yet to grow on me, but it will, it will!

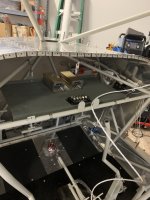
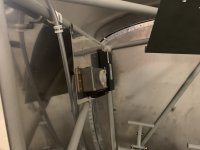
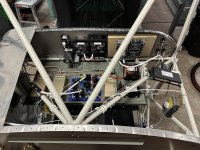
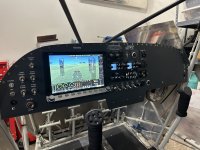
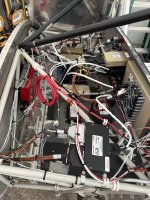
I'm going with electric trim since I'm using the Dynon Skyview system and I like their autopilot trim controller. I have it on my RV-8 and it makes cross country flying almost boring. I also mounted my elevator servo in the tail area so I have to make sure I build in access to be able to pull it out if necessary. Other notes include the avionics shelf installed behind the panel. I will move the tabs for the throttle, prop and mixture below the panel as I've seen some do. Being only 5'8" tall, I'm not too terribly worried about hitting it with my knee, etc. I've tried hard to reduce the avionics behind the panel because of access (learned this the hard way on my -8), so I've distributed most of the non-panel mounted boxes to areas where I can easily get to them. The shelf in the area behind the baggage area will be easy to get to. I'm going with fuses for this plane. I did a VPX for the -8 and while it's been rock solid, I just don't want to spend that money again, so I've mounted the fuse panel where it can be easily inspected and fuses replaced. The rear area has it's own fuse panel and a connection to the single point ground.

I'm pretty pleased with where I am so far, but the elephant in the room is fabric and I have to gird up my loins and put on my game face and get to it soon.

Some photos:
 

Attachments

  • IMG_1258.JPG
    IMG_1258.JPG
    1.6 MB · Views: 8
  • IMG_1259.JPG
    IMG_1259.JPG
    2.4 MB · Views: 6
  • IMG_1255.JPG
    IMG_1255.JPG
    2 MB · Views: 6
  • IMG_1262.JPG
    IMG_1262.JPG
    2.2 MB · Views: 6
  • IMG_1261.JPG
    IMG_1261.JPG
    2.3 MB · Views: 5
  • IMG_1257.JPG
    IMG_1257.JPG
    2.3 MB · Views: 5
  • IMG_1256.JPG
    IMG_1256.JPG
    2.5 MB · Views: 5
  • IMG_1260.JPG
    IMG_1260.JPG
    2.4 MB · Views: 6
Mark - moving your throttle/engine controls below the panel might interfere with stick movement. The stick needs to go under than panel for forward stick movement. Be careful you do not build something below the panel that will not allow that. Mark
 
I agree. Stick movement and knees were the reasons I placed my controls on the panel and above the tube. Now that I am flying, my right hand rests perfectly on the black knob and I am happy with that placement decision.
 
I am aware of that issue and will keep that in mind. Knees won't be an issue for me with my height...I will remount the elevators and take a second look at the travel issue before cutting anything!
 
Finally got started on fabric covering the horizontal stab. I think it going fairly well so far, but I have a couple of observations:

1. In the Stewart Systems videos, the idea that you can apply the Ekobond and let it dry for as long as you like and then stick the fabric to it isn't exactly as it sounds. You need the glue to be at least a little tacky to hold the fabric, I've found. You can iron it on but I couldn't get the fabric to stay in place with finger pressure alone unless the glue was still a little green.

2. The fancy pinking shears sold by Stewart, aka Florian Rotary Pinkers have not worked well for me at all. They don't cut cleanly and you can't use them effectively in tight areas. My cuts with them look like a rabid cat got a hold of the fabric. I'm heading out to the store to get a pair of Fiskars. I think that part of the issue with the Pinkers is that the dacron is so thin and tough, it has a hard time cutting cleanly. For over $90.00, they have been a disappointment. Anyone want to buy them for a good discount?

3. The Fabric Pro iron is awesome. Heats up fast too. Worth every penny they cost IMO
 
I forget where I got my rotary pinker cutter. Out of the box it cut cleanly except in one spot so that was a show stopper. I sent it back and just bought a good pair of pinking shears. Everyone should buy a good digital iron, definitely worth the cost. 30 years ago you could buy a good clothes iron that would hold temperature pretty closely. Most of the chinese junk today will swing 40 to 50 degrees.
 
I also did not have much luck with the rotary pinking shears... Bought straight pinking shears and never looked back.
 
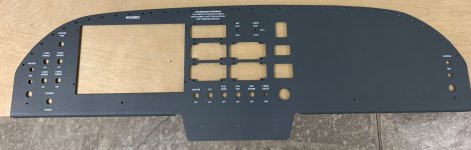
My finished panel arrived today:

IMG_1299.jpg
I created the layout and had Steve Schurwald at Aircraft Specialty Flightlines (www.asflightlines.com) fabricate it out of .090 6061-T6, powder coat and screen print it.
open
 

Attachments

  • IMG_1299.jpg
    IMG_1299.jpg
    659.1 KB · Views: 1
I would love to find someone to etch my CF panel, right now it is just mylar prints for labels. Yours looks great.
 
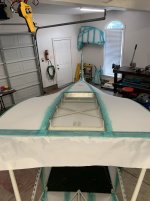
Finished covering the top and tail. I'm happy with how it all came out, other than the lowest rib on the VS being pulled up a little by me prematurely shrinking the fabric above it. I have a removable aluminum center section for the cabin roof mounted with almost 50 6-32 screws (it ain't coming off). The com antenna will be mounted there, almost a perfect ground plane. I'm glad I put in the extra effort to make sure that lower rib on the VS was rib stitched since it's so much more streamlined than letting that area balloon out.

IMG_1394.jpg
IMG_1395.jpg
 
Before I took a week to prepare for Oshkosh, a week to go to Oshkosh and a week to recover from Oshkosh, I managed to get the Ekofill sprayed onto the fuselage. I'm very happy with how it went on. I made the mistake of brushing it onto the tail feathers which resulted in a thick coat that I now have to sand down. In one of the Stewart Systems videos, Marty Feehan makes the point that you always want to spray it on or you'll have 5X the amount of sanding to do. I'm here to say he's spot on. Wish I'd sprayed it...oh well

68157985925__C59F5D5F-6FE2-475A-8007-971999F5BA2A.jpg
 
Since I restarted the project, I thought I'd post a few photos of where I am. As a more or less retired person (small business owner and son taking over), I have time to work on it. When I paused the project, I was working on the avionics since I had access to everything I needed. That's where I'm focused right now. Still have a bunch to go, but I anticipate having it all done in a couple weeks, minus the connections from the wings

Click image for larger version  Name:	IMG_1851.jpg Views:	0 Size:	2.53 MB ID:	92243 Click image for larger version  Name:	IMG_1851.jpg Views:	0 Size:	2.53 MB ID:	92243
I ran out of bullets (aka DB sockets) so have to wait a few days to get another supply. Like Geo Patton in France, I'm outrunning my supply lines. The blue board you see in the photo is a Dynon Skyview interconnect board designed and sold by Brian Adams in Reno. If you've worked with the Skyview system before (I installed it in my RV-8), there are a bunch of interconnecting wires sharing data across components and it's extremely easy to create a rats nest of wires. This helps simplify it.

I had originally planned to do a simple fuse panel for the electrical distribution scheme, but decided to go with the VPX Sport. I used the Pro model in my RV-8. The issue I had with the fuse panel was related to trim safety since I am implementing an electrical trim system (Ray Allen) and having had a trim incident in the RV-8, I could imagine the same in this plane and I assume it would be harder to control given the size of the elevators and the trim tabs. So, now I have two trim control systems (VPX and Skyview, in the autopilot panel), with a 12 pole on-on switch that allows me to select which trim control system I want active. In the case of the incident in the RV-8, the Dynon autopilot panel decided it was time to descend in the middle of a cross-country flight. Turns out there was a fault in the panel, but it kept doing it. I implemented the same back up plan later which allows me to cut out the Dynon component and use the VPX trim system, and vice-versa. If you're going to control trim electrically (and I know this is controversial with the BH), then you need a backup. I've never had an issue with the VPX....between the two systems, my odds are pretty good.

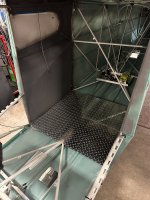
Another thing I addressed is the flimsiness of the baggage area floor. I'm not planning to compete in STOL competitions, so I'm not counting ounces, and I want a sturdy and safe cargo area. So I ditched the piece of .025 aluminum that was back there in favor of a 1/16 piece of diamond plate. I love this. No more buckling when I climb back there to do work. One of today's jobs is the baggage area rear bulkhead, which will be made from Kydex stiffened with left over stringer pieces. I'll post photos later on this.

Painting is on my mind...if I can get a few days of decent weather here in the Memphis area.

Click image for larger version  Name:	IMG_1851.jpg Views:	0 Size:	2.53 MB ID:	92243
 
Last edited:
I'm surprised that .025 aluminum was provided for the floor boards. Bob said to use .032 in the 4 place and it is marginal. I have already deformed it by stepping in the wrong place.
 
Interesting about floor board thickness. I looked at Bob's Patrol book. He said use .032 on the floor where you'll stand. All others get .020". I know my factory floor is has NO .020. its at least .032 could be thicker (this is a 2017 kit)
 
It was marked as .025 on the aluminum, so... Anyway, it was way too flimsy. I love the 1/16". .032 might have been acceptable or at least tolerable. I turned the old floor into part of my baggage compartment bulkhead yesterday. One of my missions for this plane is flying for Pilots N Paws, and in the past, I always seemed to get Pit Bulls, Huskies, Great Pyrenees, or a mama dog with 7 puppies. I flew these missions in my RV-8 believe it or not. but this plane will be the bee's knees for hauling homeless pups...

​
 
Beavering along on the Companion. I should have the panel, avionics done this weekend, at least as far as I can go before wing attachments and all that. We are having a nice stretch of weather here in West TN right now, so I took advantage to get some painting done. Using Stewart Systems and I have to say that as long as you take it slow and easy, and layer on multiple thin coats, it results in a nice finish. Unfortunately for me, the underlying fabric work isn't anywhere near perfect...but I think it's airworthy. I'm too used to metal. I'll have to put some eye catching vinyl graphics on to distract viewers!

IMG_1883.jpg
 
Diamond tread aluminum plate in 3003 can be had in 0.045" thickness as well, although I think the 1/16" is not that much heavier and stiffness goes by cube of thickness.

Love seeing the factory tabbing on the fuselage... def helps visualize where things go. Speedy build!
 
From what I can see in the picture, looks like a pretty good fabric job. We are our own worst critics.
 
99% wired...1% when I get the wings mounted, etc. I have some more painting to do this week while the weather cooperates and then engine mounting, with FWF and cowling ahead throughout the winter. My plan, if you can call it that, is to emerge from the darkness and wetness of winter ready to move it all to the hangar. We shall see...

IMG_1889.jpg

IMG_1887.jpg
 
Working on FWF mainly now that the panel is in. Seats from Daniel at Sport Aircraft Seats arrived and they look nice.

IMG_1908.jpg

I finally got to sit in the plane and test the fit. as well as the view over the nose and I'm happy. Daniel was great to work with and they did a great job.

I'm spending a lot of time these days waiting on parts to arrive. If I had all the parts that I'm waiting on, I'd have FWF done in about a week (not counting the baffles of course) and would move onto the cowl. Oh well...
 
Now that I'm back in the saddle on the Bearhawk, I thought I'd bring things up to date.

Last fall, I had to replace my firewall due to a collapse of the dolly I had the fuselage mounted to...I had repurposed part of the shipping crate and added heavy duty casters to it so I could keep the fuse at a good working height. After mounting the engine, and attempting to move the fuse over, the dolly gave way and down it all came, landing on the lower corners of the firewall. This was after I winched it up off of the floor:
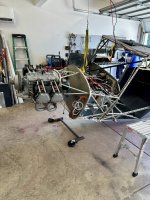
IMG_1901.jpg

Yes, that's the offending part laying there on the floor. I was extremely lucky (I can hear you muttering that and other things) in that the firewall gave up its life to protect the rest. It also happened to be only about 6" off of the floor. Some of the bottom paint was scuffed up and the whole thing landed flat. The transponder antenna just broke off and didn't end up punching a hole in the fabric...on top of that I somehow had an extra identical transponder antenna in my parts drawer. Talk about small things to smile about. Really notwithstanding the firewall, there was very little damage and it was all minor and cosmetic. I was very lucky

Anyway, I thought I could simply replace the bottom corners of the firewall and ordered some stainless...after trying that for a few weeks, I just gave up. I don't think there's a way to make repaired stainless steel look good, and so I ordered a new firewall...glad I did that, it looks so much better, but then I had to demount everything and remount the engine, which is what I've been up to for the last 6 weeks or so.

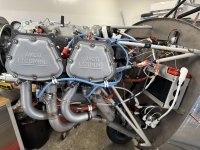
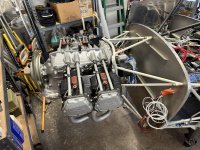
The engine is remounted and everything rewired

IMG_2264.jpg IMG_2263.jpg

I'm finally done with the blasted exhaust tunnel (hate that thing)

IMG_2265.jpg

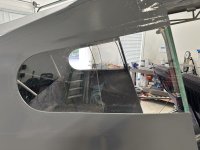
Got the windows fitted

IMG_2266.jpg

Got the cabin top panel fitted

IMG_2267.jpg

There are a ton of things to be done, but I'm excited to be back on the project. Fortunately, I won't have an engine for the RV-14 to distract me until June, so it's all Bearhawk these days and hopes are to take it to the hangar in the spring and attack the wings.
 

Attachments

  • IMG_1901.jpg
    IMG_1901.jpg
    3.1 MB · Views: 4
Boot cowl part deux...the new firewall was not identical to the old firewall of course, so that meant that everything I had fitted to the old firewall would no longer fit...so I had to build another boot cowl over the past two weeks...what a pain, but it's done and now onto the cowl, something I haven't done once so far!

IMG_2274.jpg
 
Back
Top