Elevator counterweight casting

Bearhawk535

Junior Member
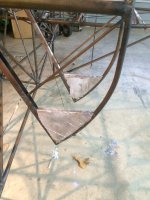
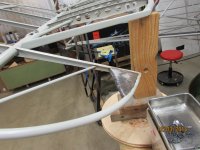
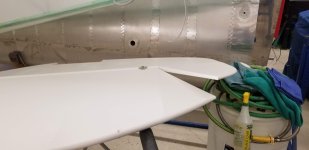
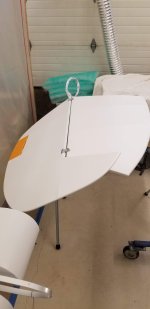
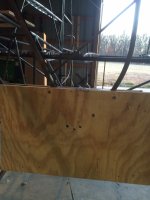
i tried my elevator counterweights as described by Eric Newton in his guides but did not like the results. So I melted them out and redid them by sandwiching the tip between 2 pieces of plywood and pouring them vertically. I am pleased with the end results.
 

Attachments

  • photo3251.jpg
    photo3251.jpg
    1.2 MB · Views: 0
  • photo3252.jpg
    photo3252.jpg
    1.4 MB · Views: 0
  • photo3253.jpg
    photo3253.jpg
    1.4 MB · Views: 0
  • photo3254.jpg
    photo3254.jpg
    1.3 MB · Views: 0
Is 5" from the tips the "common solution" for how much lead to use? I have been having trouble trying to figure out how much lead to use - where do "draw the line", so to speak. I suppose it's easier to remove excess lead later on than to add more after it's covered... but didn't know where to start.
 
Pour more lead than you think you need. Then when you do the actual balancing - remove the excess from the aft side of the lead piece. Mark
 
Also make sure you smooth it out because if you don't ANY imperfections will show up in the fabric and in the paint. And if your a perfectionist you'll end up cutting off the fabric and starting over because no matter how much filler primer you use, it won't correct it. Donna
 
Is 5" from the tips the "common solution" for how much lead to use? I have been having trouble trying to figure out how much lead to use - where do "draw the line", so to speak. I suppose it's easier to remove excess lead later on than to add more after it's covered... but didn't know where to start.

So, would 5" be "more than I need" or should I pour 6 (or 7, or 8, or...)? Seems easy to remove some as Mark says, but much harder to add... Just want to make sure I'll have enough in there!
 
Also make sure you smooth it out because if you don't ANY imperfections will show up in the fabric and in the paint. And if your a perfectionist you'll end up cutting off the fabric and starting over because no matter how much filler primer you use, it won't correct it. Donna

Good point. Maybe I'll spend a bit of time with the wooden "form" to make sure it's super-smooth, so the edges won't be rough. MDF would probably NOT be the best choice for the mold material - LOL.
 
Another, learn from my mistake, point--when you epoxy prime, wait the full 7 recommended days before you put your fabric on. Polytak makes a good epoxy primer stripper. D.
 
Good point. Maybe I'll spend a bit of time with the wooden "form" to make sure it's super-smooth, so the edges won't be rough. MDF would probably NOT be the best choice for the mold material - LOL.

Why not? Are you afraid it'll combust from the glue?

Seems like tracing the opening shape on your mold sidewalls and routering around it so that it extends slightly into the cavity would help keep it below the effective surface.
 
Bill, it was not a problem adding some more lead. We just made sure we had something for it to hang onto like another tab or a screw. It doesn't take much lead to do what needs to be done and just as soon as I can get a photo of ours I will. D.
 
Why not? Are you afraid it'll combust from the glue?

Seems like tracing the opening shape on your mold sidewalls and routering around it so that it extends slightly into the cavity would help keep it below the effective surface.

No, I was just thinking that MDF has a pretty rough texture, which would mean the lead surface would be pretty rough as well. As Flygirl1 points out, that means more work when it comes time to cover. Your suggestion to "countersink" the form around the tubing could solve that as well, but I was thinking that a smoother surfaced wood would also address the issue.
 
Any wood product is going to off-gas as it burns. I suspect that a pre-warmed steel or aluminum plate is going to be smoother. Russ Erb Erbman figured out a way to approximate the weight of the fabric by using a weight of a certain mass in a certain place, but I don't have the particulars handy.
 
No, I was just thinking that MDF has a pretty rough texture, which would mean the lead surface would be pretty rough as well. As Flygirl1 points out, that means more work when it comes time to cover. Your suggestion to "countersink" the form around the tubing could solve that as well, but I was thinking that a smoother surfaced wood would also address the issue.

I can think of no smoother processed wood product than MDF. Are you thinking of OSB? MDF is extremely smooth, much more so than plywood.
 
But that's balanced just a bit nose-heavy without the fabric. Is that the goal here? I thought they were to be balanced (as perfectly as possible) WITH the fabric...
 
Last edited:
When cast I had the weight hung off the elevator at the position that Russ Erb calculated that simulates the entire weight of the elevator that needs to be compensated for, including fabric. When it's all done, it should be nose-heavy without the fabric. (see previous two log entries)
 
I have question about how to cover over the counterbalance: Is it preferable to have the fabric glued directly to the lead? Or would it be better to have the lead recessed slightly so the fabric drums above it?
 
Based on our experience it was kinda hard not to glue to the lead if you don't recess it. You'll probably want to put some reinforcing tape or something on the lead as the fabric will be too close to that surface to not be concerned about wear. They say if you can push on the fabric and touch something under it, you need protection at that point. When we ironed it the fabric tightened up enough to lay flat on the lead and when we applied the polyspray brush coat, it stuck it down to the lead and any imperfections showed up at that time. What you see ( or even don't see ) there you will really see when you apply the silver coat.) (The dangers of Polyspray is a whole other thread.) Our lead was not recessed below the tubing. We sandwiched the tube with wood and clamps and poured the lead so routing out for a recess I think would be a good idea.
 
As I'm painting parts the thought occurred to me to check the balance of the elevators before doing the topcoat. I'm glad I did. Even though I used Russ Erb's method for calculating the amount of lead (according to his CD, his turned out "perfect"), it's not enough. So I'll have to sand off the primer on the underside, open up the fabric and somehow attach a weight to the back of the existing weight. Bob B. suggested drilling a hole in the front tube that forms the elevator tip and adding lead in there but I don't thing it would be enough. Anyway, put in more than you think you need. According to my kit log I put in 4lbs. 5 would have been much better. You have been warned! 20211203_132714.jpg20211203_153639.jpg
 
965CA615-D6CE-4DEC-BBB2-0FC4241D91D3.jpg I tacked two thin sheets of metal to my elevator and then brazed around the edges being very careful to keep everything below the surface of the elevator tubes. Filled with molten lead. The holes are where I added anchor bolts brazed and ground flush. Fabric will not touch this surface. I calculated the amount of lead to balance and it turns out I was within 1 oz of what the factory is now pouring. Stewart covering with paint applied is .8 oz per square foot.
 
I used oratex so my fabric weight was pretty much fixed. If I painted I might have erred on the side of too much counter weight, and drill thru the fabric on the bottom side to remove excess lead weight, and patch the fabric.

I think Bob might be right. Figure out how much lead you need to add and the volume it requires(I would use lead shot, even though I cast my lead balance weights).Drill the leading edge of the elevator balance. Pour in a little lead, inject some epoxy, a little more lead, a little more epoxy. The screw/bolt should hold the new weight in place. I would do it in the front corner of the tube.

If the current counter weight is very close, i.e. it is just barely under balanced, I would probably just accept it. Just my opinion.
 
Last edited:
I also had to add weight to my elevators after they were covered. I used lead wool and epoxy that I packed into the leading edge tube. Worked out well.
 
Back
Top