Engine Break In and First Flight

whee

Junior Member
Question for those of you that have installed a new/overhauled engine on you BH and had to break it in congruently with flight testing. I have the EAAs new flight test manual and I'm not sure it is possible to follow their recommendations while properly breaking in my fresh engine.

So, how did you guys handle the first flight? What procedure did you develop or follow?

The break procedure for my engine says for the first flight to takeoff normal, climb shallow then maintain level cruise at 75% power and best power mixture for 1 hour. Minimum safe altitude for me is 6500msl so I'm looking at WOT and max cruise rpm (2600) to even get close to 75% power. I'm not too thrilled about flying circles around my airport at 1500agl and max cruise speed for an hour in a untested air frame. I'm sure the controllers in the tower won't be too thrilled about it either.

I know lots of guys have been through this exact thing before so I'm really interested to see how you handled it.
 
Whee, we did the same as what your saying you should do. Having a new to me electronic display made matters a bit overwhelming. I would find the nearest non towered airport and fly over it for an hour. We flew a circuit between two non towered airports and checked out some things like flight stability while doing that. Don't worry too much about all the other stuff, that hour will go by a lot faster than you think and there will be plenty of opportunity to finish all necessary flight testing. Keep in mind not all things that are going to fail, fail immediately. Over time vibrations take their toll as well as hard landings and so on, so post and preflight inspections are really important. Breaking the engine in properly the first time is also really important. I believe the first 15 minutes is as important, so keep your ground runs to a minimum. As far as my first flight and actually every flight since, I always say if I can get back on the ground with everything I left with, it was a good flight. ;-) I'm sure your workmanship is above and beyond, so have confidence in it. I'm pretty sure it won't come apart. Good luck and have fun with it. Trust me, you won't be able to wipe that smile off your face!!!
 
Whee, I know those are the recommendations of engine manufacturers and overhaulers. I like to make a short 10-15 minute flight first. Then land to de cowl and check all fuel and oil lines etc for leaking. Then I feel more confident to go up and spend an hour circling the airport. The controllers will be OK with what you want to do on a first flight of your plane. Mark
 
Whee, this is still fresh in my mind, having done my 1st flight last November.
I also had to deal with a freshly OH engine, bolt-on to a untested air frame…In my case, I did stay within reach of the airfield for flight 1 to 4. Made arrangement with the controller prior to the 1[SUP]st[/SUP] flight and the game plan was to circle the airfield at 1000ft above circuit altitude.
I’ve run my engine harder than what you’ve suggested. I’ve read a lot about that, and there is a lot of different approaches suggested by different eng mfg. In my case, I ran the engine between 75 % to 100 % for the 1[SUP]st[/SUP] hour, cycling from one setting to another every 5 minutes or so. Everyone agreed that CHT should be kept as low as practical. In my case, OAT was below freezing level, so my CHT never exceeded 380.
One critical thing that you haven’t mentioned in your post is: Ground runs prior to 1[SUP]st[/SUP] flight.
I suggest to read an extract from Russel Mahlon on that subject. He also suggest a run-in schedule prior to the 1[SUP]st[/SUP] flight. The take away form that is never exceed 350F CHT during any ground operation. Lack of cooling on the ground will glaze the cylinder walls and prevent actual break in from occurring during you actual flight runs. In my case, I’ve limited my CHT on the ground to 320 F.

One observation as well about Brake Break-in…It took me 3 ground runs (following the brake mfg break-in procedure) in order to achieve reasonable braking action. So plan for some level of ground runs prior to the 1stflight.
Good luck
Mike
-----------------------------------------------------

Hope this helps!This is how I would do the initial runs. I have used this procedure thousands of times with complete success.
Good luck,
Mahlon

CYLINDER RUN-IN INSTRUCTIONS FOR CHANNEL CHROME,
CERMICROME, AND CERMINIL BARRELS

1] Install mineral oil in ALL normally aspirated engines and all Teledyne Continental turbocharged engines. Install AD oil in all Textron Lycoming turbo charged engines.

2] Start engine, run at 800 R.P.M.'s for three (3) minutes, shut down, check for leaks.

3] Start engine, run at 1,000 R.P.M.'s for three (3) minutes, shut down, check for leaks.

4] Cowl aircraft.

5] Start engine, run at 1,200 R.P.M.'s for three (3) minutes, shut down, park into wind.

6] Start engine, run at 1,400 R.P.M.'s for three (3) minutes, shut down, park into wind.

7] Start engine, run at 1,400 R.P.M.'s for five (5) minutes, run up to full power, check all engine parameters, retard power to 1,000 R.P.M. for one (1) minute, shut down.

8] Check for leaks The engine has now had it's Test Cell run time and is ready for other ground runs, taxi tests, adjustment runs, etc., observing the precautions from the post

All runs should be made into the wind.

At no time during these runs should CHT exceed 350ï‚°F.

Between all engine runs, allow adequate cool off time.

Before proceeding to next run, you should be able to hold your hand on a rear cylinder head for three to five seconds.

CYLINDER RUN-IN FOR STEEL,
NITRIDED OR REBARRELED CYLINDERS

1] Install mineral oil in the engine.

2] Start engine, run at 800 R.P.M.'s for three (3) minutes, shut down, check for leaks.

3] Start engine, run at 1,000 R.P.M.'s for three (3) minutes, shut down, check for leaks.

4] Cowl aircraft.

5] Start engine, run at 1,200 R.P.M.'s for three (3) minutes, shut down, park into the wind.

6] Start engine, run at 1,400 R.P.M.'s for five (5) minutes, shut down, park into wind.

7] Start engine, run at 1,400 R.P.M.'s for ten minutes, shut down, park into wind.

8] Start engine, run at 1,400 R.P.M.'s for five (5) minutes, run up to full power, check all engine parameters, retard power to 1,000 R.P.M. for one (1) minute, shut down.

9] Check for leaks The engine has now had it's Test Cell run time and is ready for other ground runs, taxi tests, adjustment runs, etc., observing the precautions from the post

All runs should be made into the wind.

At no time during these runs should CHT exceed 350ï‚°F.

Between all engine runs, allow adequate cool off time.

Before proceeding to next run, you should be able to hold your hand on a rear cylinder head for three to five seconds.

This is some information on running after completing the above schedule:
Knowing this crucial information allows us to make practical decisions regarding ground runs and flight profiles from the new or newly overhauled engine point of view.
To put it simply, if we get the ring to cylinder interface too hot from too hard of running, lack of cooling or another reason we will glaze the cylinder walls and prevent actual break in from occurring. Because, we are dealing with multiple independent cylinders on the engine, these conditions can happen to one cylinder, all cylinders or anything in between on the same engine. So our job above all other aspect of engine operation during the break in phase, is to keep the cylinder's as cool as possible. If we do this we will not have any problems or issues with the engine as far as break in goes. During any and all ground runs we should limit the duration and actual temps we encounter to prevent glazing from happening. We tell our customers to keep all ground runs less than 10 minutes. Don't run the engine above 2000 RPM unless you are doing a momentary full power check, high speed taxi tests or actual take off runs. If the CHT goes above 350*F or the oil temp goes above 180*F at any point during the 10 minute max. duration ground run, or at the expiration of the ten minute time limit, that run should be terminated. Then, park the aircraft faced into the wind and allow the engine to cool, until you can place your hand on the cylinder heads and barrels for 5 seconds without hurting or burning you hand and the cylinders feel relatively cool to the touch. After the engine has cooled, continue with the last run where you left off. Obviously, from what we have learned about temperature, running the engine more conservatively will not cause any problems and may even help the break in process but operating within these restrictions, on the ground, should prevent any glazing issues. These limitations apply to an engine that has had a test cell run before any ground runs are attempted. If your engine hasn't had any test cell time, then I can supply you with a ground run schedule, to replace the test cell run, which can be performed on the aircraft. If you want or need that information, just email me privately and I would be happy to send it along.
When it comes time to fly the aircraft, once again we want to observe the ground run rules, for taxi and warm up. Once we are ready to fly, we want to use full power for take off and initial climb and then we want to reduce power to climb power(normally around 85%) until we reach a safe altitude above the airport. Keep the climbs, as flat as possible, to maintain as much cooling as possible. Remember that heat is our major enemy and we can control that with climb speed. After establishing an appropriate altitude, reduce power to 65% to 75% ( preferably 75 % if speed restrictions will allow it). If we see temps, exceeding 15% of our ground run limitations, in initial flights, we should reduce power to control those temps and land the aircraft. Then, double check all cooling associated equipment, repair as necessary if you find a defect, let the engine cool off and fly it again, taking up from where you left off, observing the same restrictions. The first flight shouldn't be any longer than 10 or 15 minutes maximum, even with good cooling that would allow a longer flight. The first flight is a "test flight" and after landing you should do a through visual inspection of the engine and its installation, for leaks and any other operational issues like interference fits that showed up under power, chafing of lines etc. After the first flight issues are checked, we are ready for further flights under the same ground run and flight restriction's we have been observing. The key issue once again is heat. If we control the heat by power setting, airspeed, step climbing or any other means at our disposal we will not glaze the cylinders and we will successfully break the engine in. If we operate the engine at too low of a power setting, to seat the rings, we will not harm the engine or the eventual break in process, unless we develop enough heat to glaze the cylinders. In another words, operation at a low power setting, isn't a deterrent for break in unless we have the heat
.
 
I wasn't too concerned about cylinder break-in until attending MIke Busch's webinar Breaking Good last week. His take on it is keep idling and ground running to an absolute minimum. Once in the air fly at as close to 100% power as possible while keeping cylinder head temps below 420 for Lycomings and 380 for Continentals. Use mineral oil or AD oil without any anti-scuff additives. Multiviscosity oil is OK. He said if you can fly 60 min at a time and ideally no higher than 2000' ASL. With steel cylinders the majority of the break-in should occur within two hours, break in is indicated by drop of 15-20 deg in cylinder head temps. This doesn't work for me on many levels. For one thing our airport is at 6500'. I am only 50 miles from Western Skyways in Montrose and I know they have an engine test cell. I am going to call them and see what they would charge to put a couple hours on the engine at full power to get the break in started before I install it.
 
Thanks Mike. Lots of good information there. I have followed Continentals ground run procedure which is somewhat similar to what you posted. Because of some valve noise and a fuel pump failure I have one or two more ground runs that need to be completed.

Continentals 75% power break in procedure is close enough to everything else I've read and know from personal experience that I'll likely stick to it as close as possible. I may break it into two 30min flights depending.

Rod, Thanks for posting about Mike Busch's webinar. I typically listen to all of them but have gotten behind. I'll make it a point to listen to his most recent one. My airport (4740msl) isn't as high as yours but it is still high enough that making more than 75% power will be difficult while maintaining a safe flight altitude. I think running the engine in a test cell would be a great option.
 
Whee,

Sometimes A&P schools have test cells that if you went in and talked to them, they would let you run it...it gives the students and opportunity to see new stuff and you would have hand to help hang and run it.

This was back in 1990, but I went to A&P school in Cheyenne (now Redstone college out of Broomfield Colorado). We ran a number of engines for homebuilders to check for leaks, break-ins and trimming and rigging everything from the props to the mags.

Just a thought...

Andy
 
It's unfortunately not possible to comply with the ideal break in and an ideal flight test simultaneously. For me I selected a compromise that most heavily favored the flight test, being that the engine served no purpose if I wrecked the airplane. One builder told me that his engine supplier would do the break in on a stand for an extra $1000, so there's one data point. If I were in the same position today and found a similar offer, I'd definitely consider it.
 
Unless the pattern is empty a traffic pattern can take about up to 8-10 minutes, the hour is eight laps or so around the airfield. The hour will go by really fast, mine certainly did! It will feel like there are a thousand things you need to pay attention to, but to side with Jared you don't want to wreck the airplane. I suggest planning on flying full throttle as much as you feel safe doing so. And try to reduce all the other distractions. For example, if you have an EFIS with an EMS it will record your engine data for you, nothing needs to be written down. If you are not familiar with a glass cockpit most will be set to display a standard six instrument configuration.

Good luck, you will have great time!
 
I have been thinking about this same thing, and it seems that running an untested airplane up near VNE on its first flights might not be my first choice. Not a problem on a 180 hp 4 place, but it could be a big issue on a 540 powered BH, or a 390 Patrol. I would rather work my way up the airspeed ladder, slowly, and feel for vibration etc.

The last sentence of Aero-Tango's post said operation at a lower power setting is not detrimental to break-in. Most of the other things I have read said to run at or above 75%.

Conflicting information. I would much rather operate my rebuilt 540 at a much lower power setting, not for the engines sake, but for the airplane, and me.
 
Last edited:
Most light aircraft normally fly around at 65-75%. It is no big deal to break a new engine in at 75% for them. I guess I am wondering how important the power setting is. I wouldn't care if the break-in took longer.

I am pretty sure an RV-8 wouldn't want to fly around at 205 mph for the airplanes first hour of flight either. This can't be a new issue.
 
Most light aircraft normally fly around at 65-75%. It is no big deal to break a new engine in at 75% for them. I guess I am wondering how important the power setting is. I wouldn't care if the break-in took longer.

I am pretty sure an RV-8 wouldn't want to fly around at 205 mph for the airplanes first hour of flight either. This can't be a new issue.

I haven't watched Mike Busch's EAA webinar yet but no doubt he covers why the power setting is important. Simply put, it takes high cylinder pressure to properly seat the rings and high power settings are required to achieve those high cylinder pressures. I venture a guess that many engines aren't broke in properly but the owners never really know the difference. Typical airplane owners fly their airplanes so little that the engines die prematurely due to lack of use or operator abuse. High oil consumption is commonly found on aircraft engines and is generally accepted as the norm.

https://video.eaa.org/detail/videos...7443001/webinar--breaking-good?autoStart=true
 
Yeah, I have read and reread a bunch of articles that say the exact same thing. Aero-Tango's post (I don't know if he was the author) at the bottom said lower power won't hurt anything as long as the CHT's are under control. That is the first time I read that.

I would like to at least get an hour or two to slowly increase the speed to make sure I don't feel any bad vibrations, and just get a feel for the airplane. I know that won't help break the engine in. I was just hoping it won't glaze the cylinders or keep the rings from seating. After a couple of hours, I will do the prescribed break in.

VAF has a bunch of old threads on break in. A few of them mention flying a new airplane around at high speeds on the first flights, but they don't expand on it much. Lycoming and Continentals also only talk about the engine aspects. They obviously are not concerned with an experimental aircrafts' first couple of flights.

I wish I had more tailwheel experience. I would just put 29's on for the first flight and I think the extra drag would address my concerns.
 
Last edited:
I’m going to take mine to Alaska Aircraft Engines and pay them to break it in. They will run it in their test cell. The last thing that I want to do is fly an aircraft that is brand new at 75% or more of available power of a brand new six cylinder fuel-injected IO-540 engine for 60-90 minutes, screaming along at 125kts plus. Too many things going on at the same time.
 
Last edited:
I did a little searching on VAF, and some of them talked about paying for test cells, and one said somebody had made a "ground cooling duct" to run the engine on the ground. No other elaboration so I did some you tubing of various flavors. Dyno's, test cells, Lycoming, airboats, etc.

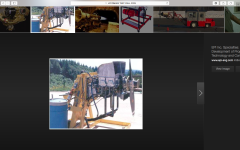
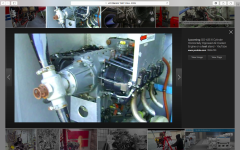
I might be overthinking how hard it is too break the engine on the ground. A few of the dyne's had fan fed duct, but most simply had some flavor of scoop sitting above the engine directing the prop blast down through the cylinders. Sort of like a big hood scoop. I would estimate most were 4-8 square feet of opening facing the prop. Lycoming had one of the simpler ones where they said they run their new engines in for 1-2.5 hours.

A lot, or maybe most, airboat look like they run with nothing but the bare engine. A few had an extremely simple venturi effect updraft setup for cooling. Just a flat piece of sheet metal on top of the engine with tabs cut and bent up. The air flows over, and suck a little air from the bottom.

The picture of Lycomings' test cell is attached. Quality isn't that good as it is just a screenshot from youtube.

It may not be rocket science to at least seat the rings on the ground.
 

Attachments

  • SCOOP.png
    SCOOP.png
    822.8 KB · Views: 0
The nice thing about testing on your own plane is not only simplicity, but you get to put some time on your installation, not just the engine. The only thing that would not be tested would be your ducting and cooling exhaust exhaust. You get to watch the instruments and see when the rings seat, and that is it. Not test flying simultaneously.
 
No I’m not the author of the bold text in my post. This is from Russel Mahlon. He was, I think, product manager at Mattituck engine. He contributes a lot to the VAF forum, very well respected.
What Russ is explaining in is write-up, and the meaning of the last sentence is if you run the engine at low power setting (ground run as an example), it will not harm the eventual break-in process, as long as you keep the CHT low, and thus prevent glazing. If glazing happens, you’ll never be able to breakin your engine properly.
 
Stuff deleted...

I am pretty sure an RV-8 wouldn't want to fly around at 205 mph for the airplanes first hour of flight either. This can't be a new issue.

When I test flew my RV-8 with a 0 timed IO-360 I was at 100% for the first couple of hours. I left off the wheel pants to give me some drag, but still zipped around at 175 kts !
 
My understanding of Engine Break in theory. (warning, I have no experience, just book knowledge)

....a new cylinder wall has been honed and has a microscoipic peak/valley scratches that form a cross hatch pattern. The break-in mates the compression ring to the cylinder wall and wears those microscopic peaks into plateau's.

Increasing the pressure between the Ring and the Wall seems to be the goal at break-n. The highest Internal Cylinder Pressures are attained at high power settings, which increases outward pressure on the compression ring against the cylinder wall. My vision..... "Its a dirty Job, get it done quickly to avoid glazing!" Results of a well done break-in are low oil consumption for the life of the engine.

Low Power reduces the pressure between the ring and cylinder wall.

A common failure is the hills/valley being filled in with carbonized material from combusted oil residue that builds up, glazing the cylinder walls. The result in a smooth cylinder wall and high oil consumption. Its repairable.....re-hone cylinder walls, replacement of the rings, then re-do the break-in. I've wondered if the high pressure is what scrapes this contaminate off before it cooks/hardens.

Whee. Higher power settings are attainable If you did your engine runs in single digit temperatures. Your density altitudes would come down a couple thousand feet. If CHT are elevated at Best Power mixture during break-in, richen it up.

I wonder how the re-honing cost compare with a $1000 test stand run. I have no idea, jus thinking out loud. It Might be worth the risk.

Bengelis has a drawing of an engine test run shrowd in his book "On Engines" or "Firewall Forward".
 
You describe the process very well. Besides the cost of rehoning there is all the work involved in removing the cylinders. Plus re-installing and getting everything properly torqued again. This is something I am really anxious to avoid.
 
When I test flew my RV-8 with a 0 timed IO-360 I was at 100% for the first couple of hours. I left off the wheel pants to give me some drag, but still zipped around at 175 kts !

YeeHaw!!!

Brooks, You seem to have a good understanding of the process now how do we make it happen on a unproven airplane at a higher elevation airport?

Removing cylinders is a big deal; removal of all the stuff, installation of the torque plates, cylinder and ring work, re-installation. Lots of room for error.

I'm probably making a bigger deal out of engine break in than I need to. Minimizing ground running and running the engine as hard as safely possible will likely be adequate. I guess we will find out.

Thanks everyone!
 
I've shared my test flying procedures on here before, I think. Here's a link to the short version we used recently, following our rebuild:
https://drive.google.com/file/d/1LbD...ew?usp=sharing
Refer to pages 7 and 9 for the most relevant information.

Here is the original full plan, and I mean FULL... This was for the original first flight.
https://drive.google.com/file/d/0B44...ew?usp=sharing
Refer to pages 11 and 12 for the most relevant information.

Note the original plan was written without the benefit of hindsight. The second iteration was under a different context, the plane we already well understood and proven.
 
Last edited:
I can attest to being very nervous flying behind my first airplane engine overhaul.. especially since the instrumentation was oil temp, oil pressure and a bayonet probe on number three. Plugs out of the top holes...spun the engine until the oil pressure came up..used lycomings mineral oil and STP mix to assemble. Installed the plugs. Fired up...ran for about a minute. Checked for leaks. Blasted off. Full throttle...had to keep full rich...I don’t like a CHT meter with just one bayonet probe. Kept CHT below 450. 10 minutes...landed and reassessed cooling issues..airplane had 3k hours plus..but less than 300 hours on an owner built cowl.. modified the cowl outlet...made it bigger. Used a quart of oil during the first hour..probably blew it overboard. Oil level at a quart from full for the next couple hours, may have used 1/2 quart. Doesn’t use oil now...cylinders had unknown hours on them. Log book said they were new 300 hours before the engine had to come down due to bad vibration. They were not new...exhaust seats had three angles...seat was at the edge of the valve face. One cylinder required the shortest push tube available from Lycoming...a dash 10

Next time...I’m going to build a big hood with a nice arc towards the back to mimic in flight airflow.

My rule of thumb after an overhaul on a Diesel engines. Start...check for leaks and noise. Button everything up. Then if no truck dynometer.. try and drive the engine through the brakes.. I was a dealership journeyman diesel mechanic... did many, many overhauls...just one come back...and that was a blower seal on a silver 6V92TA. Took a week to fail.

Edit....it did not have a CHT meter until I installed one at overhaul.
 
Sorry if I missed a mention above, but there's an article in Kitplanes Dec 2018 by Michael Leigh on ground engine break-in.

He brings up some good points of why to break-in on the ground, using your airplane as the test stand (with proper cooling and ducting of course).

- you can break in before you do the taxi tests, which are by definition low-load tests that seemingly contradict the engine manufacturer break-in process
- you get very familiar with your engine, it's operation, sounds, vibration, pressures, temperatures etc etc and the worst thing that can happen is you have to shut er down.
- obviously less risk involved vs unproven engine + unproven airplane tested together at once

It's a compelling idea.
 
A couple of my take aways from all the sources I read about engine break in and 1st flights.

Guy takes off on his first flight/new engine. CHT's are through the roof. Lands. Modifies his cooling system................What I read is that new engines generate a lot more heat until the rings seat. Lots of metal to metal contact between rings and cylinder wall. After they seat, CHT's go down 25-50F individually as they seat. Did the cooling system need to be modified?

Older certified planes had little in the way of engine instrumentation, but the cooling system was certified. Put a new engine in, takeoff, and run the heck out of it and you were blissfully ignorant of the individual CHT's. Sometimes too much information isn't a good thing.

But homebuilts have homebuilt cooling systems, so that is a variable. High CHT's and rising on the first flight? Poor cooling system, or just the engine breaking in normally?

Depending on where you live there is another problem. Whee said he lives at 6500'. 75% power is around 8000', on a standard day, and Idaho gets pretty hot in the summer. Even on a standard day would you want to test fly a whole flight at 1500 agl ? On a hot day he probably can't generate 75% on the ground.

I haven't seen the Kitplanes article but I will look,
 
The break in of the O-360 on my Patrol went about as badly as one could imagine. I initially installed an electronic ignition system that I'd had prior good experience with. The one on the Patrol had serious issues. Lots of ground running. Most was un cowled. I think I had 3 hours on the engine before the first flight. It was pumping oil so badly there was actually oil seeping from the exhaust system joints. I didn’t have much choice. I ended up pulling the ignition system and installed a Pmag (which is amazing!).
On the first flight, I never pulled back from 2700 rpm. CHT’s ran near 400 and oil temp was quite high. I spent a little time making a cooling lip and tightening up the baffling. By the third hour, CHTs were at or below 350. I ended up replacing the vernatherm to help oil temp.. As the engine broke in, oil temp came down.
Nearing 100 hours now and all temps are good. Oil consumption is about a qt in 10 hours, which is great in my book!

I offer up this information to ease the worries about a textbook break in. Sometimes you just have to do your best.

Bill
 
I read the article, his article is in agreement with what was written here. He did a lot of fabrication, and from other examples I have seen, it might be easier than that, especially since we already have a pressure cowl built. I think either using the pressure cowl, or a scoop, seems easier.

The only issue I see with the scoop is if you have the top half of the cowl removed, I am not sure how the lower cowl will respond to the prop blast. Maybe no problem.

Here are a few pics of test stands.
 

Attachments

  • scoop2.png
    scoop2.png
    757.6 KB · Views: 0
  • scoop3.png
    scoop3.png
    996.8 KB · Views: 0
  • scoop4.png
    scoop4.png
    1.5 MB · Views: 0
  • scoop6.png
    scoop6.png
    1.2 MB · Views: 0
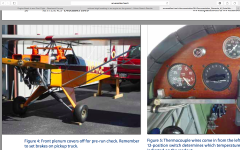
Here is a screenshot from the article. Michael custom built two cowls, and attached a coupe of leaf blowers to them. I can post a link to a free link to the article, but I am not sure if putting copywrited material is against forum rules.

I will try to find a different design that I saw, It was a sheet metal shroud, with what looked like a 12" scat hose feeding it from above. I think you could just make a cheap upper cowl flap, and feed the air in through that, using the pressure cowling on the airplane. The basic spec is 1/4 PSI, but you also need the correct flow rate. Lycoming supposedly specs a mass flow rate for cooling for each engine, but I haven't been able to find it yet. I will keep looking. If anyone knows the number, or where to find it, it would help.

If 1/4 PSI is enough to drive the cooling flow, I don't see why you couldn't create that Delta P from the bottom, instead of the top. Attach a duct to the bottom of the cowling, seal the upper cowling with some duct tape, and draw air from the bottom.

Doing a really rough calculation a different way, and I am not at my place where I can measure my cowl intakes, I think the volume flow rate seems to be a few thousand CFM. You can get a blower in that range, in 12" diameter.
 

Attachments

  • scoop7.png
    scoop7.png
    1.1 MB · Views: 0
Posting a link to where they have the content published on their site is always fine. Posting the content itself is less optimal, even if it is currently available publicly. If they were to make it unpublic on their site, and it was also posted here, then that could be a problem. By posting a link to where they have it published, we are preserving their ability to control whether it is public or not. I think of it this way... If someone wants the information in that article and is not a kitplanes subscriber, we don't want them to be able to come here and get it for free instead. For me this is mostly about respecting the viability of what is perhaps the most important publication for our hobby. It's doubtful we'd ever hear anything from them either way.
 
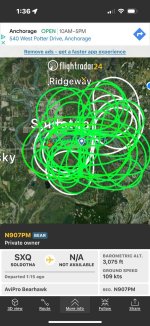
Hey all...question for those that have broken in their engine, but first some background info. My first flight was pretty exciting, new engine and airframe, flying at more than 75%. I was bumping between 145-150MPH. It wasn't a great feeling, especially not knowing what noises were normal and what weren't! Anyway, first flight was 1.3 and I used about one quart of oil. Second flight was 2.2 and I used about 1/2qt of oil. Third flight was only .9 (cut short by bad weather) and it appeared that I didn't use any oil. If I did, it wasn't much. CHTs have stabilized (I think) and I never saw anything above 428F on the first flight. Oil temp is stable at 187F. It helps having an OAT of 33F! I changed the oil yesterday and I'm ready to go back out once my RPM gauge comes back from repair.

I have a grand total of 4.4 hours. Three takeoffs and three landings. Zero airwork, no slow flight, stalls, nothing...just flying really fast in circles above the airport. So the question is how long should I fly it at 75% and above before I can start exploring the flight envelope? The answers that I'm getting so far from other sources is anywhere between 10 and 25 hours. It is impossible to follow the EAA phase testing and breaking in an engine at the same time using successive flights as guidance . Any input is appreciated.

p.s. I did get almost an hour doing pattern work in the left seat of Ken Frahm's Bearhawk and I am extremely grateful for the opportunity!. The time was invaluable and gave me the sight picture and airspeed "feel" that I needed for my flights, especially landing.

Click image for larger version  Name:	IMG_20240606_111215.jpg Views:	0 Size:	299.5 KB ID:	90487
 
Last edited:
AKBearhawk, I remember the main thing was running at or near full power until oil consumption stabilises. Everyone agreed on that, at least - you don't want to risk glazing the cylinder barrels. For some people, their engine needed 10 hours >75% power, others needed 45 minutes. It all depends on whereabouts in the engineering tolerance / fit of the somewhat random combination of different sized parts in your engine - as I understand it.

That's the manufacturer's instruction too - from memory - run hard until oil consumption stabilises (not stops, stabilises - presumably at a level you are happy with). It sounds like you achieved that.

I recall that if oil consumption doesn't stabilise in 10 hours, then you might have a problem on your hands. Worst case it means honing cylinders, I know one or two people who needed to do that.

Beyond that, we maintained high power settings wherever possible for the first 20 to 25 flights (which we calculated would be roughly 25 hours) as a risk mitigation measure. Referring back to the flight plan we posted on the previous page (link below), you can see the 75% power requirement scattered through those flight plans.

Obviously, it is necessary to reduce power settings for a range of flight tests, and of course for descent / approach / landing / ground running. Therefore, time spent operating at lower power setting does necessarily cause any problems, provided it's interspersed with extended running at high power settings, periodically. Again, you can see how we did this in the flight test plan.

We didn't delay the flight testing schedule in the interests of running hard to break in for 10 or 25 hours. We designed our flight test schedule to minimise lower power operations, to what we felt was an acceptable level in the early stages. This was a balancing act. The risk of the engine glazing is one thing, but the risks associated with flying 25 hours with a relatively untested aircraft ranked higher in our risk assessment.

We have had no problems with the engine, after following this plan. We have run around 1,100 hours now. We have been burning around 1 qt (or L) per 50 hours, until recently. We are now seeing a very gradual increase in the rate of oil consumption, with no other signs of engine wear increasing (oil filter particles normal, etc).

​
 
Hi Paul, something that I have noticed that I'm sure you know too, is that it is hard to get really scientific about oil levels. The plane's parking attitude really matters, but also, immediately after a run, the oil level will be different than some hours after a run. It drains down into the sump from other places in the engine. Study the long term trends but expect lots of noise in the short term unless you are checking in a very consistent way.
 
Fun stuff Paul! No doubt everyone will give you a somewhat different opinion. You’ll just have to settle on what you’re comfortable with.

For me it was 5 hours. At that point the plane hadn’t used any oil in a couple hours, CHTs were cooler and I felt the risk of glazing the cylinders was now lower than the risk of flying an untested airplane.

It sounds like you might be at the same point except you might need another data point or two to know if oil consumption has stabilized. Like Jared said, make sure you are checking the oil the same way every time. My engine will “make” about 3/4 quart if I check it the next day vs right after a flight.

What type of cylinders did you go with: steel, chrome, nickel? If you went with steel or nickel I’d bet you are good to go. If chrome I would have been planning on 10 hours or more to break them in.
 
Good work there Paul. Another data point. I was given the same advice to run mine hard for 25 hours etc. At about 1.5 hours the CHT's showed a decrease, and there was very little oil consumption during the initial few hours, so I'm pretty sure that it could have been considered "run in" at that point. I did keep it running hard for about 10 hours mainly because the engineers were telling me to do so and I didn't have any experience to fall back on. Then, like Whee and Battson, I carried on with the test schedule, but continued to run it hard wherever I could. Now, with about 320 hours "airtime" on it, I typically add a quart at 35 hours between 50 hour checks.
 
Running "hard" to break in an engine is easy on most airplanes. But on a 540 powered BH or Harmon Rocket it seems a little dodgy. I built a cooling shroud to do it on the ground, and it looks like the local airport authority is going to let me do it. Hopefully video to follow in a couple of weeks.
 
Good points. I check the oil generally twice. Once after the flight when the dipstick is cool enough to remove, and when the engine has cooled down.I went with factory Lycoming cylinders, nitrided steel (blue stripe).
 
I broke in an IO-550 on my Bonanza a few years ago. it was almost impossible to maintain the desired power/fuel flow settings without being deep into the yellow arc of airspeed. I stayed in smooth air as much as possible and got it done, but it was not easy. thought about flying with the gear extended to slow it down, but that’s really no fun at all, and reduces airflow to the engine.
 
My single point experience aligns with Nev. A noticeable drop in CHT at around 2 hrs and nothing much after that.
 
The dodgy part is just the highly powered part. I would have no issue with a o-360 powered BH or Patrol on breaking in the engine., But running the engine a couple of hours on the ground sure seems like it might make the first flight go smoother.
 
I thought I posted pictures a while back but can't find the thread. I used 1" square tube from the wing crates. I made it as a 4 cylinder shroud, with a 2 cylinder extension for the 6 cylinder that I have. I think it will work for either, but not completely sure.
 
Back
Top