Shock Strut Boots

alaskabearhawk

Moderator

Attachments

  • photo6229.jpg
    photo6229.jpg
    1 MB · Views: 0
Last edited:
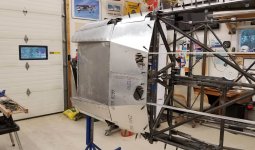
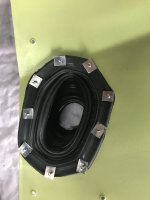
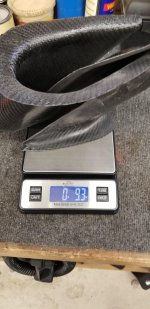
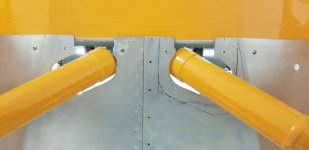
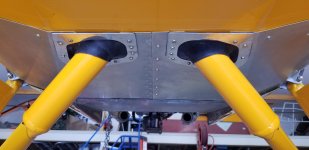
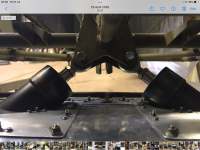
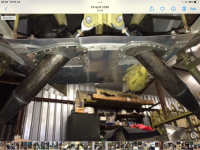
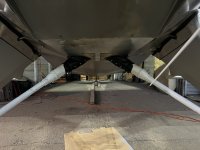
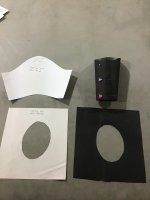
I used cheap shifter boots while i looked for something better. The narrow end is positioned and sealed with a zip tie against a small plastic bushing on the threaded shaft of the rod end. It drapes over the upper end of the strut and flares out through the movement hole and is kept in place with an outer flange screwed to the boot cowl. It doesn’t move with the shock but closes out the area sufficiently to prevent fumes etc.
 

Attachments

  • photo6230.jpg
    photo6230.jpg
    1.3 MB · Views: 0
  • photo6231.jpg
    photo6231.jpg
    1.6 MB · Views: 0
Mark Goldberg's reply from earlier today that I inadvertently deleted (long story, sorry Mark)
You could also use the fiberglass fairing that Bob makes. When on the ground it can pull away from the boot cowl sheet metal a little. But in the air it tucks up tight and helps reduce drag from the round tube top of the shock struts. Mark
 
That's something completely new to me. I just visited his web site and saw the fairings for the Patrol, but didn't see anything for the 4-place. Not really sure how that would work with the movement of the struts though, being solid.
 
When the struts are unloaded, the fairing seals against the belly. On the ground, as the struts extend, there is a gap between the belly and the upper flange of the fairing.
 
Here is what I did.

I used the softest CV boot I could find.
 

Attachments

  • photo6258.jpg
    photo6258.jpg
    481.3 KB · Views: 0
  • photo6259.jpg
    photo6259.jpg
    453.2 KB · Views: 0
  • photo6260.jpg
    photo6260.jpg
    499.6 KB · Views: 0
  • photo6261.jpg
    photo6261.jpg
    537.7 KB · Views: 0
  • photo6262.jpg
    photo6262.jpg
    1.7 MB · Views: 0
This is what I did, in the end.

I started out with boots, however I found it was a terrible annoyance and took far too long at annual maintenance time. The metal parts that held them in place also scratched the paint on the shock struts.

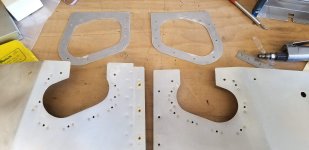
This design allows me to just slip the whole belly panel off in one go. Ideally I would cut it into two pieces so I can remove half at a time, for ease of access. Removing the whole thing at once is a fiddly job. I would always stick with this design of boot.

When in flight, the gear retract inwards and it all seals up nicely.

Sorry about the poor photo, I just snapped it on the way past. This engine now leaks a little oil, after it's visit to the shop, whereas new from Bob it didn't lose a drop.
IMG_20190820_103113.jpg
 

Attachments

  • IMG_20190820_103113.jpg
    IMG_20190820_103113.jpg
    1.7 MB · Views: 0
Battson, did you use baffle material there? Looks like one piece for each strut more or less bent around and pop riveted? Looks great, I may emulate your idea. Thanks for posting it!
 
Mark Goldberg's reply from earlier today that I inadvertently deleted (long story, sorry Mark)
You could also use the fiberglass fairing that Bob makes. When on the ground it can pull away from the boot cowl sheet metal a little. But in the air it tucks up tight and helps reduce drag from the round tube top of the shock struts. Mark
Does anyone have a link or a photo they would care to share?
 
Yes, unfortunately I will be re-doing this area where the gear struts penetrate the belly. I just cannot seem to get this sealed up, despite the inordinate amount of time I've spent down there. CO is real problem for me. I suggest everyone consider a CO detector for this reason.
 
Hadn’t thought much about CO. Do you have an electronic one or those round paper like indicators?
 
Rob Taylor had been dealing with this issue for just over four years. He finally came up with a solution he said that works. Two strut boots, NAPA part number SA1997 and two neoprene washers. One hour flight and no detectable CO in the cabin. YMMV

Resized_20210921_121628.jpgResized_20210903_153906.jpgResized_20210903_153731.jpg20210921_131227.jpg20210921_131221.jpg20210921_131218.jpg20210921_131224.jpg
 
I saw the comment about shock strut fairings for the Patrol and called Bob about them. He said they don't fit the 4-place, apparently the angle between the struts and the fuselage is different. He briefly explained how to make them, doesn't sound too difficult.
 
He didn't go into much detail. He said use a come-a-long to pull the gear together. Shape foam to streamline the struts and cover the opening, then glass it. I would like to see a picture of the ones he sells.
 
I wasn't aware that Bob sold a cover for the gear leg struts. I was at his hangar a year ago and saw the wing strut fairings he sells. Didn't see anything for the gear legs.
 
I am also interested in seeing how these are installed. I can't imagine streamlined... Broadside seems quite a bit draggy. But I guess drag is better than CO!
 
They install streamlined. The open edge is oriented to the rear of the aircraft and held in place with clamping pressure around the strut. Like Mark G said, the top flange is at an angle to the belly when on the ground and looks a bit funny, but while in the the air the gear angle changes and the flange is then flush with the belly.
 
After going through several designs, I finally finished up the seal around the gear struts. There seem to be a lot of good design variations out there. I am hopeful that this will hold up to the exhaust fumes and potential oil exposure. If I had to do it all again, the one change I'd make would be to have the aluminum come a bit closer to the strut, so there is less rubber exposed.
 

Attachments

  • photo10486.jpg
    photo10486.jpg
    2.2 MB · Views: 0
  • photo10487.jpg
    photo10487.jpg
    2.3 MB · Views: 0
  • photo10488.jpg
    photo10488.jpg
    2.5 MB · Views: 0
  • photo10489.jpg
    photo10489.jpg
    1.9 MB · Views: 0
This has got to be the best I have seen as long as you get full range of motion without opening the seal around the strut.
 
I used some heavy duty silicon rubber liberated from exercise bands. The stuff seams to be able to stretch well over 200%. Not flying yet but it seams to seal well moving the shock strut as far as it will move. I used several layers.
 
That was the problem I was having... While in a resting static position, the rubber (neoprene) would hold a seal fully around the strut tube. However, when the struts pull in after the weight is relieved (airborne) the inside would pull in even tighter and the outside would gap open...
 
For anyone who has struggled with a CO issue as I did during the test flying - I remade the shock seals twice, taped all the boot panels from the inside, then systematically plugged holes throughout the fuselage. There's a lot of them in these type of aircraft. None of this worked sufficiently.

Finally, I lowered the exhaust pipes. This was very easy to do and took 30 minutes, simply pivoting them down around the universal joints a small amount, and also twisting them so that the elbow sat lower. I had originally kept them tucked up close to the tunnel to be streamlined. They're now sitting about 2" lower, and my CO monitor reads zero when the mixture is full rich. Even when I removed the tape from over the hole for my gascolator drain, it still reads zero.

I plan to get some short curved extensions made up to further direct the exhaust away.
 
Last edited:
I've considered lowering my pipes as well. I have the same CO issue. Let us know what you come up with for pipe extensions. Is this something from Vetterman?
 
Clint can sell you a set of bolt-on turndown angles. Let me know if you have any trouble getting in touch with him.
 
Rob - at this stage I haven't added any extensions, I've just loosened the support brackets enough to lower the pipes. I was able to get a couple of inches movement. Worth trying this first as it made a large difference.
 
I referenced an article in post 10.1. Conclusion is Negative pressure in the fuselage can draw exhaust into it. They sealed a hole in the aft bulhkhead to fix there problem.

I've saw one fix where a NACA vent turned backwards was installed on the belly under the cabin to create suction. It was able to capture the contamination and vent it overboard keeping air above the floor fresh.

Nev discovered another solution that maybe Piper dealt with in the same way....I mean look at that thing! Its got to be 12" long! Holy Smokes!!


Screen Shot 2022-02-16 at 10.02.15 PM.png
 
  • Like
Reactions: Nev
Actually not Piper exhaust, it's Sutton aftermarket. Might see such on a Bearhawk with a light engine/prop combo someday - you never know...
 
Cessna 180/185s have a tail cone air scoop that was added via a service letter to reduce CO in the cabin. The kit was free and even included the princely sum of $4 to cover installation labor (in 1962). :)
 
  • Like
Reactions: Nev
Sorry for the late response. Below is the link to the product - NCI-2P04x36x36. I use it at work as a gasket material. It is neoprene with fabric reinforcement (similar to baffle material). The fabric prevents it from splitting out, but it tends stays pretty flexible, more so than the baffle material in my opinion. I also have another piece on the top side that is glued in place to help just in case some gasses do get through when the shock struts move. I tried to design it so that it will be sealed when the gear comes together in flight, knowing that there could be gaps in it if the plane is loaded down when taxiing. The piece above that is glued should help with the taxiing issue.

https://products.kuriyama.com/item/.../neoprene-cloth-inserted-sheet/nci-2p04x36x36
 
I would be happy to sell it to you by the foot. The rolls that I stock are 36" wide. Just PM me. It is very reasonably priced in my opinion.
 
Hey Paul. Does Bob or anyone have a pic of the CF shock strut cover boot installed? I'm still trying to get an image of the preferred installation and orientation.
 
I used these https://www.lowes.com/pd/Oatey-Mast...1-4-in-3-4-in-Adjustable-Diameter/5001984937? or
41qxg99IVLL._AC_SX425_.jpg
these

Figured if they last 15 years on the roof of a house, they'd work.
 
That really does look great. I tried to do something similar but was too lazy to take the struts off, so I cut a strip down the rubber and glued it back into place. I need to find something better
 
Where did you find those - they look sweet. I still need to meet up for an Idaho Bearhawk day with ya. In annual right now...great timing.
 
Since I have a Maule M5-235C, I bought the parts catalog :-) Note that this is leather (Naugahyde?) and covers the bottom of the control column in the cockpit. I believe you can buy it as a complete assembly (no sewing or anything required)


Maule Boot Top.png
 
https://bearhawkforums.com/forum/be...-strut-cutout-splitting-the-boot-cowl-section
That link has shows a thread with the strut cover and rubber seal that Bob Designed. The drawing can be found in Beartracks.

My origonal was made iaw the drawing with a rubber seal and round hole. Don't cut the sealant hole round like the Beartracks Drawing shows...it way too big. When the gear articulates the hole opens up.

Stinger (LSA scratch builder) used 1/8" thick silicone sheet (Amazon). I installed his design today and no comparison to my rubber (from an innertube) seals. Silcone can really stretch. Cut the hole rediculously small & oblong...it will fit nice and tight over the strut.

Dont drill holes in rubber....sharpen a tube end with a file and cut them using a drill.

Click image for larger version  Name:	IMG_0826.png Views:	0 Size:	5.31 MB ID:	87132 Click image for larger version  Name:	IMG_0827.png Views:	0 Size:	5.00 MB ID:	87135 Click image for larger version  Name:	IMG_0827.png Views:	0 Size:	5.00 MB ID:	87135
Click image for larger version  Name:	Screenshot 2023-12-16 at 9.33.56 PM.png Views:	0 Size:	1.59 MB ID:	87136 Click image for larger version  Name:	IMG_0827.png Views:	0 Size:	5.00 MB ID:	87135
 
IMG_4626.jpg IMG_4627.jpg IMG_4628.jpg IMG_4633.jpg IMG_4634.jpg
I used oil resistant neoprene from Granger that met the specification spelled out in Beartracks. I decided to try 1/8 in on one side and 1/16 in on the other. I looks like it is going to work but I am a ways from flying. It sounds like exhaust placement has more effect on CO levels then anything else.

Roger
Companion QB
 
  • Like
Reactions: Nev
Figured I would share how I did mine they are made out of canvas with a vinyl backing I believe it’s a type of marine fabric. Very lightweight and seem to seal pretty well
 

Attachments

  • photo15803.jpg
    photo15803.jpg
    1,007.6 KB · Views: 0
  • photo15804.jpg
    photo15804.jpg
    1.2 MB · Views: 0
  • photo15805.jpg
    photo15805.jpg
    1.1 MB · Views: 0
  • photo15806.jpg
    photo15806.jpg
    1.5 MB · Views: 0
Back
Top