You are using an out of date browser. It may not display this or other websites correctly.
You should upgrade or use an alternative browser.
You should upgrade or use an alternative browser.
Tell us what you did today on your Bearhawk Project
- Thread starter Bcone1381
- Start date
Mark Goldberg
Bearhawk Aircraft
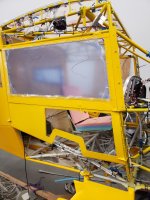
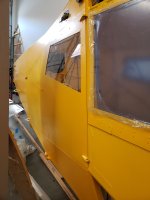
Looking good John. Seems you are going for the high visibility look like Nev in New Zealand. Mark

svyolo
Junior Member
Sort of a dull yellow. It took a bit of experimenting on small parts to get the Stewarts paint to match the low grade sheen of Oratex. Basically a very flat, smaller version of orange peel. I didn't like the look of glossy paint next to Oratex. Never quite looked right to me. Maybe a different color it would look better.
I think it will make repairs easier as well. Sort of like texture on walls.
I think it will make repairs easier as well. Sort of like texture on walls.
svyolo
Junior Member
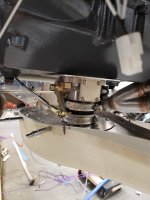
Started fitting the Vans' FAB today, even though I haven't built the cowl yet. My EFI throttle body is about half the height of a Marvel carb or MFI fuel servo. I was hoping to keep it all, or mostly inside the lower cowl, or just protrude slightly with just a small blister on the outside. I mounted the FAB as far rearward as I could. I will cut off most of the forward part of the FAB that normally penetrates the lower cowling. I have the nose bowl fairly accurately located. It looks like I will need a small blister, 1/2" to 1" inch deep, and 6-8 inches long to clear the FAB to the lower cowl. I will feed the engine air hopefully from one of the intakes, which will hopefully seal the lower cowl a bit better, and make lower cowl removal easier.
Attachments

rodsmith
Well-known member
Finally received 8.50x6 Aero Classic smooth tires and tubes from Desser. I first tried to buy these in early September, they have been out of stock since then. Last week they finally got some in. If anyone is interested, they are still in stock today. I had initially been planning on getting Desser retreads, which are a lot cheaper but quite a bit heavier. Several people use the smooth Aero Classic in our area and are happy with them. People have had less luck with the 4-ply treaded Aero Classics. They tend to pick up thorns in the grooves and go flat when operating off field in CO and Utah.

Gerhard Rieger
Well-known member
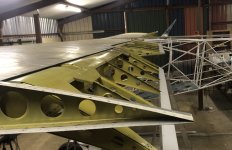
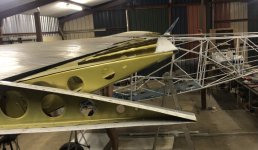
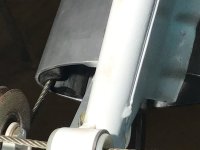

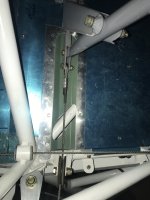 I made the cable through holes in the wing, had to add a small vesconite bush to align the cable at the bottom of the strut. I also added a small channel under the floor panels to allow for more clearance for the aileron cable. It actually works better than expected. Made up the aileron cables, swaged and rigged up temporarily. Final adjustments will be done while fight testing.
Last edited:
Chris Werner
Active member
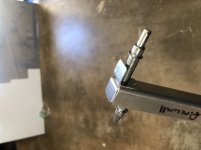
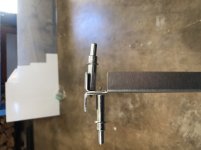
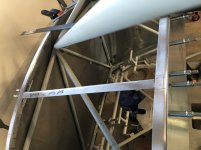

spinningwrench
Patrol
Wing #1 done and in the cradle. Probably should build a second one.


Bcone1381
Finished Patrol
This thread started 6 1/2 years ago, has +1300 responses, and 51,500 views. I never thought it would go on so long!
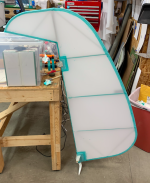
I'm still plugging away: working on Fabric! I'll finish tail feather rib stitching tonight. I like the Staggerwing hidden knot and Stewarts!! So far fabric may be my favorite part of the build.
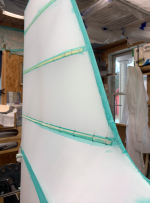

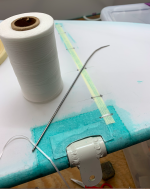
I'm still plugging away: working on Fabric! I'll finish tail feather rib stitching tonight. I like the Staggerwing hidden knot and Stewarts!! So far fabric may be my favorite part of the build.
Attachments
Last edited:

Sir Newton
Well-known member
Lol ya two wings is good. second one goes way faster!
spinningwrench
Patrol
Exactly, no head scratching on this one.
gary heuser
Member
finished up all the form blocks tor routing blanks and forming for bending flanges and holes for all the flaps and aileron nose ribs and pockets. ribs next.
gary heuser
Member
I like fabric work also I am used to the stits proccess. I may have to visit someday, when I visit my brother in Brighton
spinningwrench
Patrol
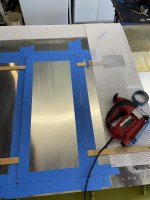
It’s that a little aluminum plate you use as reinforcement around your hinges?

RatherBFlying
Well-known member
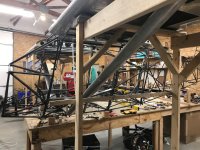 Wings drilled and struts fit

SpruceForest
Scratch-Built Patrol SP
Should wrap up the last of the wing rib MDF tooling and start on the flap and aileron stuff using the larger template cutoffs tomorrow... just the flanging templates for the tip ribs and the center rib forming block to go. Had forgotten how delightful MDF was to work with in quantity, as it is seldom used in luthiery. Even with a respirator, nasal rinse and Flonase 2x a day needed to stave off the inevitable sinus infection, and that's after a fairly efficient cyclone dust collection system in the shop handles 95% or more of the fines off the band saw, router table, and tablesaw. The CA fumes from edge hardening made yesterday's 50's F temps in Maryland a very welcome development... all that MDF dust and glue fumes wafted away on a breeze while I went through the last of 16 ounces of Starbond super thin that has been in the 'fridge for too long to trust for guitar work. Massive shop cleanup after this stage of the prep work wraps, allowing the focus to switch from fine brown dust extraction to fine aluminum chip collection...that's progress, right?

triumphantduke
Model 5 QB #16
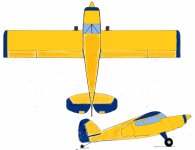
scheming and dreamin' - thinking of minimizing the paint effort and weight, while leaving the door open to paint later - cover a model 5 in oratex 6000 yellow and blue, leave the shiny bits coated with LPS Hard Coat, AV30 or just plain polished or nothing but a wash? I don't need a polished look, especially if the oxidized layer is a natural protectant...or maybe just paint the aluminum bits to match is best for longevity - The science of corrosion prevention 
Attachments


Last edited:

Utah-Jay
BH Companion
scheming and dreamin' - thinking of minimizing the paint effort and weight - cover a model 5 in oratex 6000 yellow and blue, leave the shiny bits waxed?
I am painting the engine and boot cowl, but going with polished wings. TrueAirSpeed has a BH 4Place with polished wings that I really like

jcowgar
LSA QB
My LSA kit has been sitting while I have been preparing and finishing up another project. It took way to long to start, took delivery 5/15/2021, but as of last Sunday, Feb 6, 2022, we started the build. We being myself and my girls. I played around with multiple tools to track my build but wound up settling on a static site generator. I like to document my plan, tasks to do, etc...
Anyway, the plane is on its gear, have the rudder pedals test fit, control sticks in, floor boards trimmed to fit properly. I need to order some proper hardware, thus many of these things are just initial fit, but I'm just happy to be starting now.
My build log, if interested, is at https://jeremys-bearhawk-lsa.vercel.app ... It updates daily (or as we work on it, can't make it to the shop every single day). I will post monthly updates or so here as well.
Anyway, the plane is on its gear, have the rudder pedals test fit, control sticks in, floor boards trimmed to fit properly. I need to order some proper hardware, thus many of these things are just initial fit, but I'm just happy to be starting now.
My build log, if interested, is at https://jeremys-bearhawk-lsa.vercel.app ... It updates daily (or as we work on it, can't make it to the shop every single day). I will post monthly updates or so here as well.

Mark Goldberg
Bearhawk Aircraft
Looking good Jeremy. FYI - sometimes it gives better clearance if you install the bolts at the top of the shock struts non standard - meaning the head aft and the nut on the forward side. The bolt head takes up much less room than the nut and bolt threads sticking out. For clearance with the stick assy. Mark
jcowgar
LSA QB
Mark, yeah, those bolts are ones I have to order. I had them in before the main control stick. I figured I would wait until I get the real bolt in and take a peek then. It doesn't look like they will conflict, I like to follow standards, but I also do not like anything with "tight" tolerances that could cause a control issue. I like plenty of clearance :-D
Bcone1381
Finished Patrol
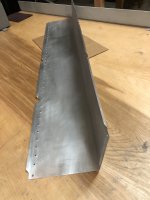
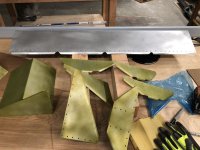
The fabric has no support around the hinges, so I stole this idea from others to help make the installation a little bit cleaner. (my nieghbor/engineer says stealing an idea is called "Research!" Haha) I used .020" 2024-t3.
Most hinge gussets I've seen are U-shaped to carry the load around the tube to support fabric on both sides of the hinge and may be installed before covering. Those can be installed before covering. I saved quite a bit of time with these smaller pieces and they contact the tube so I think they will be plenty secure. I use gussets everywhere fabric is unsupported. If you magnify my rudder you'll see the bottom gusset supports the fabric in the rudder horn area where the horn has a flange for strength. There is no way to support the fabric inside that. Gear attach fittings is another area that got gussets.
Most hinge gussets I've seen are U-shaped to carry the load around the tube to support fabric on both sides of the hinge and may be installed before covering. Those can be installed before covering. I saved quite a bit of time with these smaller pieces and they contact the tube so I think they will be plenty secure. I use gussets everywhere fabric is unsupported. If you magnify my rudder you'll see the bottom gusset supports the fabric in the rudder horn area where the horn has a flange for strength. There is no way to support the fabric inside that. Gear attach fittings is another area that got gussets.


alaskabearhawk
Moderator
Funny, my finish date was Someday. But, it is getting closer to Someday.
Out of the paint booth this morning. A couple tiny runs when I tripped on the stupid air hoses, but all in all looking good. Moving on...
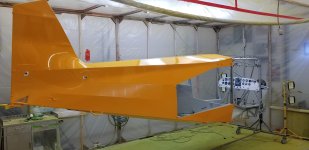

Out of the paint booth this morning. A couple tiny runs when I tripped on the stupid air hoses, but all in all looking good. Moving on...

Craig Van Sickle
Well-known member
Incredible job!
jcowgar
LSA QB
Got stringers all cut and fit, front control stick cut to size and test fit the grip, then got kicked out of my garage by a family of skunks that apparently made a home under the garage! I see no skunks but the odor was unbearable. Guess I will call someone Monday to see what they can do. No odor outside, but opened the garage door and wow! There may be no more building until that problem is taken care of :-(
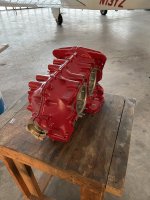
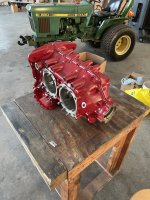
Over the last couple days, I’ve painted my O-360 crankcase, getting ready to assemble the engine, and I got the new Bob designed brake master cylinders in the mail, and got them installed.
Attachments


SpruceForest
Scratch-Built Patrol SP
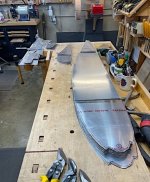
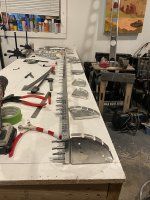
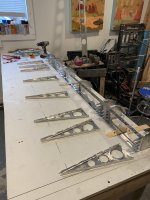
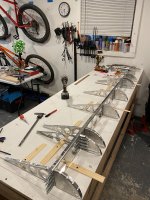
Baby-steps, but still progress. First aluminum order showed up (3 x 025 4x8, 2 x 032 4x8, 1 x 032 4x12, 1 x 020 4x8) and the three 025 sheets got sliced and diced yesterday. Despite some creative layout, I only managed to get 28 of the 30 nose ribs out of what I had, but did manage all of the center, flap, aileron, and aileron nose ribs, plus the full-chord tip ribs. The remaining pile of offcuts was pretty small... enough to get out some of the stiffeners. Next order will have the remaining 025 needed!
On to getting the 020 ribs and spars bent... the Patrol builder search for the elusive 10' brake...
On to getting the 020 ribs and spars bent... the Patrol builder search for the elusive 10' brake...
Attachments


NSLaw
Well-known member
Over the last couple days, I’ve painted my O-360 crankcase, getting ready to assemble the engine, and I got the new Bob designed brake master cylinders in the mail, and got them installed.
Looks great. Question for you - are you overhauling your engine yourself? Are you an A&P? I'd like to overhaul an engine myself, but am cautious about the difficulty. Would be interested in your thoughts if you're overhauling one! Thanks!

rv8bldr
4A Scratch Builder
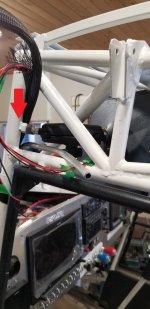
I've been mounting my O-540, working on baffles, running wires, etc, and it never seems to look any different  So, while I was sitting in the cockpit making airplane noises the other day I was trying to figure out a mounting spot for my large Samsung tablet. I don't like it strapped to my knee, and I don't particularly like it mounted on the passenger side of the cabin (like I have it in my Maule). So this is what I came up with. I welded a 1/4x20 nut to the forward fuselage vertical member in the upper, port corner. I threaded a RAM 1" ball into that nut and use a RAM extension clamp to hold the tablet. The tablet is now mounted in a position that doesn't block any view outside and is easily accessible for data entry and map panning.


So, while I was sitting in the cockpit making airplane noises the other day I was trying to figure out a mounting spot for my large Samsung tablet. I don't like it strapped to my knee, and I don't particularly like it mounted on the passenger side of the cabin (like I have it in my Maule). So this is what I came up with. I welded a 1/4x20 nut to the forward fuselage vertical member in the upper, port corner. I threaded a RAM 1" ball into that nut and use a RAM extension clamp to hold the tablet. The tablet is now mounted in a position that doesn't block any view outside and is easily accessible for data entry and map panning.Attachments
Last edited:
rodsmith
Well-known member
I wasn't comfortable overhauling my engine myself, but didn't want to send it off to a shop. I was fortunate to have a mechanic with 25 years experience building engines for Western Skyways in our local EAA chapter. I worked with him rebuilding the engine. Learned a lot, there is nothing real difficult, but there are steps that I was glad to have someone with experience overseeing.
Sir Newton
Well-known member
Clever Solution
NSLaw, yes, I’m overhauling my engine myself. I am an A&P/IA, and I have been building engines for a number of years now. . I completely understand your reservations, they are very simple engines, but you certainly don’t want to overlook anything. I’d say if you can build a bearhawk, you can read through the lycoming overhaul manual and overhaul your own engine. It would be great if you had someone with experience who could watch over you and walk you through the finer points the first time around. As you mentioned, lycoming and continental both have factory run engine build classes that you can go to. I’ve never been to one of those, but I’ve heard from a few people that have gone that they are an excellent experience, and you’ll leave knowing more than you thought possible about these engines.
What engine are you planning on putting in your Bearhawk? Do you have a usable core engine? Feel free to send me a message if you want to talk more about engine building, I’d be happy to answer questions and help where I can.
What engine are you planning on putting in your Bearhawk? Do you have a usable core engine? Feel free to send me a message if you want to talk more about engine building, I’d be happy to answer questions and help where I can.


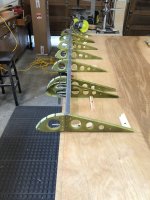
Assembled LSA right aileron Spar and ribs
Satisfying to get some scratch built parts to come together for the first time after 3 months if ribs jigs etc
Satisfying to get some scratch built parts to come together for the first time after 3 months if ribs jigs etc
Attachments


Sir Newton
Well-known member
You know it man! Every step puts you closer to the end goal.
rodsmith
Well-known member
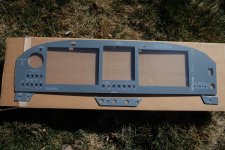
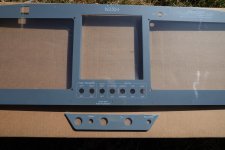
Received my panel today from Superior Aircraft Components. Not cheap, but a much better job of coating and labeling than I could have done. Garmin G3X with GPS IFR enroute and approach, G5 backup. I will be doing the avionics wiring. This company was recommended by Steinair, they no longer provide this service unless they are doing the whole avionics installation.

Last edited:
Sir Newton
Well-known member
Nice job looks very professional. Everyday 1 step closer to flying.

robcaldwell
Model B Quick Build Kit
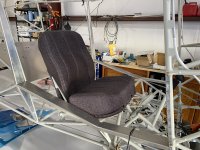
Nice seat!
When my seats arrived, I had to return them to have the bottom cushions cut down because my head was in the overhead tubes. 2" lower was helpful, but I still wear a helmet. My head just clears the tubes now.
When my seats arrived, I had to return them to have the bottom cushions cut down because my head was in the overhead tubes. 2" lower was helpful, but I still wear a helmet. My head just clears the tubes now.

Nikkeyf
Member
Finally! I think I have finished my spars. I'm pretty sure I will find later on something I haven't done on them and will need to take care of it. The only thing I hope is that I will find it in the hangar- not at 6000' AGL
Attachments


Utah-Jay
BH Companion
robcaldwell I am concerned about the height of the seat at this point, I will fly it and see how it goes.
gary heuser
Member
I finished all of my aileron ribs, nose ribs, pocket, ribs . I am know working on the flap ribs, and I have about half of the wing nose rib blanks cut. next week I hope to start bending up spars.
depends on the weather, and the kids spring break, trying to annual my tcraft.
depends on the weather, and the kids spring break, trying to annual my tcraft.

Mark Dickens
Companion QB
Now that it's warming up, I'm back in the shop doing fabric. Stitched the right elevator yesterday and plan to have all the tapes on it today.
Mark Dickens
Companion QB
Excellent idea and one I didn't come close to thinking of...and it's too late since I am just now seeing this after applying the tapes this morning! Oh well, it wasn't going to be an OSH award winner anyway
geraldmorrissey
Well-known member
Well done.
Sir Newton
Well-known member
Have faith fellow builder! You have officially created aircraft parts!
Sir Newton
Well-known member
Your photo is inspiring
Sir Newton
Well-known member
Its more work then it looks. eh
Last edited:
Sir Newton sure is

Dpearson
4-Place QB (A Model)
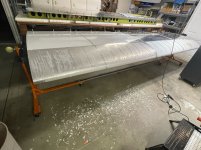
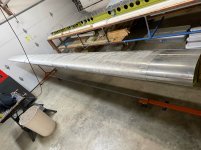
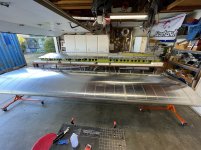
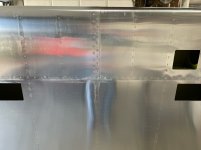
I'm working on getting the white plastic off the right wing now. Even after 16 years the bottom surface (Where it was sitting on the Styrofoam in the crate) still peeled off clean, but in the other areas where the plastic was exposed it's very brittle and the adhesive underneath is rock-hard. I'm using a plastic scraper and lots of Goof-off. It's slow going but the results are good, with only a few areas of corrosion hiding underneath the plastic.
Attachments


Dpearson
4-Place QB (A Model)
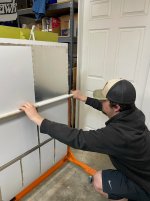
I finally got all the white plastic off the right wing - it took 3 weeks. The bottom peeled easily using the PVC pipe trick, as did about 1/2 the top surface. The top surface near the leading edge, and the leading edge itself, required heat gun, plastic razor scrapers, and "Goof off" to get the brittle plastic and petrified adhesive softened and removed. I found a bit of corrosion lurking under the plastic, will be hitting that with alumiprep and alodine tomorrow.
Attachments


alaskabearhawk
Moderator
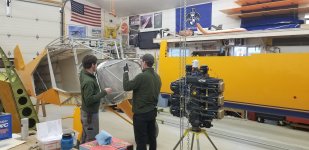
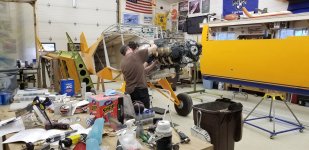
It was a good day today. Put it on the gear last night and the fuselage was out of the rotisserie for the last time today. Engine was hung and started on the baffling.



Mark Dickens
Companion QB
Wow...that's commitment. How old was that plastic?
robcaldwell
Model B Quick Build Kit
Congratulations Paul! I'm just so impressed with what you have committed to and accomplished!
Ursa Buteo 272
Well-known member
Impressive progress, know that must feel great!
Puzzling question? Once you hung the engine, how much ballast and where did it take to keep the tail down?
Kevin D
[NODE="272"][/NODE]
KCHD
Puzzling question? Once you hung the engine, how much ballast and where did it take to keep the tail down?
Kevin D
[NODE="272"][/NODE]
KCHD
alaskabearhawk
Moderator
We were watching it very closely as the hoist was lowered! It was very light in the tail even with the sawhorse clamped to the handholds on the fuselage. It didn’t take but just slight pressure up on the tail to get it to move. We put two 25lb bags of lead shot on the sawhorse to keep it down.
Mark Dickens
Companion QB
Finished covering the rudder, so next step is covering the fuselage. I'm straining the ole brain trying to think of everything that must be done before covering, but I'm sure I'll miss something. I also brought the ailerons home from the hangar with the intention of covering them, but I want to install the counterweights first so am waiting on some tube and lead wool to arrive from Amazon. Yes, you can buy lead wool from Amazon. Is there anything you can't buy on Amazon?
Bcone1381
Finished Patrol
If I can only make an adjustment to my counterweight after I paint!!
Regarding the to-do list. I watched this Stewarts Video. At the beginning the author goes through preparing the fuselage for covering. I took it to heart, and followed what he said. its worked out real well. He builds a picture of the job ahead real well.
About 16 seconds into this +hour long video he is dealing with this. I watched it a BUNCH of times. A lot of the material applies to all covering systems.
https://www.youtube.com/watch?v=MGpMEuPnM7g&list=PL2-Qw9PjdmNRv_ehdBk5xd3YhOr7n8nMJ&t=13s
Regarding the to-do list. I watched this Stewarts Video. At the beginning the author goes through preparing the fuselage for covering. I took it to heart, and followed what he said. its worked out real well. He builds a picture of the job ahead real well.
About 16 seconds into this +hour long video he is dealing with this. I watched it a BUNCH of times. A lot of the material applies to all covering systems.
https://www.youtube.com/watch?v=MGpMEuPnM7g&list=PL2-Qw9PjdmNRv_ehdBk5xd3YhOr7n8nMJ&t=13s
Mark Dickens
Companion QB
That video is on the watch list. I've briefly skimmed it in the past, but as you said, it bears much closer watching. I've found that all of the Stewart Systems videos I've watched have a ton of useful information in them, but you must watch them carefully because they will sneak in details that you might overlook in the initial watching

AKKen07
Well-known member
The first functional test of my airplane is complete! The fuel system works! After cleaning out the system as well as we could and testing the 3 electric pumps (2 aux tanks and main boost) My dad and I checked unusable fuel system quantities in level attitude, then added 3 gallons to each main tank and hoisted the plane up to 20 degrees (which required over 100lbs tied to the tailwheel). Then we tested the fuel flow with the boost pump on from both tanks, pump off from both, on from left, then on from right. This certainly met my idea of "minimum fuel." The marginal head pressure to start with and decreasing as each test progressed showed in the results as the flow decreased slightly with each test. All three tests with the pump on blew by the required 125% of max fuel flow with large margins but the system would not pass on gravity feed alone in these conditions. If I manage to lose both engine pumps in flight (engine driven and boost) with minimum fuel I know now not to attempt a max performance climb... I do think the engine would run, however, if at a moderate cruise power setting and pitch attitude.
-Picture won't upload so I'll post to the FB group-
.
-Picture won't upload so I'll post to the FB group-
.
Bcone1381
Finished Patrol
Readers who may use Stewarts...beware of their old BUT very good videos may document some old outdated procedures. This has led to confusion or negligence applying there coatings. So, get their most recent installation manual (Some may not even know that it exists) read all the latest product literature. All this is available on line at Stewarts website. Example, a procedural change is to apply Eko-FIll only after the fabric has been sealed with diluted EkoBond glue.
alaskabearhawk
Moderator
Hey Ken... per AC 90-89B for fuel testing: "Place the aircraft’s nose at an angle 5 degrees above the highest anticipated climb angle." Is your Vx 15 degrees?
geraldmorrissey
Well-known member

Nikkeyf
Member
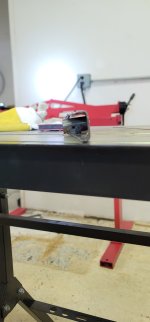
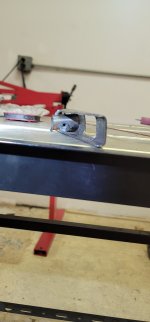
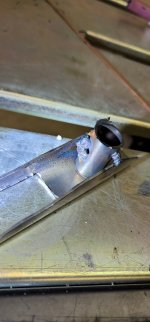
Fabricated second set of parts for aleron and flaps linkage. Keep practicing welding on the first one. The corner between the tube and the bracket is too tight. I wonder if anyone could point me to the right direction? (see pictures) this is the first set of parts. It is clearly ruined, but I still don't get how to weeks a tube to a flat surface...
Attachments


TimTall
Well-known member
There's only one thing left to do!
This chart has been on my wall for almost 3 years now. It always felt good to mark tasks as complete, but marking off the last one before FLY felt especially satisfying.
Thanks to Jared for the online version of this flow chart.... https://www.mindmeister.com/917081852?t=RSYClGATP3 I've found it incredibly useful, especially at the earlier stages when I was trying to figure out where to start and what to do next. Taking the time to draw it out on paper was worth the effort. Looking at it regularly helped me to stay on task and make sure that I was always working on something that was in the critical path. That's not to say i didn't go off on a tangent now and then, but the chart helped pull me back to tasks that needed to be done in order to keep progress flowing along towards the main goal.
My build definitely wasn't that fastest at almost 3 years but I'm okay with that. I still managed to ride my mountain bike and dirt bike, ski now and then, and work a full time job. The whole time I was wishing I was in the shop working on the plane, but having some balance was important for sure.
Thanks to everyone on the forum for your contributions. I haven't been all that active posting here but I've definitely learned a lot. Now that I'll have some spare time again, I'll get more involved. It'll also help that I've changed jobs. I'm not stuck on a computer all day at work anymore so I'll be more inclined to be at the keyboard when I'm at home.
Pics coming soon.
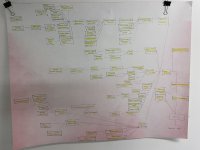
This chart has been on my wall for almost 3 years now. It always felt good to mark tasks as complete, but marking off the last one before FLY felt especially satisfying.
Thanks to Jared for the online version of this flow chart.... https://www.mindmeister.com/917081852?t=RSYClGATP3 I've found it incredibly useful, especially at the earlier stages when I was trying to figure out where to start and what to do next. Taking the time to draw it out on paper was worth the effort. Looking at it regularly helped me to stay on task and make sure that I was always working on something that was in the critical path. That's not to say i didn't go off on a tangent now and then, but the chart helped pull me back to tasks that needed to be done in order to keep progress flowing along towards the main goal.
My build definitely wasn't that fastest at almost 3 years but I'm okay with that. I still managed to ride my mountain bike and dirt bike, ski now and then, and work a full time job. The whole time I was wishing I was in the shop working on the plane, but having some balance was important for sure.
Thanks to everyone on the forum for your contributions. I haven't been all that active posting here but I've definitely learned a lot. Now that I'll have some spare time again, I'll get more involved. It'll also help that I've changed jobs. I'm not stuck on a computer all day at work anymore so I'll be more inclined to be at the keyboard when I'm at home.
Pics coming soon.
Sir Newton
Well-known member
I love it & that is just for the kit builders.
Last edited:
Mark Dickens
Companion QB
Awesome! Almost 3 years isn't bad at all! Can't wait to hear about the first flight!
Mark Dickens
Companion QB
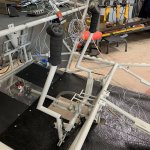
Spent many hours in the shop and rerouted the wiring bundle from the back of the plane in prep for covering. Installed the stick grips and wiring. Doesn't sound like much does it, but I can say I made forward progress nevertheless!

Mark Dickens
Companion QB
It's just rubberized wing walk material. I wanted something tough that could function with carpet on top, if I chose. It's not great looking, but I determined at the outset that I was building a pickup truck, not a Ferrari
Mark Dickens
Companion QB
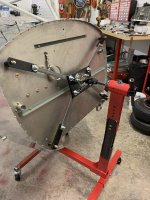
I decided that I needed a rotisserie since the idea of painting on my back seemed a little over the top for me and my 65 year old back. It's no work of art or close to some of the masterpieces I've seen, but it appears to get the job done. Like many others, I took advantage of a Harbor Freight sale on engine stands ($52) and then I cut it up, rewelded some things and that took care of the firewall side. For the tail, I took a wood support I'd built for the RV-8 and modified it to support two pillow block bearings ($15 for the two of them on Amazon). As I said, it's no engineering marvel but it supports the fuse and allows a full 360 rotation.

spinningwrench
Patrol
Looks good. Not having the front linked to the back is slightly dangerous. Ask me how I know.
Mark Dickens
Companion QB
Yep, I have given that a lot of thought since I had one of the ends twist a little one time and I got an illustration of what could happen. I still have a couple of "enhancements" to make on this and this is definitely one of them. I did replace the front cross bar on the engine stand with a longer piece of tube and that has added a lot of stability. Now I need to tie them together
Mark Dickens
Companion QB
Not a bad weekend at all. Covered one side of the baggage area with heavy cloth. Ran out of heavy cloth so didn't get the other side done, so I went ahead and covered the bottom of the fuselage with the medium cloth. Surprisingly easy, which only means that I've screwed something up somewhere in the process. I just don't know what it is yet. Somehow also managed to avoid injuries (unless you count burning my finger tips with the iron), which is the crowning achievement of this weekend.

Bcone1381
Finished Patrol
I finished fabric covering today. I used Stewarts Systems, and was very pleased. All flight control surfaces, doors, and gear legs are covered.
Next on my list is to redo my boot cowl to get a better fit. Then I'll join the fuselage with the wings so I can trim and fit the windshield, fabricate the lower windshield fairing, sky light, wing root fairings, and install the Cessna Fresh Air vents.
Then we'll paint....I think.
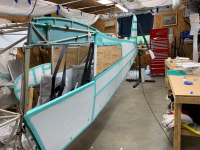
Next on my list is to redo my boot cowl to get a better fit. Then I'll join the fuselage with the wings so I can trim and fit the windshield, fabricate the lower windshield fairing, sky light, wing root fairings, and install the Cessna Fresh Air vents.
Then we'll paint....I think.