Announcement
Collapse
No announcement yet.
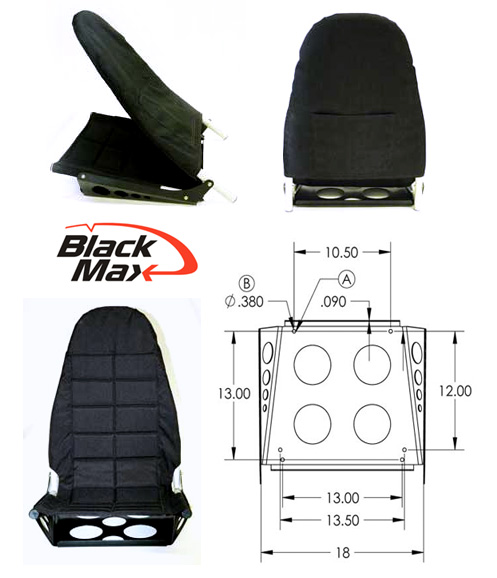
Sling Seat option
Collapse
X
-
They are made for ultralights (http://www.blackmaxbrakes.com/comfortlite-seat)
Snipett from recent Zzz post: "having...a seat bottom that won't blow out... and cookie-cutter your butt through it like a pasta die" if you ever landed real hard. The visual stuck with me. I'll stick with steel-frame seats with springs and memory foam for mine. The relevant post: http://bearhawkforums.com/forum/tool...ks-and-bottoms
Comment
-
I think the plans are pretty vague on designs for seats..... something on the level of "make some seats"! We did our own design but that is because Brent likes designing stuff like that. We have a sheet aluminum pan over a steel frame. We have not covered them yet so I have only sat directly on the aluminum pan but they actually don't feel that bad just like that. We will of course be adding foam padding on top.Last edited by EricP; 03-15-2016, 04:42 PM.
Comment
-
I have only seen a few different peoples seat pan but I think Z's aluminum pan looks really nice. I was going to use the same method but decided to go with fabric. My reasoning for fabric is because I am trying to maximize headroom so I can wear a helmet. I'm 6'1" and really long in the torso so headspace is always an issue. I tested the fabric by putting some on a frame and jumping on it like a trampoline. I weight 220lbs and couldn't break it but it did stretch; I shrunk it again with a iron and it looked as good as new...aside from the footprints.Scratch Built 4-place Bearhawk. Continental IO-360, 88" C203 McCauley prop.
Comment
-
Well, first off, Brent did the design work! He made a metal frame out of 4130 tubing we had laying around. Then he had the aluminum pans made from regular aluminum sheet. We made the sides of the seat bottom "triangulate" so that seats bottom sides have a "curve" up to provide some side lateral support. This whole piece "clips" (using u shaped clips we riveted to the bottom) to the frame.
The seat back is similar but we did not add and triangulation at the sides but let the sides on it curve around the back.
The neatest trick Brent came up with is how the seat attaches to the aircraft frame. He cut a steel tube in half to create a place for the frame to rest on top of the landing gear carry through. Then it is able to rotate a bit due to the nesting curve. He then attaches it with a hose clamp that holds it in place. We did this so we can adjust the angle of the seat bottom and the front can rotate around this half tube over the carry through.
OK, at this point I realize hardly any of this is going to make sense the way I am writing it. I will try to get some pics done and post them. I have attached some random pics my daughter took that were not trying to show the seats. So the seats are there but you can't see any detail.
Maybe we can get Jared to put another article in the newsletter. I think Brent's design is good enough to warrant putting the info out. We have adjustable seat back angle as well as adjustable seat bottom angle (and to a small degree height). Of course it also has fore and aft travel with a locking mechanism with two locking lugs.
I think just the bare aluminum pan feels pretty good by itself.
**Caution** At this point while we have used these bare seats with no foam or upholstery to sit in the bare frame and "make airplane noises" we have not used them in flight at all or in a fully assembled mode.
Pics: Daughter get her picture taken in Tinhawk, Eric and Brent adjust cowl hood, custom gear leg fairing, view of raw instrument panel with seat backs in view, Brent and Eric examine "something", left side of plane with seats showing, view of seats from over seat back,
Eric
Comment
-
Obviously I have no idea how to control the attached pics for the posts... Sorry.
Here are the two missing pics from the previous post. Daughter getting her pic in Tinhawk, View of custom rudder pedals.
IMG_4515.jpg IMG_4402.jpg
Comment


Comment