Bearhawk Aircraft Bearhawk Tailwheels LLC Eric Newton's Builder Manuals Bearhawk Plans Bearhawk Store

Announcement

Collapse
No announcement yet.

Boot cowl/glareshield construction - aluminum angle supports?

Collapse
X
 
  • Filter
  • Time
  • Show
Clear All
new posts

  • Boot cowl/glareshield construction - aluminum angle supports?

    Did anyone here who's completed their instrument panel and glareshield NOT use the angle aluminum supports that tie the instrument panel to the firewall? In Eric Newton's finish manual he shows some 3/4" angle tying the panel to the firewall, which seems like a good construction method, but is it necessary if your panel won't be holding a ton of avionics and instruments? I'll have a piece of glass (G3X Touch) and a radio/transponder, and not much more. Is the overlapping glareshield and boot cowl side strip make for a rigid enough combo? Or does the angle just make for a nice stiff attachment point that's easy to add the nutplates to?

    I will be use the smaller 1/2" angle on the instrument panel curvature as the shelf for the glareshield. Any pics you guys have are incredible helpful. Thanks. -Z

  • #2
    I did this on the pacer boot cowl....only to keep it from vibrating. I use the stratus 2. The artificial horizon sensor didn't do well with the standard cowl which used a 90 degree bend on one side of the boot cowl, the other over lapped.
    This is my progress as of yesterday


    Sent from my iPad using Tapatalk

    Comment


    • LukeS
      LukeS commented
      Editing a comment
      Mark,
      Your fabric covering job looks nice. What covering system did you use, and would you recommend it?

  • #3
    Found a pic of the old boot cowl. On the floor you can see the 90 degree bend....wasn't real sturdy. The boot cowl overlap was folded under.


    Sent from my iPad using Tapatalk
    Last edited by Mark Moyle; 04-14-2015, 12:39 AM.

    Comment


    • #4
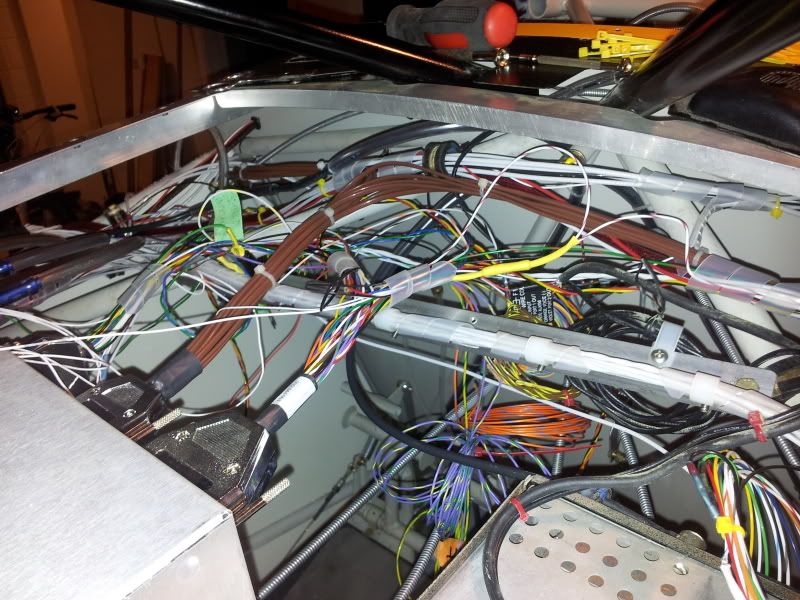
      Without some solid angle section in there, the whole thing will be able to change shape a little, because it's virtually a 'simply supported' structure, owing to the thin Al-2024's flexibility.
      That could allow a lot more vibration to develop. It might act as a nice crumple zone in a crash...?? (JK)

      Also, the panels will try to bow upwards without some angle in there to hold things true, because of the bend in the boot cowl.

      Comment


      • #5
        Originally posted by Battson View Post
        Without some solid angle section in there, the whole thing will be able to change shape a little, because it's virtually a 'simply supported' structure, owing to the thin Al-2024's flexibility.
        That could allow a lot more vibration to develop. It might act as a nice crumple zone in a crash...?? (JK)

        Also, the panels will try to bow upwards without some angle in there to hold things true, because of the bend in the boot cowl.

        So how did you do yours?

        Comment


        • #6
          I just put some angle in there, and made an instrument-back access hatch while I was at it. Not that I'll ever use it.....

          You can see it on the edge of this photo, don't mind the half-finished wire organisation job in the back there.........

          Comment


          • #7
            Yes, I see the angle for the boot cowl sides. Looks like you used a little angle across the front too? I see where you made some cutouts for the cabane braces. Was this photo taken during the construction of the glareshield? Does the forward glareshield piece screw to that forward angle as well?

            Comment


            • #8
              Screwing around with some scraps today trying to figure out what works best. Feedback welcome.

              I'm just using some 1/2"x .080" angle. Not sure the alloy since Home Depot doesn't think that's important to put on the label. I like this because it sacrifices as little panel area as possible for the attachment.


              Kerfed on 1/2" sections. This tight spacing is probably only necessary on the curviest part of the panel (I think.) I think I'll go up to 5/8 or 3/4 anyway so my clecos aren't interfering with each other.


              I offset the angle approx .032" below the edge to try and make the glareshield/boot cowl mate the backside of the panel. Of course this number is way too precise for reality since I ended up eyeballing it. Another builder told me he let the sheet overhang and put a strip of rubber on it.

              What thinks ye all?

              Last edited by Zzz; 04-19-2015, 12:05 AM.

              Comment


              • #9
                All looks fine Zane. Maybe a little over kill on the angle but no harm except a few grams of extra weight. I do like to extend the glareshield aft towards the pilot and put a piece of fuel line on it to make something less sharp for potential impact of my forehead. Mark

                Comment


                • #10
                  Originally posted by Zzz View Post
                  Yes, I see the angle for the boot cowl sides. Looks like you used a little angle across the front too? I see where you made some cutouts for the cabane braces. Was this photo taken during the construction of the glareshield? Does the forward glareshield piece screw to that forward angle as well?
                  Yes, the forward angle was to anchor the whole thing together firmly. I wanted to stop the top glare shield from vibrating against the tube section and removing the paint.

                  Your work looks very tidy, and I have to agree with Mark - I don't think you needed that many rivets, but they sure won't hurt now the work is done

                  Comment


                  • #11
                    It's a practice piece from scrap, not a keeper.

                    Comment


                    • Battson
                      Battson commented
                      Editing a comment
                      I wondered about the odd dimensions!

                  • #12
                    Originally posted by Mark Goldberg View Post
                    I do like to extend the glareshield aft towards the pilot and put a piece of fuel line on it to make something less sharp for potential impact of my forehead. Mark
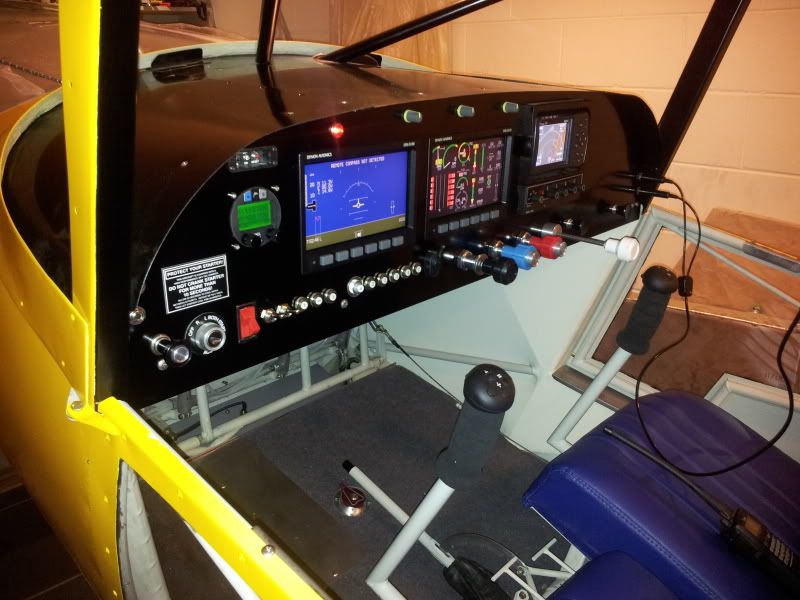
                    Yes it would be rather sharp without the fuel line, as seen here:


                    If you do go this route, which I'd agree isn't everyone's style, it helps to cut the fuel line on the right side. The line comes in a coil or with some natural bend in it, you need to cut on the inside of the coil / bend to ensure the fuel line stays put on the dash without any glue.

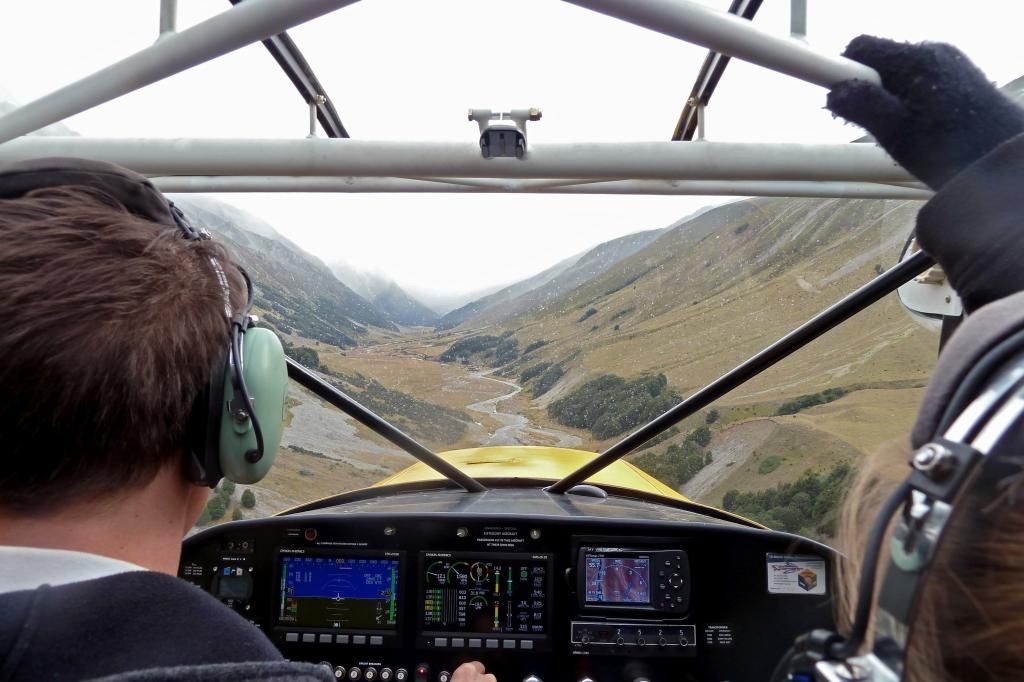
                    Personally, I like the shade visor addition. It makes the instruments a little easier to see in most lighting situations. The exception is a high sunlight coming down through the skylight just behind the pilot , but even then - you have your shadow covering them.

                    Rubber fuel line is visible here:


                    I think this second picture is a nice illustration of the extra shadow provided by the visor.

                    Comment


                    • #13
                      It does make for a nice little shade. Even with the fuel line, I think face contact would be pretty ugly. Here's to should harnesses.

                      Did you ever find a use for your trim wheel arms?

                      Comment


                      • #14
                        Originally posted by Zzz View Post
                        Did you ever find a use for your trim wheel arms?
                        You can see the GoPro attachment bracket in that photo! Just need to get myself a ND filter...

                        Comment

                        Working...
                        X