Hi Frank, William offers the motor mount for the LSA. And there is already a Corvair flying on a Bearhawk LSA. The Corvair is very inexpensive to maintain as well. I can buy all of the valve train components from the local auto parts store. Much less expensive than the O200.

You are using an out of date browser. It may not display this or other websites correctly.
You should upgrade or use an alternative browser.
You should upgrade or use an alternative browser.
DavzLSA progress
- Thread starter davzLSA
- Start date
Hey Guys I have progress to report. I decided my air box was too big to build the cowl I wanted , so I made a new one except smaller. I have also stripped the fuse back down to the bare fuse so I can clean it and touch up paint before covering. This means that all systems are tested and fitted, so for the millionth time I will reassemble it but the next time will be the final time. I have ran the engine many time, I now have about 1 hour on the hobbs. I am beginning the covering process, Presently I am covering the rudder, this is my first time covering anything so its not as good as a pro but I think it looks pretty good, Im not done with it yet. One of the things about covering that puzzled me was what to do about the hinge points. I decided to wrap the hinge point in aluminum. The wrap at the bottom of the rudder had to be done in 2 parts to hey around the control horn, I have pic of that here. as well as pics of my new airbox.
Attachments


Last edited:
Hey guys, I have progress to report. Im finally covering my tail feathers, I have both elevators , the rudder and both trim tabs and one horizontal stab done. Currently working on the other horizontal stab. Waiting on my paint, its going to be red. The fuse is next after the tail feathers. I have the fuse stripped now so I can clean it and repaint some areas. Ill be posting pics as I go. Hope you all like the pics. I am using the Stewart system.
Attachments
-
 photo14491.jpg1.8 MB · Views: 0
 -
 photo14493.jpg2 MB · Views: 0
 -
 photo14495.jpg2.3 MB · Views: 0
 -
 photo14494.jpg2.4 MB · Views: 0
 -
 photo14496.jpg1.9 MB · Views: 0
 -
 photo14497.jpg2.7 MB · Views: 0
 -
 photo14564.jpg2.6 MB · Views: 0
 -
 photo14565.jpg2.4 MB · Views: 0
 -
 photo14566.jpg2.8 MB · Views: 0
 -
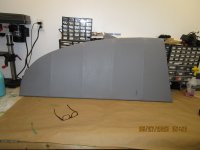 photo14567.jpg1.9 MB · Views: 0
 -
 photo14568.jpg2 MB · Views: 0
 -
 photo14569.jpg2.2 MB · Views: 0
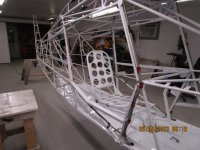
Hey Guys, It been awhile since I have posted an update. For anyone interested I am continuing to work. I have finished all the welding all the welding Im going to do on my fuse. I have changed the seat yet again to get more back movement. Now I have about 1 foot of travel. Im not too worried about the rear seat because I will be flying solo most of the time.I am at the final assembly stage, I have completed all the things I wanted to do to the fuse before permenantly attaching parts. I have fitted the fuel system, made all the fuel lines. The panel is mostly wired. All the engine instruments are in and tested, still need to wire up the radios and get data links between a couple of other instruments. The floor boards are all fitted and as of today they are painted. I plan to cover the interior as well. But I need to get the throttle control and trim control install before the covering. I will make update as I get stuff installed and at the end Im going to post another video of the engine running. Once I get interior systems in I will then cover the outside and get it in primer. I still need to make the engine cowl also. I have the nose bowl so the engine cowl will be built off the nose bowl. Here are some pics, hope you like them!
Attachments



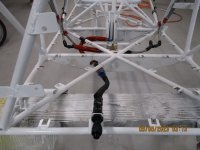
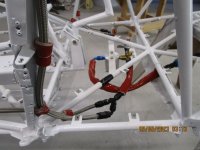
Hey Guys got some more progress to report. Got all the floor boards in, got the fuel system in with all the fuel lines permanenty attached and leak tested.. Today I got the rear windows in too, Had to get some thinner polycarbonate, The other I have was too think and way too heavy. I have all the control cables in as well. I made a universal joint for the interconnect rod that goes between the control sticks and the idler arm. This cures the problem with the rod end bearing unscrewing when the stick is moved side ways. I have pic, hope you like them.
Attachments
-
 IMG_0515.jpg2 MB · Views: 0
 -
 IMG_0520.jpg1.9 MB · Views: 0
 -
 IMG_0521.jpg2.2 MB · Views: 0
 -
 IMG_0522.jpg2.1 MB · Views: 0
 -
 IMG_0523.jpg1.8 MB · Views: 0
 -
 IMG_0516.jpg2.2 MB · Views: 0
 -
 IMG_0518.jpg2.1 MB · Views: 0
 -
 IMG_0517.jpg2.1 MB · Views: 0
 -
 IMG_0519.jpg2.2 MB · Views: 0
 -
 IMG_0528.jpg1.8 MB · Views: 0
 -
 IMG_0527.jpg2.1 MB · Views: 0
 -
 IMG_0525.jpg2 MB · Views: 0
 -
 IMG_0526.jpg2 MB · Views: 0
 -
 IMG_0524.jpg2 MB · Views: 0
Last edited:
Hi Guys, I have progress to report. I have the fuel system in and it has been leak tested. All the lone are permenatly attached. All the floor boards are painted and installed. I am at a point now where I am doing final assembly on everything. All the welding is done and everything is painted. So now im just assembling everything. Next up I will start the covering process starting with the interior, then to outside. Ill be posting pic as I go. This must be how it feels with a fast build kit? Just bolting stuff together not having to worry with fabing or welding anything??? But I had all the fun fabing and painting everything. Here is the universal joint pic.Hope you like the pics!!
Attachments

Last edited:


David Swartzendruber
LSA QB
Today I got the rear windows in too, Had to get some thinner polycarbonate.... I made a universal joint for the interconnect rod that goes between the control sticks and the idler arm. This cures the problem with the rod end bearing unscrewing when the stick is moved side ways.
Dave,
What thickness of polycarbonate ended up working well for you for the rear windows?
For your rod end bearing issue, how many degrees of movement did you find was needed to accomodate full aileron travel in the LSA? I found that the rod end from Mark is capable of 35 degrees of movement if installed in a way to allow it. Until I install my wings and hook everything up, I don't know how many degrees of rotation are needed. I measured it on Mark's Patrol at Oshkosh this year and his stick only moved about 33 or 34 degrees from full right to full left.

Bcone1381
Finished Patrol
Another idea/view point.
This has been discussed in the past but in context of the Patrol. Here is a thread.
https://bearhawkforums.com/forum/bearhawk-patrol-plans-build/18642-control-stick-pushrod
I used the fix in Post #11, which puts a joggle in the idler arms to make place where the rod end is captured by the idler wider and avoids contact between the idler and the rod end. A couple of bushings are also used in this method to keep the rod end centered on the bolt.
This has been discussed in the past but in context of the Patrol. Here is a thread.
https://bearhawkforums.com/forum/bearhawk-patrol-plans-build/18642-control-stick-pushrod
I used the fix in Post #11, which puts a joggle in the idler arms to make place where the rod end is captured by the idler wider and avoids contact between the idler and the rod end. A couple of bushings are also used in this method to keep the rod end centered on the bolt.
Hey Dave, The polycarbonate im using in my rear windows is .090 inches thick, it fit very well into the frames. I set my control up to swing the front stick 10 inches to each side on center. I checked Marks LSA and that was the way his was set up. I have not built my wings yet so I cant give you exact numbers yet. With my universal joint in action it just turns until the rod end reaches its limit then the link rod just turns. It does not loosen the rod end bearing. The rod end is tightly bolted into the end of the u-joint.
David Swartzendruber
LSA QB
Yes, that's what I had to do to take full advantage of the amount of travel that the rod end was capable of. My question then was is that enough. If the LSA only requires 35 degrees or less, then it's good with no further mod. I used a spacer on each side that I got from McMaster-Carr.
https://www.mcmaster.com/92510A552/
https://www.mcmaster.com/92510A552/
David Swartzendruber
LSA QB
I forgot that you didn't have any wings yet.

Hey guys I have progress to report. Today I got the interior painted, so im done with the interior now. I still need to attach some controls and I have more prep work to do before starting the out side covering. The interior turned out better than I expected. The stewart system is very easy to work with. I have a bunch of pics. Some of them show my fuel system, how I have it attached and routed. The manual has plenty of guidance on routing but I never saw anything that suggested on how to attach the fuel line. You will notice I used flexible lines through out. A friend who was in a crash and was badly burned and this influenced my decision to use flexible lines. Also you will find a drawing of my universal joint on the control rod that attaches to the idler arm. As usual any comments or suggestions are welcomed.
Attachments
-
 photo14916.jpg2 MB · Views: 0
 -
 photo14917.jpg1.9 MB · Views: 0
 -
 photo14918.jpg2.2 MB · Views: 0
 -
 photo14919.jpg2.1 MB · Views: 0
 -
 photo14921.jpg2.2 MB · Views: 0
 -
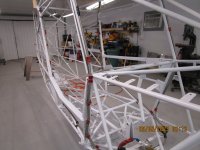 photo14922.jpg2.1 MB · Views: 0
 -
 photo14923.jpg2.1 MB · Views: 0
 -
 photo14924.jpg2.2 MB · Views: 0
 -
 photo14925.jpg1.8 MB · Views: 0
 -
 photo14927.jpg2 MB · Views: 0
 -
 photo14928.jpg2 MB · Views: 0
 -
 photo14926.jpg2.1 MB · Views: 0
 -
 photo14929.jpg2 MB · Views: 0
 -
 photo15013.jpg1.8 MB · Views: 0
 -
 photo15014.jpg1.9 MB · Views: 0
 -
 photo15015.jpg2 MB · Views: 0
 -
 photo15016.jpg1.9 MB · Views: 0
 -
 photo15017.jpg2 MB · Views: 0
 -
 photo15018.jpg1.8 MB · Views: 0
 -
 photo15019.jpg1.9 MB · Views: 0
Hey Guys I dont have any progress to report on my plane but today I started my tail wheel training. I logged my first hour in 25 years. It was great, the instructor was impressed I did as well as I did. I had forgotten how much I missed it. It was a J3 Cub. Once I get the endorsement I plan to keep my proficiency up by flying at least once a week until I get my LSA built. Another reason I wanted to start the flight training was too keep me motivated on my build. As far as my plane goes, I have the interior painted and I am waiting on some parts to get some electrical work done before covering the outside of the fuse. When that is done I will post more pics.
David Swartzendruber
LSA QB
Congratulations on getting back in the air. I did the same thing 2 years ago after about a 25 year break as well.
HI Guys, I have progress to report. I have been thrashing on my airplane pretty heavy lately. Having started back flying has really motivated me to get moving. So now I have the interior covered and all the coax ran for my antennas. I have the ELT tray and associated wiring installed as well. I am waiting on my FAA guy to come by and inspect the fuse before I cover the sides and top. I have the bottom covered already. I wanted the fuse to be visible for him to inspect before the final covering. In the mean time I have started making wing parts. I have started making the hundreds of rib stiffener angles. I am lucky that I have a friend that has an 8 foot sheer and a fiend that came by yesterday and actually helped me make some parts. Everyone is always asking when are you going to finish, and I tell them I am a one man show for a show that take 10 men if it is to be done in a reasonable amount of time. So my process so far has been to make the aluminum parts the old fashioned way (by hand) then deburr them then etch them then prime them. This is some of the work no one ever sees and unless you have done it yourself I don't think one can really appreciate how much work goes into it. My hat is off to the guys in Mexico making all those fast build kits. Here are my pics, as usual comments and suggestions are welcome.
Attachments
-
 photo15019.jpg1.9 MB · Views: 0
 -
 photo15096.jpg2 MB · Views: 0
 -
 photo15097.jpg2.1 MB · Views: 0
 -
 photo15098.jpg2.1 MB · Views: 0
 -
 photo15099.jpg2.2 MB · Views: 0
 -
 photo15100.jpg2.3 MB · Views: 0
 -
 photo15101.jpg2.2 MB · Views: 0
 -
 photo15102.jpg2.1 MB · Views: 0
 -
 photo15103.jpg2 MB · Views: 0
 -
 photo15104.jpg2 MB · Views: 0
 -
 photo15105.jpg1.9 MB · Views: 0
 -
 photo15106.jpg2.3 MB · Views: 0
 -
 photo15107.jpg2 MB · Views: 0
 -
 photo15108.jpg1.9 MB · Views: 0
 -
 photo15109.jpg2.1 MB · Views: 0
 -
 photo15110.jpg1.9 MB · Views: 0
 -
 photo15111.jpg2 MB · Views: 0

Hey Frank, I don't really have a completion date in mind. It just depends on how much I get out to the shop and work on it. Im thinking I would like to get it done within the next year and a half. I still have a lot of work to do, but flying is really motivating me to get it done as soon as possible.
Hey Guys I have some progress to report. I have both sides of the fuse covered now, just waiting on some more antichafe tape to get the top covered. I have pic for the fuse where I a trimming out the threshold of the entrance door and the door.
Attachments


Hey Guys, I have progress to report, I have the fuse fully covered now with all the tapes, it has 6 coats of ekofill and is ready for primer. My plan is to get it in primer, about 4 coats with sanding in between. Im going to leave the final coat of primer un-sanded until I get ready to put the top coats on. In the mean time I will install the boot cowl and firewall then put the landing gear back on it. Then I will install panel again and finishing wiring it. So there will be more progress to report in the future. Hope you like the pics.
Attachments


Hi Guys, I have progress to report. I finally have the engine cowl built and mostly installed. I also have to prop spinner installed with its million plate nuts. Im waiting on my camloc fasteners to finish up the cowl openings. I have started fitting the wind screen as well. Trying to get this fuse done so I can get started on the wing. Ill be making updates as I go.
Last edited:


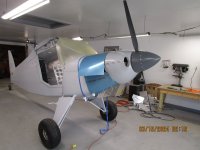
Hey guys I have progress to report. I got a bunch of parts painted, still lots to go. I have all the tail feathers painted and most of the metal parts on the cowl painted. I have to get the timing set on my engine. Im going to wait until that is done before I put the cowl back on. The tail feathers are now all red but Im going to put white stripes on them so I will need to temporarily put them back on the plane to get the stripes aligned, Then remove them and get the rest of the fuse painted. Then I will start my wings. Big thanks to Frank for the drill alignment guide blocks. I know it will make foe a better quality spar. Got bunches of pics. Hope you like them.
Attachments


Hey guys, I have some progress to report. I am working on my wing ribs. and am waiting on aluminum plate from aircraft spruce. I have decided to make my spar cap in one piece. I am going to make 3 sets of spar caps when I get the aluminum plate from aircraft spruce. Ill be looking to sell 2 sets of one piece spar caps if anyone is interested. I spoke with Bob about them and he agreed it was a good idea and that the one piece spar cap would be stronger than the spar caps built from multiple parts. Im not saying that the as designed spar cap in not strong enough obviously it is. This is a way to speed up the construction of the wing spars and maybe alleviate a little apprehension about assembling the multiple parts. If anyone is interested please PM me.
Hi Guys, I have progress to report. I finally have all the main ribs preped. Still have leading edge and trailing edge ribs to go. Still lots of work ahead. After I get the ribs done Ill start the spars. I color coded the ribs so I would know which ones were .020, ,032 and .025. Also notice the location of the rib stiffeners. I spoke to Bob about weather it made any difference which side of the rib the stiffeners went on. He said it did not make any difference. I put them opposite of the rib flanges to make it easier to rivet wings skins on. If the stiffeners were on the flange side of the ribs the stiffener would interfere with the bucking bar when bucking the wing skin rivets.
Attachments


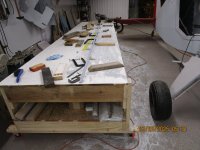
Hey guys, I have progress to report. I have finished preping all my ribs, so Im on to the 1 piece spar cap strip. I have not cut all the blanks. I used a circular saw with a metal cutting blade. I have added pictures of the mess it made. But I now have 3 sets of spar cap strip blanks. 2 of the sets will be for sale when I get them finished. I intend to update the progress here of all 3 sets.
Attachments




David Swartzendruber
LSA QB
Dave, with the one pieces spar caps, is the idea that each cap will not only be one piece instead of layered, but the top and bottom caps and the spacer strips in between will all be integrated into a single piece per wing?
Yes Dav the front and rear spar caps are one piece and the front spar cap where is it layered is machined from a 1/4 inch thick piece of 2024-t3 aluminum slab. the rear spar cap is 1/8th inch thick and that part is milled from a slab of 1/8 inch thick piece of 2024-t3 aluminum. Bob said it would increase the wing strength by about 10%. I have been collaborating with Bob on this project and it has his blessing. I will post updates on this forum as I make progress on the spar caps and my wings. Eventually I would like to offer complete spars in the future.
https://www.youtube.com/watch?v=R7eF_DuZ6Uc
Hi guys here is an update on my progress. I have been milling spar plates for the main wing spars.
Hi guys here is an update on my progress. I have been milling spar plates for the main wing spars.