
You are using an out of date browser. It may not display this or other websites correctly.
You should upgrade or use an alternative browser.
You should upgrade or use an alternative browser.
Kit #7 arrived
- Thread starter Utah-Jay
- Start date





Utah-Jay
BH Companion
I often joke with my wife when I walk in the door at the end of a long day working on the plane… Some days you are the bug, and some days you are the windshield…. Well yesterday I was mostly the freaking BUG with a few small wins.
Why? Because after getting the landing and wigwag lights done I started on the 3 in 1 wingtip lights, did the left one first and all was good. The right one at first did not work at all, so I redid all the connections at my ACM (Dynon). I had extra wire (shielded 4 wire in 20 gauge), so I cut it and redid all the connections using a ground soldered to the wire shield. Boom, I instantly had my strobe lights, but still no (green) NAV light. Got frustrated…. Sat down and had two cookies and then went back at it but still no joy… my buddy looked at it, we checked to make sure all the pins were fully seated, then checked the voltage and compared it to the left wing. Everything matched, but no NAV. My buddy is a wiring genius and will look at it next week when he gets back in town. In the meantime I did the connections (Deutsch plugs) for the two camera power boxes for the wing strut cameras and both are good to go.
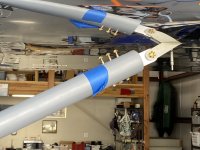
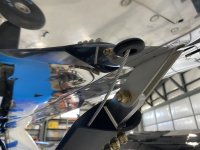
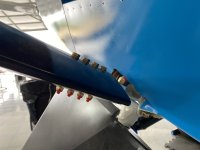
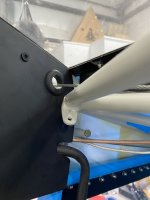
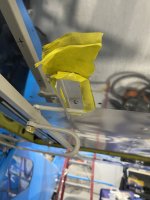
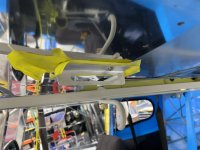
Today I drilled the holes for the aileron cables to feed down the strut. That went pretty well, as you can see in the photo I put a rubber grommet on for the time being. Amazon had perfect timing as they delivered my rub block material for the inside of the strut for the cable to rest/rub on. I will cut and fit those tomorrow IF I have time after doing a final sanding on my wingtips.

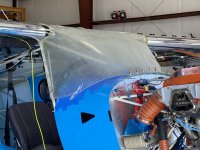
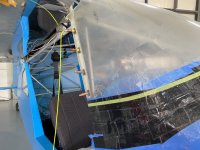
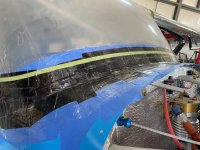
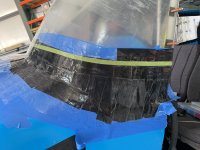
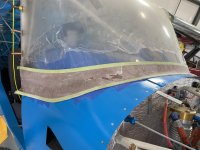
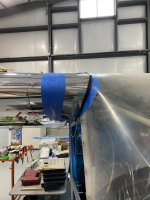
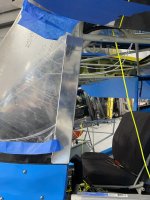
I leave Monday for 5 weeks of work… I am nearly positive the windshield will not fit itself while I am gone. The windshield pretty much scares the crap outta me
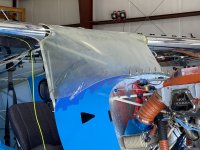 Truth be told, when I snug it up against the side attach points it is about perfect along the bottom edge.
Why? Because after getting the landing and wigwag lights done I started on the 3 in 1 wingtip lights, did the left one first and all was good. The right one at first did not work at all, so I redid all the connections at my ACM (Dynon). I had extra wire (shielded 4 wire in 20 gauge), so I cut it and redid all the connections using a ground soldered to the wire shield. Boom, I instantly had my strobe lights, but still no (green) NAV light. Got frustrated…. Sat down and had two cookies and then went back at it but still no joy… my buddy looked at it, we checked to make sure all the pins were fully seated, then checked the voltage and compared it to the left wing. Everything matched, but no NAV. My buddy is a wiring genius and will look at it next week when he gets back in town. In the meantime I did the connections (Deutsch plugs) for the two camera power boxes for the wing strut cameras and both are good to go.
Today I drilled the holes for the aileron cables to feed down the strut. That went pretty well, as you can see in the photo I put a rubber grommet on for the time being. Amazon had perfect timing as they delivered my rub block material for the inside of the strut for the cable to rest/rub on. I will cut and fit those tomorrow IF I have time after doing a final sanding on my wingtips.
I leave Monday for 5 weeks of work… I am nearly positive the windshield will not fit itself while I am gone. The windshield pretty much scares the crap outta me
Truth be told, when I snug it up against the side attach points it is about perfect along the bottom edge.Skyward II
Well-known member
Lookin good. Your list must be down to a few pages….
Utah-Jay
BH Companion
Utah-Jay
BH Companion
Where is the best place to store my wingtips while I am away working? I figured on the wings so I spent the day doing a final sand, did not finish as I both ran out of sandpaper and my fingers got numb. Oh and some of the fill I put on yesterday must have not had a good mixture as it was not sanding to powder but rather gumming up the sand paper a bit, so I will finish tomorrow.
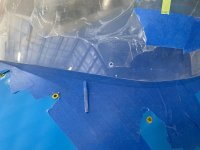
Yesterday I ran the aileron cables, so today I made rub blocks for the cables to rest on in the top of the strut.
I started with this

And finished with these
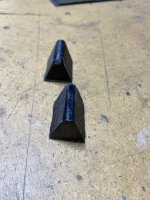
Yesterday I ran the aileron cables, so today I made rub blocks for the cables to rest on in the top of the strut.
I started with this
And finished with these








Utah-Jay
BH Companion
All fuel lines and sight gauge lines are finished.


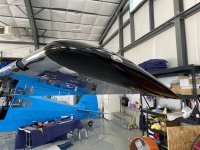
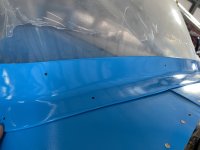
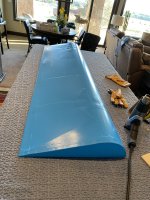
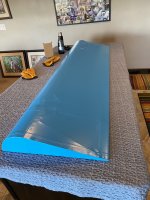
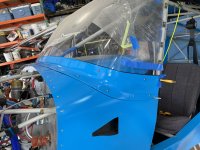
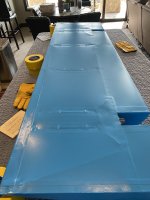
Put the epoxy primer on the wingtips and windshield fairing today, they will get painted when I get home after this weeks work trip.
I had a left wingtip light gremlin that got solved a few days ago, so all my wiring is all set. I updated (for the first time) my Dynon HDX, so all it good on that front.
I made part of the wing to fuselage fairing template yesterday, it was the front cap I made.
I am chipping away at things
Put the epoxy primer on the wingtips and windshield fairing today, they will get painted when I get home after this weeks work trip.
I had a left wingtip light gremlin that got solved a few days ago, so all my wiring is all set. I updated (for the first time) my Dynon HDX, so all it good on that front.
I made part of the wing to fuselage fairing template yesterday, it was the front cap I made.
I am chipping away at things
Skyward II
Well-known member
Progress. Looks good.


Of the three Companion weights that I know of, yours is in the middle and pretty close to the other one at 1257. Have you figured up the location of the empty cg yet?
Utah-Jay
BH Companion
jaredyates
I have not, we just threw it on the scales yesterday as the scales were used for a Kitfox and needed to be returned to the EAA chapter. It was just a quick weigh.
My plane with all the avionics and heavy duty cargo closeout was never going to be as light as the one that Dave built. My target was 1220 +/- 20 so I am happy as it stands now, but I think the weight will change +/- 5 before I am done
I have not, we just threw it on the scales yesterday as the scales were used for a Kitfox and needed to be returned to the EAA chapter. It was just a quick weigh.
My plane with all the avionics and heavy duty cargo closeout was never going to be as light as the one that Dave built. My target was 1220 +/- 20 so I am happy as it stands now, but I think the weight will change +/- 5 before I am done


gregc
Well-known member
Nev Just to note that Bob set the aft limit for the Companion at 19.8 so 21 is over the limit (although it would probably fly just fine).
My empty CG matched N103BH exactly but the max baggage weight limit we calculated is quite different due to us choosing different arms for the seats and baggage area.
Im looking forward to seeing numbers on a third example. I understand that Dave validated his weight limit number during testing.
Utah-Jay I found that it is critical to be as accurate as possible when you level the plane. The relatively heavy tail and long arm of the tail wheel means that leveling errors have a large effect.
My empty CG matched N103BH exactly but the max baggage weight limit we calculated is quite different due to us choosing different arms for the seats and baggage area.
Im looking forward to seeing numbers on a third example. I understand that Dave validated his weight limit number during testing.
Utah-Jay I found that it is critical to be as accurate as possible when you level the plane. The relatively heavy tail and long arm of the tail wheel means that leveling errors have a large effect.

Utah-Jay
BH Companion











Utah-Jay
BH Companion
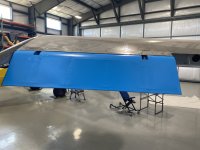
Past several days were spent wrapping the ends and pockets for the 2nd Flap and Aileron.


Then I undertook actually covering the aileron

Then today I hung the right aileron
Left Flap covering starts tomorrow, likely will take 2 days, possibly 3, once hung it is on to rigging
Then I undertook actually covering the aileron
Then today I hung the right aileron
Left Flap covering starts tomorrow, likely will take 2 days, possibly 3, once hung it is on to rigging
Attachments

Skyward II
Well-known member
Getting close. Looks great!

Utah-Jay
BH Companion
I was too busy to take photos today, but both ailerons and both flaps are hung. Flaps are set to the wing using the springs and rod ends… aircraft spruce SCREWED me and is delivering my shackles two days later than the shipping I paid for. They arrive tomorrow at some point.
Then I will set cable lengths and nicopress the cables, adjust the turnbuckles and the start on the aileron cable rigging
Then I will set cable lengths and nicopress the cables, adjust the turnbuckles and the start on the aileron cable rigging
Utah-Jay
BH Companion
As posted above I have been working long hours everyday and today got the flaps (yesterday on the flaps) and ailerons all done. The ailerons are super light to the touch and have no side to side slop at all, I was really happy with that! Turnbuckles just above the triangle need a few turns to take out a bit of slack. I had to put a bit of lubrication on the right flap torque tube and that eliminated a bit of a slow and not quite complete retraction. Being I was doing it I did the left as well and now both spring (pun intended) back to full retraction.

Utah-Jay
BH Companion
Safety wired all but two of my turnbuckles today as I am buttoning things up. As I am sure many of you can commiserate…. I lost the will after a while and I just did not feel like removing the floorboard under the pilot seat to do the elevator, the remaining one is the aileron pass-through and I have a reason (more to come later) for waiting on that one. Here is a photo example

I also started the fuselage to wing fairing today.


While those are a perfect fit, I am going to change from .025 to .016 or .020 for a more efficient curve on the leading edge. Yep…Imagine that doing things more than once
I also started the fuselage to wing fairing today.
While those are a perfect fit, I am going to change from .025 to .016 or .020 for a more efficient curve on the leading edge. Yep…Imagine that doing things more than once

Sierra Skydog
LSA quickbuild
Good job at keeping a sense of humor through some “not so fun” tasks! I have to re-learn that once in awhile

Bcone1381
Finished Patrol
Have you tried to form the curve around a cylinder? I found that I could test a scrap piece of Alumn. You know, form it around a cylinder of a given dimension and then check the results of the scraps curvature radius against my desired radius. I then would adjust my cylinder diameter and test it again on a new piece of scrap until I got the diameter I desired.
I made that cylinder diameter adjustable by wrappping a cardboard shipping cylinder with I think felt I had on hand. It was quick and easy. 2024-t3 Alumin work-hardens, so if you sneak up on your desired radius, it will require a smaller and smaller diameter to get it to move. So Finetune your cylinder so your scrap can bend from flat to your desired curve with one motion. In otherwords, don't sneak up on it.
I made that cylinder diameter adjustable by wrappping a cardboard shipping cylinder with I think felt I had on hand. It was quick and easy. 2024-t3 Alumin work-hardens, so if you sneak up on your desired radius, it will require a smaller and smaller diameter to get it to move. So Finetune your cylinder so your scrap can bend from flat to your desired curve with one motion. In otherwords, don't sneak up on it.
Utah-Jay
BH Companion
Working on fuselage to wing fairings
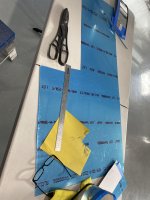

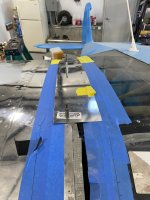
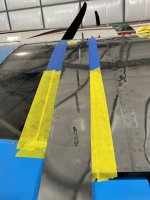
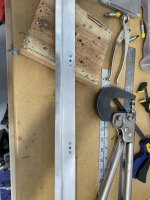
Today I built a shelf for the aileron crossover cable to keep it above the trim cable

 I countersunk the screws so as to never have a chance of a cable rubbing on a screw.
Just clamped in place at the moment. But I do not like anything potentially rubbing.
Today I built a shelf for the aileron crossover cable to keep it above the trim cable
I countersunk the screws so as to never have a chance of a cable rubbing on a screw.Just clamped in place at the moment. But I do not like anything potentially rubbing.



Utah-Jay
BH Companion
Lots of building, not much posting, getting close though
Flap and aileron pocket closeouts have been made and primed ready for paint.
Had a bit of a F-up building the front of the fuselage to wing fairing a week ago and had to order more material, but finished the two fronts and tops today. I dig into the bottom tomorrow
I will trim them all when the fitting is done


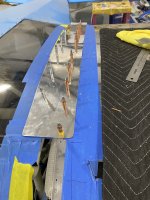

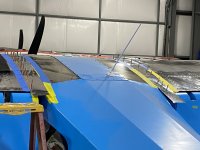
Flap and aileron pocket closeouts have been made and primed ready for paint.
Had a bit of a F-up building the front of the fuselage to wing fairing a week ago and had to order more material, but finished the two fronts and tops today. I dig into the bottom tomorrow
I will trim them all when the fitting is done
Last edited:


Utah-Jay
BH Companion


Skyward II
Well-known member
Commitment. It’s motivating. DAR date set yet?
Utah-Jay
BH Companion
Commitment. It’s motivating. DAR date set yet?
DAR has inspected the plane twice already as he is on my home field fairly often and is happy to stop in and check it out. I am hoping for first week of January. Planing an engine start next week before I leave for two weeks of work on December 8th. :fingers crossed:
Utah-Jay
BH Companion
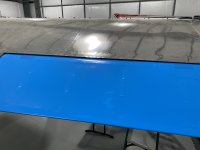
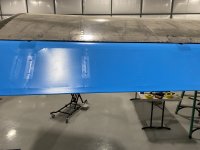
Made a bunch of shiny stuff blue
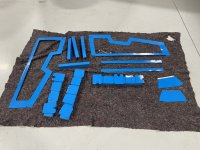
That was yesterday’s batch, plenty more got painted today and is still in the paint booth
Put a few pieces on before I left the hanger just for the feel good factor
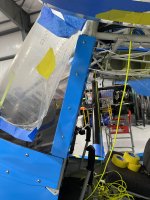
FYI, if you see a small amount of “orange peel” it is on purpose so be as close of a match to the Oratex fabric as possible.
Tomorrow is paint prep for some black pieces to be painted on Tuesday and then it is just putting it back together and I am done
That was yesterday’s batch, plenty more got painted today and is still in the paint booth
Put a few pieces on before I left the hanger just for the feel good factor
FYI, if you see a small amount of “orange peel” it is on purpose so be as close of a match to the Oratex fabric as possible.
Tomorrow is paint prep for some black pieces to be painted on Tuesday and then it is just putting it back together and I am done

Utah-Jay
BH Companion
https://youtu.be/tAXfKbM9TAQ?si=PFCx9S0U466ytN0m
First engine start today. NO LEAKS!
Just a couple of squawks that need to be addressed.
1188 days from start to start
First engine start today. NO LEAKS!
Just a couple of squawks that need to be addressed.
1188 days from start to start


RobinDeMarco
Model 5 Scratch Build
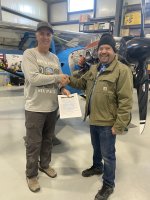
Good luck with the inspection. Your build looks great!




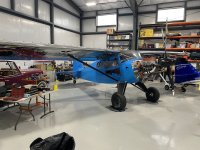
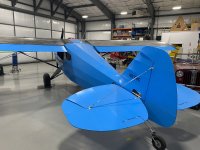
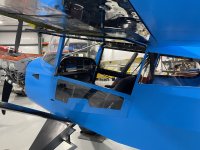
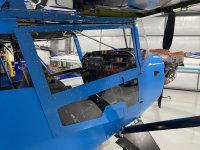
Sierra Skydog
LSA quickbuild
Awesome! Well done, congratulations!
KinzuaBearhawk
Bearhawk QB Companion
Congratulations Jay. I’m following your path (and pictures) and hope to be ready for inspection this year. Good luck with flight testing.
Utah-Jay
BH Companion

TrueAirSpeed
Junior Member
Congratulations Jay! Now get that ppl and apply for your repairman’s certificate.
RobinDeMarco
Model 5 Scratch Build
Congratulations, Jay! I’ve enjoyed watching your progress.
Astro John
Well-known member
Congrats! Thanks for all the updates along the way. I am sure I will be looking at this thread quite a bit while I build my 5.
Skyward II
Well-known member


Utah-Jay
BH Companion
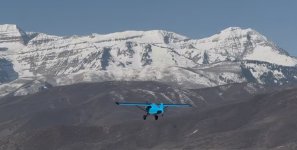
Today was the day….
First flight went great, NO squawks. NO leaks. Maybe 1 pound of stick pressure for a right heavy wing. Flew straight. Had to pull the power back to not over speed the engine. Ran it at 2600-2630 for 45 minutes. Speed on final was higher than I wanted, but felt comfortable with the lack of time in the plane. Takeoff back pressure was at 48-50mph, so could have been a lot shorter.
TAS was 137 to 147
Indicated was 130-133
Ground speed was about 4-6 below TAS
First flight went great, NO squawks. NO leaks. Maybe 1 pound of stick pressure for a right heavy wing. Flew straight. Had to pull the power back to not over speed the engine. Ran it at 2600-2630 for 45 minutes. Speed on final was higher than I wanted, but felt comfortable with the lack of time in the plane. Takeoff back pressure was at 48-50mph, so could have been a lot shorter.
TAS was 137 to 147
Indicated was 130-133
Ground speed was about 4-6 below TAS
Last edited:
Today was the day….
First flight went great, NO squawks. NO leaks. Maybe 1 pound of stick pressure for a right heavy wing. Flew straight. Had to pull the power back to not over speed the engine. Ran it at 2600-2630 for 45 minutes. Speed on final was higher than I wanted, but felt comfortable with the lack of time in the plane. Takeoff back pressure was at 48-50mph, so could have been a lot shorter.
TAS was 137 to 147
Indicated was 130-133
Ground speed was about 4-6 below TAS
Great to hear Jay, please keep us updated as you go!
Utah-Jay
BH Companion
Here is a video from the ground. It is obvious that I was VERY conservative with the takeoff rotation and carried extra speed on the landing as it is a new plane and just learning the feel.
https://youtu.be/ne2yn6xEGHM?si=J-6V9lKWD40oTpVp
https://youtu.be/ne2yn6xEGHM?si=J-6V9lKWD40oTpVp
Astro John
Well-known member
Congratulations! Thanks for sharing all of your experience along the way.
KinzuaBearhawk
Bearhawk QB Companion
Great first flight.