
You are using an out of date browser. It may not display this or other websites correctly.
You should upgrade or use an alternative browser.
You should upgrade or use an alternative browser.
Tell us what you did today on your Bearhawk Project
- Thread starter Bcone1381
- Start date

Bdflies
Between Projects
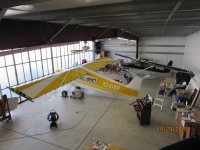
Fuselage final paint is done. Back in shop. Avionics arrived, from Sarasota Avionics, last week. Bunch of boxes is pretty cool! Wiring harness is VERY INTIMIDATING! Early today, I laid the harness out on a table and connected the various boxes to the connectors. NO EXTRA CONNECTORS!! Everything figured out. This afternoon, I built a rack to mount the remote Xponder & comm. YeeHaw! I'm installing avionics!
Bill
Bill

Today I was working on a mount for the adahrs in the wing, between the fuel tank and fuselage. This would have been easier with the wing off, but not easy enough to justify removing a wing.

Flygirl1
Patrol#241FLYING
I took a photo of the beginning of our wiring to the electric store we have been shopping at and the guy says--"don't apply for a job here, I won't hire you". Looks a lot better today, but still what a bunch of spaghetti! So far everything works as it should. Had an issue with the headsets and the mic wiring, but eventually figured it out. We built a drop down tray under the glare shield that will work nice for ease of access. It is hinged and in place with southco's. All the Dynon stuff is on it. Transponder, back up battery, comm, and any other separate boxes. We do understand and appreciate your excitement in getting this part done!!! D.
Last edited:

Can you compensate being off centerline with your AHRS? I seem to recall they liked to be closer to the center.
Yes, it needs to be parallel to the three axes, but the specs for being off those axes are published and relatively liberal. I put a remote compass in the wing tip.

Wow, that is liberal. Makes for a lot of mounting opportunities.


Bcone1381
Finished Patrol
Bill,
Some of us see avionics as complicated...just the choice of the avionics let alone the wiring of them. Could you also share with us sometime the route you chose and recommendations? For example, I liked the Sarasota Avionics Website, and can see the wiring harness being built as cutting thru a lot of the complications.
Brooks
Some of us see avionics as complicated...just the choice of the avionics let alone the wiring of them. Could you also share with us sometime the route you chose and recommendations? For example, I liked the Sarasota Avionics Website, and can see the wiring harness being built as cutting thru a lot of the complications.
Brooks
Feeling a little cranky today? 
I've often considered buying my engine in pieces to spread out the costs.

whee
Junior Member
I've often considered buying my engine in pieces to spread out the costs.
I didn't purposefully by mine in pieces. I bought a core that needed up having a bad crank. If you have the ability and desire to rebuild your own engine, or work with an A&P, then I think buying a good core is the least expensive way to go. I'm really excited to get the rest of my steel parts back from Aircraft Specialties so we can start engine assembly.

JimParker256
Bearhawk Enthusiast
Chris - that was SOOOO bad! (I loved it!)
Bdflies
Between Projects
No Title
My mission to Oshkosh, this year, was to order avionics. The panel will be extremely simple, but packed with information and features. The box of stuff arrived last week and I've begun installation! Panel will consist of a Garmin G3x touch 10" display, G5 backup doisplay, Garmin 307 autopilot panel. The G3x will operate a remote comm radio and a GTX 45R transponder. That transponder, paired with the WAAS GPS source, will provide ADS/B in and out. The G3X will display engine parameters and AOA information, by virtue of the special pitot ptobe. The 307 will control pitch and roll servos. The G3X provides the 2 place intercomm. So, no radios or transponder on the panel. No intercomm, either. No engine gauges. As a matter of fact, not a steam gauge, with a needle on the panel, either. There will be a BUNCH of circuit breakers, however.... and a vertical card compass!
Bill
My mission to Oshkosh, this year, was to order avionics. The panel will be extremely simple, but packed with information and features. The box of stuff arrived last week and I've begun installation! Panel will consist of a Garmin G3x touch 10" display, G5 backup doisplay, Garmin 307 autopilot panel. The G3x will operate a remote comm radio and a GTX 45R transponder. That transponder, paired with the WAAS GPS source, will provide ADS/B in and out. The G3X will display engine parameters and AOA information, by virtue of the special pitot ptobe. The 307 will control pitch and roll servos. The G3X provides the 2 place intercomm. So, no radios or transponder on the panel. No intercomm, either. No engine gauges. As a matter of fact, not a steam gauge, with a needle on the panel, either. There will be a BUNCH of circuit breakers, however.... and a vertical card compass!
Bill
Attachments


JimParker256
Bearhawk Enthusiast
That looks very nice, Bill.
How are you planning to attach the panel itself to the airframe? It looks like you counter-sunk for rivets? I'm using nut-plates and screws so I can remove it if necessary for access.
How are you planning to attach the panel itself to the airframe? It looks like you counter-sunk for rivets? I'm using nut-plates and screws so I can remove it if necessary for access.
Bdflies
Between Projects
Thanks Jim! There are nutplates, on the horizontal tube, that the panel will screw to. Also, there's an aluminum angle curved frame along the top edge, with nutplates to attach the instrument panel and nutplates to attach the glareshield. The instrument panel will be totally removable. The only impediment to removal will be carb heat, cabin heat controls and the engine primer.
I spent today configuring the wiring harness. CAUTION: Shameless Plug to follow! I have enjoyed reading STOL Aircraft Magazine, from the first issue. Those guys are trying hard to publish a magazine that appeals to fliers like us. Sarasota Avionics is a regular contributor to the mag, so I looked them up at Oshkosh. They were knowledgeable and competitive. I told the boss that I liked the fact that he's a contributor to the STOL magazine and I was buying my system from them, for that reason. I've been in contact with those guys for the past three months. Good folks! Installing the equipment, leaves me with the impression that I made a good choice. The harness is going in really nicely! Enough of my shameless plug...
Now, hopefully the smoke will stay in the boxes, when they're powered up...
Bill
I spent today configuring the wiring harness. CAUTION: Shameless Plug to follow! I have enjoyed reading STOL Aircraft Magazine, from the first issue. Those guys are trying hard to publish a magazine that appeals to fliers like us. Sarasota Avionics is a regular contributor to the mag, so I looked them up at Oshkosh. They were knowledgeable and competitive. I told the boss that I liked the fact that he's a contributor to the STOL magazine and I was buying my system from them, for that reason. I've been in contact with those guys for the past three months. Good folks! Installing the equipment, leaves me with the impression that I made a good choice. The harness is going in really nicely! Enough of my shameless plug...
Now, hopefully the smoke will stay in the boxes, when they're powered up...
Bill
1,516 holes! Boy are my arms tired...

Sent from my iPhone using Tapatalk
Sent from my iPhone using Tapatalk
If I had to put all the days together, collectively probably something like 6 hours?
No lie! Monotonous for sure.
Bdflies
Between Projects
This week has seen me working on engine baffles. I bought the baffle kit, from Vans and am very impressed with the quality and completeness! It's all fitted and riveted together. The gasket, on top, is my challenge now. I'll post a couple of pics when it's done.
Today, 'the stars aligned' allowing the opportunity to paint the second wing, so I went for it! Note to self: Heated spray booths are great! I masked for the leading edge stripe, at 10:00 this morning and loaded the finished wing into the trailer, at 3:30 this afternoon! Whew! I was a bit nervous, but the paint was surely hard enough to move. I'm not used to that time frame.
Bill
Today, 'the stars aligned' allowing the opportunity to paint the second wing, so I went for it! Note to self: Heated spray booths are great! I masked for the leading edge stripe, at 10:00 this morning and loaded the finished wing into the trailer, at 3:30 this afternoon! Whew! I was a bit nervous, but the paint was surely hard enough to move. I'm not used to that time frame.
Bill
whee
Junior Member
Been pretty cold so I haven't done much real work on the plane. I needed to brush up on my SolidWorks skills so have been playing around with an idea for 10" wheels with beadlockers. This would allow me to run the Desser 31" tire with no tube and no concern with blowing a bead when running low pressures. Designed so I can make them with my current tools and weld it together. Made of 4130 and weighs 10.6lbs. Not likely I'll ever actually build them but maybe.


Mark Moyle
Well-known member
Why not finish the drawings...make one wheel under sized for the bearing race bores and over sized for the remainder. Send to a foundry to sandcast aluminum parts from the prototype. What ever happened to the guy who made the billet control stick assemblies?
Sent from my iPad using Tapatalk
Sent from my iPad using Tapatalk
Flygirl1
Patrol#241FLYING
Today we put on the last major thing to install on the airplane--the Props. WHOO HOO!!! We've chosen the Whirl Wind constant speed 80in composite. They look a little funky, in my opinion, but I guess you can't see em when there spinning, right? Looks like it might be a pain in the a@# torqueing them and getting the safety wire in place, but where there's a will there's a way. Weight and balance is next and then onto starting and taxi testing. Merry Christmas everybody!!

Dave Roberts
Member
The prop should work quite well. Sounds like the same prop Wayne Mackey uses. I would love to try one on my bearhawk. Congrats on your build. Sounds like you are about to the really fun part.

Patrol28
Junior Member
No Title
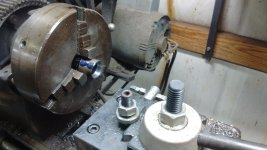
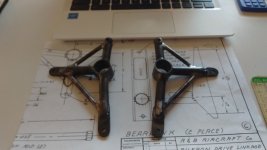
Those pesty bearing cages for the ailerons are my first item today. Since all my fuselage weldments are done it's time for the wing steel parts. Christmas day is great for shop time. Lets see what else I get done today.
Those pesty bearing cages for the ailerons are my first item today. Since all my fuselage weldments are done it's time for the wing steel parts. Christmas day is great for shop time. Lets see what else I get done today.
Attachments
Last edited:
Flygirl1
Patrol#241FLYING
Not sure what Wayne is using, we talked with Don Aldridge about his. If I remember correctly he had a W.W. on an RV and a Hartzell on his previous Patrol and he liked the performance of the W.W. the best. I haven't flown a controllable pitch prop in about 13 yrs., so I'm not sure I can say how it will compare. But for the cost of those props, it will work GREAT--that's my story and I'm sticking to it. ;-) D.

Deftone
4-place Scratch Builder
Was looking over my work today while trying to repair the form block that got damaged by the old router and think I am going to start over from scratch on my form blocks. Im not happy with the quality of my work. I used a jigsaw to cut out the form blocks then finished by sanding but it just doesnt seem good enough. If someone was to go into the formblock/router template business for wing ribs I would be your first customer!
So I decided that today I would build a new build table like I have been planning for a while. Finished the first of two 8x4 tables today. What is everyone else using to finish their worktops? I was thinking of something in a matt white so I could scribble notes in pencil while I worked and can be repainted as needed. I used Red Oak Plywood, not sure if perhaps an epoxy would work? My other home built workbenches are all raw unfinished plywood tops.
So I decided that today I would build a new build table like I have been planning for a while. Finished the first of two 8x4 tables today. What is everyone else using to finish their worktops? I was thinking of something in a matt white so I could scribble notes in pencil while I worked and can be repainted as needed. I used Red Oak Plywood, not sure if perhaps an epoxy would work? My other home built workbenches are all raw unfinished plywood tops.
Last edited:

patrickh99
Senior Moment
Which model prop is that? I looked at their site and found 78", 79", & 82", but no 80" CS props
JimParker256
Bearhawk Enthusiast
The "STOL CS Series Propeller" shows 3 models, two of which are 80" props, the other being 77".
http://www.whirlwindaviation.com/props/STOLGCSseries.asp
They also have the "284 STOL CS Series Propeller" which is 84".
http://www.whirlwindaviation.com/props/284series.asp
http://www.whirlwindaviation.com/props/STOLGCSseries.asp
They also have the "284 STOL CS Series Propeller" which is 84".
http://www.whirlwindaviation.com/props/284series.asp
patrickh99
Senior Moment
Ahh, the 210. Guess I need to read closer, or get new glasses.
Let us know how it works for you.
Let us know how it works for you.
patrickh99
Senior Moment
I drilled more spar spacers today. I have almost progressed to where I expected to be last spring, so I could Alodine and prime outside during warmer weather and be ready to rivet the spars together this winter. I need to speed up if this thing is ever going to fly. 
Bdflies
Between Projects
No Title
2016 ended on a high note, in the course of my project! My struts were painted this week. Picked them up this morning. When back at my shop, I quickly assessed that there was nothing significant to do, until the wings were hung. So, with the help of hydraulics, I hung the wings! Kind of a mixed blessing, though. Exciting as it is, having the wings on, this means I'm out of my workshop, in the hangar.... Less light, no heat and the stereo isn't as good...
Happy New Year!
Bill
2016 ended on a high note, in the course of my project! My struts were painted this week. Picked them up this morning. When back at my shop, I quickly assessed that there was nothing significant to do, until the wings were hung. So, with the help of hydraulics, I hung the wings! Kind of a mixed blessing, though. Exciting as it is, having the wings on, this means I'm out of my workshop, in the hangar.... Less light, no heat and the stereo isn't as good...
Happy New Year!
Bill
Attachments


Flygirl1
Patrol#241FLYING
Congrats on getting your wings on! I like the way you put them up there. We used a dry wall lift and four people. The lift was way too wobbly for my comfort--but it did the job. I hope your hanger isn' t to far from your shop. It can be a pain needing something that's back at the shop. Happy Building in the new year!
Bdflies
Between Projects
I've been involved in several 'wing hangings'. Lots of hands usually leads to lots of confusion. The tractor is rock solid and it rarely disagrees or questions my directions. With the main wheels on the dollies, I was able to move the fuselage to meet the wing. Even easier than I imagined! If you look closely at the pic with both wings on, behind the plane are the doors to my workshop! Everything is under one roof. It's so convenient, I'm almost embarrassed.....but not really.

Sebastian
J/M N324WC 4Place QB
No Title
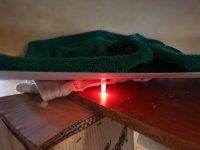
Today I felt like I got something accomplished. Been working on the wing tips trying to get them ready for paint but wanted to do a build up for the nav/strobe lights. I also had the idea that it would be nice to have a way to know if the lights were actually working from inside the cockpit. After I did the build up so the light would be stable I installed a 1/4" Plexiglas rod that runs from the light and protrudes thru the bottom of the wing tip. when I get the wing tips back from paint I will cut the rod off flush and epoxy it to the inside to hold it in place. I'm not naïve enough to think I am the only one to come up with this idea since I saw it on a Cessna. I have added some pictures.
Today I felt like I got something accomplished. Been working on the wing tips trying to get them ready for paint but wanted to do a build up for the nav/strobe lights. I also had the idea that it would be nice to have a way to know if the lights were actually working from inside the cockpit. After I did the build up so the light would be stable I installed a 1/4" Plexiglas rod that runs from the light and protrudes thru the bottom of the wing tip. when I get the wing tips back from paint I will cut the rod off flush and epoxy it to the inside to hold it in place. I'm not naïve enough to think I am the only one to come up with this idea since I saw it on a Cessna. I have added some pictures.
Attachments


Flygirl1
Patrol#241FLYING
No Title
Ok, the planes are done and today we did the weight calculations. Brand new digital electric scales were used. All inspection covers, nuts, bolts, fairings in place and the numbers are in. We have Oregon Aero seats and full interiors that include insulation. I was going for comfort for long haul trips. Dennis' plane weighs 2 lbs less than mine, which surprises me. I had to add tubing for the addition of spine material to remove the skylite. My plane is lighter on the mains, but heavier ( by 7 lbs.) on the tail for some unknown reason. ( no comments please. ;-) ) This weight includes 8 quarts of oil and me ( Operational empty weight ): 1370lbs. We are working on configuring our Dynon Skyview system and a ground run up after that, than the DAR inspection. Will post the "other" numbers ASAP. ;-) D.
Ok, the planes are done and today we did the weight calculations. Brand new digital electric scales were used. All inspection covers, nuts, bolts, fairings in place and the numbers are in. We have Oregon Aero seats and full interiors that include insulation. I was going for comfort for long haul trips. Dennis' plane weighs 2 lbs less than mine, which surprises me. I had to add tubing for the addition of spine material to remove the skylite. My plane is lighter on the mains, but heavier ( by 7 lbs.) on the tail for some unknown reason. ( no comments please. ;-) ) This weight includes 8 quarts of oil and me ( Operational empty weight ): 1370lbs. We are working on configuring our Dynon Skyview system and a ground run up after that, than the DAR inspection. Will post the "other" numbers ASAP. ;-) D.
Attachments

Bdflies
Between Projects
I kmow I'm pretty simple minded, but I'm still confused - I think. I was looking for "empty weight" and I don't think 1370 is "empty weight". I think, if I understand, I'm NOT going to ask what the empty weight is... I'm married, you see. I know better than to ask...
Bill
Bill
Flygirl1
Patrol#241FLYING
Your right, 1370 is not the "empty weight". What I read somewhere is that the Operational weight is the empty weight with the pilot weight added to that. Bill, you may be confused, but your not dumb. ;-) There is a study out that a woman who is overweight lives longer than her husband----who mentions it. ;-) Dennis warned me about this. Somebody someday is going to figure out my empty weight. I will say according to Mark G., the heaviest patrol out there is 1245 and we are less than that. Donna
Last edited:
Patrol28
Junior Member
Looking good. I know we all should strive for a light airplane for enhanced performance but we should also build for utility and how we individually want to use our personal airplane. The no electric,hand propped Patrol is fine for some but not for all. Your airplanes look like they will serve you well. More pictures please, we need motivation.
Flygirl1
Patrol#241FLYING
Hey Chewie, thanks! I'm hoping to convince our DAR to let us fly further up and down the valley instead of over mountains in the other directions. I'd just as soon stay over i-5 for a while. Not sure what the radius is these days, but hopefully we can get it stretched enough that we can stop by. With experimental props and engines I believe our fly off time is the most they do. D.
Flygirl1
Patrol#241FLYING
No Title
Here is a photo of the other Patrol. For some reason it is very difficult to load photo's. Sometimes it will take them and sometimes it won't. I have about 3000 or more photo's of the whole 4 yrs. of the build and would have been posting them all along, but we just recently acquired some sort of high speed internet. The best we could do for our location. D.
Here is a photo of the other Patrol. For some reason it is very difficult to load photo's. Sometimes it will take them and sometimes it won't. I have about 3000 or more photo's of the whole 4 yrs. of the build and would have been posting them all along, but we just recently acquired some sort of high speed internet. The best we could do for our location. D.
Attachments

Sweet ride!
Mark Goldberg
Bearhawk Aircraft
Donna, your two Patrols sure look nice. Mark
Flygirl1
Patrol#241FLYING
Hey guys, thanks for appreciating our hard work! I think the paint colors and schemes suit each of us nicely. We won't make the mistake of flying off in the wrong plane for sure!! Bill, the fairings are fiberglass. We started with aluminum, but it turns out neither of us are metalologists. I felt they were flexible enough to hold up to a bit of twisting so we attached them to the fuselage at the top of the fairing on the outside and to the landing gear at the bottom of the fairing on the inside. This will keep any gapping to a minimum when the gear is on the ground or in the air. I'll post that photo just as soon as I find it and let you know how it works. D.
Last edited:

DRLPatrol
Junior Member
I needed a little road trip yesterday and went down to see Donna and Dennis. I had not seen their planes since the wings were on. I am here to tell you they look even better than they do in pictures. One thing that does not show up in the pictures, the white paint is a satin finish and the colors are high gloss. Very nice effect. Well done guys.
Doug
Doug
JimParker256
Bearhawk Enthusiast
Two gorgeous airplanes! You should be proud of what you've accomplished!
Flygirl1
Patrol#241FLYING
Thank you all! Doug and anybody else that may care about the weight of their plane--FYI: I took the plastic off the inside and outside windows, winshield and off the prop and weighed it--1lb. That's how easy it can add up. Moral to this story--I'm taking off 1/2lb. on each main weight figures. ;-)
Bdflies
Between Projects
No Title
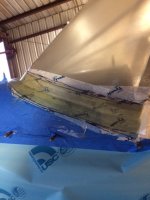
I thought I'd wait, to fuel the plane, until after weight and balance. Reading Donna's experience with seeping tanks, I decided to check out the fuel system sooner. So, I boldly put 15 gallons in each tank! I can report no leaks in either tank. I won't lie, however. I did find a primer line that wasn't tight enough... Nose high, she flows 23 gph, from 'both' and 21 gph from either left or right. If I read the flow charts correctly, 150% of my O-360 A1A's requirements is 22 gph. Yes, I did check the calibration of the flowmeter. It's spot on!
Now, I can button up the tank covers and carry on with the windshield fairings.
Bill
I thought I'd wait, to fuel the plane, until after weight and balance. Reading Donna's experience with seeping tanks, I decided to check out the fuel system sooner. So, I boldly put 15 gallons in each tank! I can report no leaks in either tank. I won't lie, however. I did find a primer line that wasn't tight enough... Nose high, she flows 23 gph, from 'both' and 21 gph from either left or right. If I read the flow charts correctly, 150% of my O-360 A1A's requirements is 22 gph. Yes, I did check the calibration of the flowmeter. It's spot on!
Now, I can button up the tank covers and carry on with the windshield fairings.
Bill
Attachments

Flygirl1
Patrol#241FLYING
We started both engines for the first time on Mon. Dennis needed a battery assist and had a small easily fixable oil leak. After the external battery was hooked up she lit after about 1/2 blade turn and ran great. Mine started ok but the Skyview screen went wacky and quit for a minute but came back on line. ( pretty sure it was due to a low voltage issue with the backup battery ). We were pretty sure we had oil pressure because we did that before hand with the plugs out. Anyway both ran great and we are just waiting for our DAR blessing to fly them. A huge milestone and if you can't tell, I'M EXCITED! This gets a 5 smiley face rating.


Flygirl1
Patrol#241FLYING
Hey Jim, not to say yours will or are leaking, but the fuel in out tanks was in there for a few days before we saw the leaks and a couple of days after that a couple more. Again, these are so tiny if you have 100ll in the tank it might disappear before you notice, so not sure it would be a huge problem anyway. Also wondering which fuel flow sensor you have. We were 15 degrees nose high and with 5 gal's we had a fuel flow of 20.62 gph. We stopped at the 5 gal. in each tank because I thought the test was supposed to be with the minimum amount of fuel. But maybe it should have been done with the minimum amount of fuel until you reach 22 gph?? I think we'll have to do the test agin till we reach the 150%. D.
Bdflies
Between Projects
How exciting! You're getting real close to first flights!
I'm replying in a post, for Whee's benefit....
I have a "Red Cube" flow transmitter. I was all set to get a "Gold Cube", because of lower flow resistance in my no-pump installation. The tech guy at Sarasota Avionics assured me that the miniscule flow difference wouldn't be an issue in a low flow installation, like mine. Seems he was right. I did the flow tests with 10 gals per side. After the tests, I added 5 more per side. I have to de-fuel before doing the W/B. I'll try a minimum level test - at whatever point the front pickups are un ported.
It's been 6 days since I put gas in and still no sign of any seeping. I'm pretty sure they're not weeping fuel. How did you fix your leaks?
Congratulations on on your engine starts!
Bill
I'm replying in a post, for Whee's benefit....
I have a "Red Cube" flow transmitter. I was all set to get a "Gold Cube", because of lower flow resistance in my no-pump installation. The tech guy at Sarasota Avionics assured me that the miniscule flow difference wouldn't be an issue in a low flow installation, like mine. Seems he was right. I did the flow tests with 10 gals per side. After the tests, I added 5 more per side. I have to de-fuel before doing the W/B. I'll try a minimum level test - at whatever point the front pickups are un ported.
It's been 6 days since I put gas in and still no sign of any seeping. I'm pretty sure they're not weeping fuel. How did you fix your leaks?
Congratulations on on your engine starts!
Bill
Flygirl1
Patrol#241FLYING
A pro seal like product and smeared every welded rivet. That's what we have--red cube. At the moment I know I cannot take off in a steep climb with less than 5 gal in each tank on board, preferably more. Or at least I shouldn't.
Thanks, I truly was afraid when I pushed the button, nothing would happen, but it did and the Whirlwind Prop was so smooth. ;-) We just talked with our DAR and he should be here Mon or Tues!! D.
Thanks, I truly was afraid when I pushed the button, nothing would happen, but it did and the Whirlwind Prop was so smooth. ;-) We just talked with our DAR and he should be here Mon or Tues!! D.
Last edited:
Bdflies
Between Projects
Donna, if you're running an O-360A1A, like mine, fuel flow at WOT is 15 gph, so you're good to go at 5 gallons per tank. The recommendation is 150% of requirements, but you're still flowing 137%. That's still a good margin. The issue of taking off and doing a max performance climb out, with 5 gallons per side, might be a whole different conversation.
Have y'all done taxi testing yet?
Bill
Have y'all done taxi testing yet?
Bill
Flygirl1
Patrol#241FLYING
Bill, Dennis said the same thing on the fuel flow. No on the taxi test. The weather here has not cooperated and rather then put the cowls back on when the DAR wants them off, we'll wait. I just hope my taxi test doesn't turn into first flight, like some do. She's sitting there looking like a caged bird who wants out!! D. If anybody has any advice on first taxi or first flight, we'll take it. We've read up on it, but first hand info is welcome. D.
Last edited:
Bdflies
Between Projects
"First taxi and first flight"? Two subjects that probably qualify for individual threads.
I've done 3 first flights, only one being my own plane. I think the first question is whether or not to fly it yourself. There may be 'glory' in building a state of the art show plane, but there's nothing particularly special about flying it first, or being the second pilot. At the risk of stepping on toes, 10,000 hours of heavy jet time doesn't mean you're ready for that Bearhawk with a 6 cylinder Lycoming. If you're qualified (fairly high performance, taildragger, STOL) and current (how much have you flown in the last few years that you've spent building), should you fly it first? If something goes wrong, are you sure your decision process will focus on saving your bacon, at the possible cost of bending your baby? I'm getting close and I've been giving the subject a lot of thought. I'm qualified and current, but I just might watch the first flight. Haven't decided yet.
Bill
I've done 3 first flights, only one being my own plane. I think the first question is whether or not to fly it yourself. There may be 'glory' in building a state of the art show plane, but there's nothing particularly special about flying it first, or being the second pilot. At the risk of stepping on toes, 10,000 hours of heavy jet time doesn't mean you're ready for that Bearhawk with a 6 cylinder Lycoming. If you're qualified (fairly high performance, taildragger, STOL) and current (how much have you flown in the last few years that you've spent building), should you fly it first? If something goes wrong, are you sure your decision process will focus on saving your bacon, at the possible cost of bending your baby? I'm getting close and I've been giving the subject a lot of thought. I'm qualified and current, but I just might watch the first flight. Haven't decided yet.
Bill
Flygirl1
Patrol#241FLYING
I've struggled with that idea for two yrs. now. Someone with more experience in a glass panel would make sense here. But, if not me who??? Who do I trust with my baby?? I've had an engine out on take off once and I'm pretty sure I would save my bacon and fix the plane, but could somebody more experienced in things that can go wrong on first flights better understand what is happening and avoid any serious problems in the first place?? Yea, lots of ? in this matter. One thing I know for sure is i will NOT do high speed taxi tests. Too many horror stories involved with those!! D. DAR will be here Mon. and the forecast is good for the rest of the week. At least one of us will be first flight for sure. ;-)
The EAA has some good resources about first flight preparation. For example: http://www.eaavideo.org/video.aspx?v=1281396978001 and http://eaavideo.org/video.aspx?v=2681554330001
Also, consider participation in the free EAA Flight Advisor program. I am on the list as a Flight Advisor for the Patrol and meet the minimum requirements, though I'm more qualified and comfortable with the 4-Place. If you can't find anyone closer and would like to talk, please let me know.
Also, consider participation in the free EAA Flight Advisor program. I am on the list as a Flight Advisor for the Patrol and meet the minimum requirements, though I'm more qualified and comfortable with the 4-Place. If you can't find anyone closer and would like to talk, please let me know.
Flygirl1
Patrol#241FLYING
Jared, Thanks for the information!! Also the offer to talk. Mark G. Called as soon as he read my post and gave me all kinds of useful information, ( Thanks again Mark ). I'd like to go with Dennis on his, for some first hand experience of my own, but even if it was allowed, he wouldn't let me😊 I'll get his input when he gets on the ground. D.

Chewie
Well-known member
No Title
Winter's been rather annoying in our valley this year. My compressor drain froze multiple times and kids were even ice skating past my house on what's supposed to be a street.
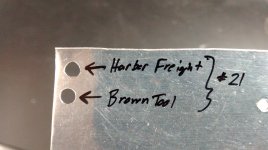
But this week I said hello to my spar again and picked up where I left off, trying to remember how to reassemble the spacers and getting the angles drilled in position. One thing I found interesting - harbor freight drill bits aren't supposed to be high precision, but I had no idea they were so useless. Thankfully I tested a couple bits first before deciding to use them. The hole was so triangular that I couldn't even slide a rivet in...no joke.
Winter's been rather annoying in our valley this year. My compressor drain froze multiple times and kids were even ice skating past my house on what's supposed to be a street.
But this week I said hello to my spar again and picked up where I left off, trying to remember how to reassemble the spacers and getting the angles drilled in position. One thing I found interesting - harbor freight drill bits aren't supposed to be high precision, but I had no idea they were so useless. Thankfully I tested a couple bits first before deciding to use them. The hole was so triangular that I couldn't even slide a rivet in...no joke.
Attachments
Flygirl1
Patrol#241FLYING
Today both planes received what I guess you could call their "birth certificates"!! Our DAR was impressed with the workmanship & handed us our certificates in short order.
Put the cowlings on and did some brake burnishing this afternoon, cycled the props a little and taxied around a bit. The P mags worked as advertised and the sky view seemed to work flawlessly with the cyl, temps all in the low to mid 300's and oil pressure around 75 for the duration which was about 15 min.
Did notice the rudder steering is way stiffer then either of us are used to. Meaning you need a lot of pressure to steer on the ground. Has anybody else noticed this? Turns work great with just a touch of break, but I don't think that is something that should be done on a regular bases.
Another milestone and the feeling is awesome. So keep up the good work people, it is so worth it!!
Donna. P.S Chewie--we feel your pain!! WX has been awful down here too. Lots of yard clean up after that last ice storm, but spring comes early to this part of the world. Also have seen what I thought was impossible--a drilled triangle hole!!
Put the cowlings on and did some brake burnishing this afternoon, cycled the props a little and taxied around a bit. The P mags worked as advertised and the sky view seemed to work flawlessly with the cyl, temps all in the low to mid 300's and oil pressure around 75 for the duration which was about 15 min.
Did notice the rudder steering is way stiffer then either of us are used to. Meaning you need a lot of pressure to steer on the ground. Has anybody else noticed this? Turns work great with just a touch of break, but I don't think that is something that should be done on a regular bases.
Another milestone and the feeling is awesome. So keep up the good work people, it is so worth it!!
Donna. P.S Chewie--we feel your pain!! WX has been awful down here too. Lots of yard clean up after that last ice storm, but spring comes early to this part of the world. Also have seen what I thought was impossible--a drilled triangle hole!!
Last edited:
Sebastian
J/M N324WC 4Place QB
No Title
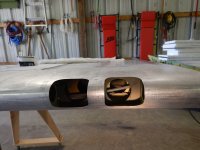
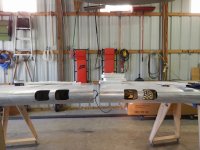
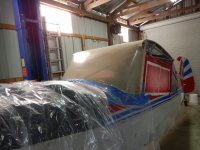
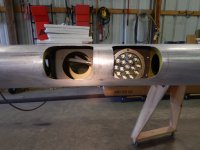
Seems like it has taken forever to get these landing and taxi lights cut in the wings and the brackets made. It's taken three full weekends, one to worry about cutting the wing and cutting it and two to build and mount the light brackets. I finished that today, now I have to make the lens for each light.
Today I also prepped the bottom windshield area for fiberglass of the bottom trim piece. I attached a few pics.
Seems like it has taken forever to get these landing and taxi lights cut in the wings and the brackets made. It's taken three full weekends, one to worry about cutting the wing and cutting it and two to build and mount the light brackets. I finished that today, now I have to make the lens for each light.
Today I also prepped the bottom windshield area for fiberglass of the bottom trim piece. I attached a few pics.
Attachments

Bdflies
Between Projects
Another milestone day! First engine run. Mine is a Bob overhaulled Lycoming O-360 A1A. I'm running a single Bendix mag and an Electroaire system. A buddy, who was standing fire watch, was amazed to see it fire right up. I don't think I saw 2 blades before it started! Runs great and the prop tracks straight.
Ah, airplane smells!
Bill
Ah, airplane smells!
Bill
Ray Strickland
Well-known member
I am wiring my panel--fun, fun,fun!
Chewie
Well-known member
No Title
Today I started pushing rivets into the second main spar. Lessons learned from the first spar are paying off.
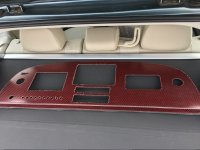
Un-bearhawk-related, I helped a local fellow with his custom panel for his Kitfox SS. It's a laser-cut carbon fiber piece that is turning out very nice. Dynon, ipad mini, map box from Vans, transponder and comms. A throttle bracket was cut from the scrap in the dynon cutout. I laid out the CAD work for a beer. And a guaranteed flight by year's end. So if any of you need panel layout work (and you have too much beer) drop me a line!
Also, in recent weeks I came across the FAA's "Aviation Maintenance Technician Handbook - Airframe" - I have no idea if these practices are intended to substitute for 43.13-1B but it's certainly more enjoyable to read and looks more updated. I like that these manuals cover the tools and equipment as well as the subject matter itself, starting at 30,000 feet and then zooming into the details. They are intended to prepare A&P students, that is, someone just starting out, so they are great for homebuilders as well. In contrast, I find 43.13-1B throws me into the weeds from page 1.
https://www.faa.gov/regulations_policies/handbooks_manuals/aircraft/amt_airframe_handbook/
Today I started pushing rivets into the second main spar. Lessons learned from the first spar are paying off.
Un-bearhawk-related, I helped a local fellow with his custom panel for his Kitfox SS. It's a laser-cut carbon fiber piece that is turning out very nice. Dynon, ipad mini, map box from Vans, transponder and comms. A throttle bracket was cut from the scrap in the dynon cutout. I laid out the CAD work for a beer. And a guaranteed flight by year's end. So if any of you need panel layout work (and you have too much beer) drop me a line!
Also, in recent weeks I came across the FAA's "Aviation Maintenance Technician Handbook - Airframe" - I have no idea if these practices are intended to substitute for 43.13-1B but it's certainly more enjoyable to read and looks more updated. I like that these manuals cover the tools and equipment as well as the subject matter itself, starting at 30,000 feet and then zooming into the details. They are intended to prepare A&P students, that is, someone just starting out, so they are great for homebuilders as well. In contrast, I find 43.13-1B throws me into the weeds from page 1.
https://www.faa.gov/regulations_policies/handbooks_manuals/aircraft/amt_airframe_handbook/
Attachments

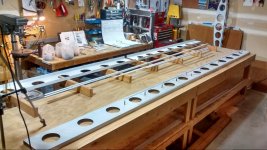
Today I started pushing rivets into the second main spar. Lessons learned from the first spar are paying off.
I *so* want to drive that first spar rivet, but dang it if I'm not paranoid about it! I need to get the attach angles aligned first, and then get the holes drilled in the spacer bars. Then things get real.
JimParker256
Bearhawk Enthusiast
Mark (Chewie) showed us the Airframe handbooks, and when I went to that site and poked around a bit, I also found the "Powerplant" handbooks, along with the handbook for Amateur Built & Ultralight Flight Testing. They can be found here: Other FAA Handbooks

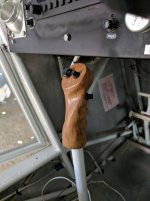

JimParker256
Bearhawk Enthusiast
How are you connecting the AP servo horn to the flight controls? And what criteria did you use to select between the Low / Med / High force servos? Single- or multi-axis autopilot? (Inquiring minds, and all that...)
I'll have all of the details in Beartracks, coming soon! I still need to verify that it all works.
whee
Junior Member
I'll have all of the details in Beartracks, coming soon! I still need to verify that it all works.
I know your trying to sell a newsletter but it's shit like this that makes me want to bag the forum. But I guess it's a choice for each of us. Maybe I should start asking for credit card info before I respond or other builders emails. ðŸ˜
Bdflies
Between Projects
Hmmm...
This morning, I had my coffee from a Bearhawk cup (thanks Jared). While enjoying that coffee, I perused this forum looking for comments or questions from like minded individuals. (Thanks Jared). It was warm today, so I wore a rather nice looking Bearhawk Patrol shirt. (Thanks Jared). While applying stripes, to my Patrol, a friend asked if there was a "Patrol" decal. I showed him the "Patrol" decals I have. (Thanks Jared). This afternoon, while perusing the forum again, I happen on the first ill words I've seen here, in my 18 months experience on the forum. And to my surprise, those ill words seem pointed at Jared.
For all his efforts, that some of us enjoy, I'm sure the profits might buy a meal out, for his family. I sure hope so.
Bill
This morning, I had my coffee from a Bearhawk cup (thanks Jared). While enjoying that coffee, I perused this forum looking for comments or questions from like minded individuals. (Thanks Jared). It was warm today, so I wore a rather nice looking Bearhawk Patrol shirt. (Thanks Jared). While applying stripes, to my Patrol, a friend asked if there was a "Patrol" decal. I showed him the "Patrol" decals I have. (Thanks Jared). This afternoon, while perusing the forum again, I happen on the first ill words I've seen here, in my 18 months experience on the forum. And to my surprise, those ill words seem pointed at Jared.
For all his efforts, that some of us enjoy, I'm sure the profits might buy a meal out, for his family. I sure hope so.
Bill
I know your trying to sell a newsletter but it's shit like this that makes me want to bag the forum. But I guess it's a choice for each of us. Maybe I should start asking for credit card info before I respond or other builders emails. ðŸ˜
I've rewritten my reply to this post about ten times so far, and I just can't find the right words to express myself here. So just let me say that I've never met a group more generous with shared information than the one featured here.
Folks like Jared and Zane host type specific forums for the benefit of the communities they serve, and I applaud them. All that you see here is out of his pocket, and done in his spare time. The newsletter is a small potato used to pay for this resource that we all get to use to collaborate at no cost to us.
I may have to rewrite this reply again...