

 Tweet
Tweet
For a long time, I have wanted to modify the standard Bearhawk flap handle. I think the original handle is perfectly suited as Bob designed it, where you are using a little flap occasionally flying from place to place (delivering engines) noting that Bob apparently enjoys slipping in flapless on some landings. It's small, light, simple, and out of the way.
So why do I want to change it?
I've found the original lever is simply too short for the recreational backcountry flying, which I enjoy the most. There is insufficient leverage and the pull force is too high for the last two notches are. After repeated use it quickly becomes tiresome. Yes - before you ask - I am always well below the flap speeds when I select a notch, as slow as possible But in some extreme cases, I need to actuate the flaps perhaps 150 times during the course of 30 or 40 landings, perhaps in as little as three or four hours elapsed time. What's more, 2/3rds of those flap movements are at the higher end of the force scale (3rd and 4th notch). Most days flying are not nearly that severe, but still that short lever makes it harder than other aircraft. I use full flaps and land slow for every single landing I make, except for strong crosswind days.
On a number of occasions I have strained my back by jerking the handle once I tire (Latissimus Dorsi) - on one occasion the strain was so bad, I could hardly use the flaps at all for several days. I had to seriously change the way I flew an approach during that time, to avoid repeatedly straining my injury. Notwithstanding my particular circumstances, that last notch is a distraction during an unwelcome critical part of any difficult approach. The small diameter (T11) bar is also difficult to grasp with big hands, and on a hot summer day with sweat on my palms, it's slipped from my hand on a few occasions. But not to worry, the solution was so easy to install!
That's why I decided to make this change. Your circumstances may vary. For most people, they might never want such a change.
What does the change include?
A picture is worth a thousand words...
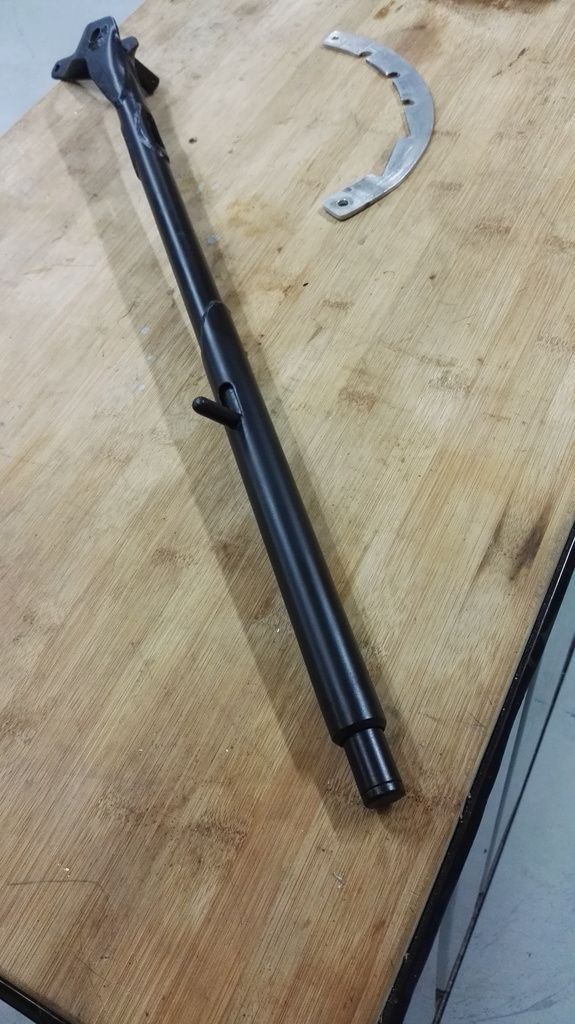
Here are some words anyway.... I overlapped a larger radius tube on the end of the existing flap handle (welding per AC43.13B). The extension is 6" long with a 2.5" overlap on the existing handle. That gives about a 50% longer handle overall. I lengthened the push-button by welding another equal diameter section onto the end, but first I pulled out the end plug to reuse on the longer button, it was just Loctited in. I welded in a section of the original gauge tube into the end on the extension, so the button has a snug-fitting guide to slide within. The button is now six inches further forward on the floor, which means I have to lean down further when I retract the flaps. To combat this, I added a second way to press the button. To do this, I put slot in flap handle and screwed a thumb-tab onto the innermost tube. This is located where the tip of the original flap button was. With this addition, I can retract the flaps without reaching further forward than before.
So how does it work? I haven't flow it yet, but the reduction in force is obvious. You could easily calculate the reduced kilogram (or Newton) force required, but let me put it in simple terms. Whereas before I could feel the springs growing tighter, now the handle has zero feeling. I don't notice any increase in resistance while I put each notch of flap on. I will report back again after I've flown it this weekend.
It sits above my fuel selector, but there is room for fingers in between without a pinch. The length is about the same as the floorboards / carpeted area, or just a fraction shorter.
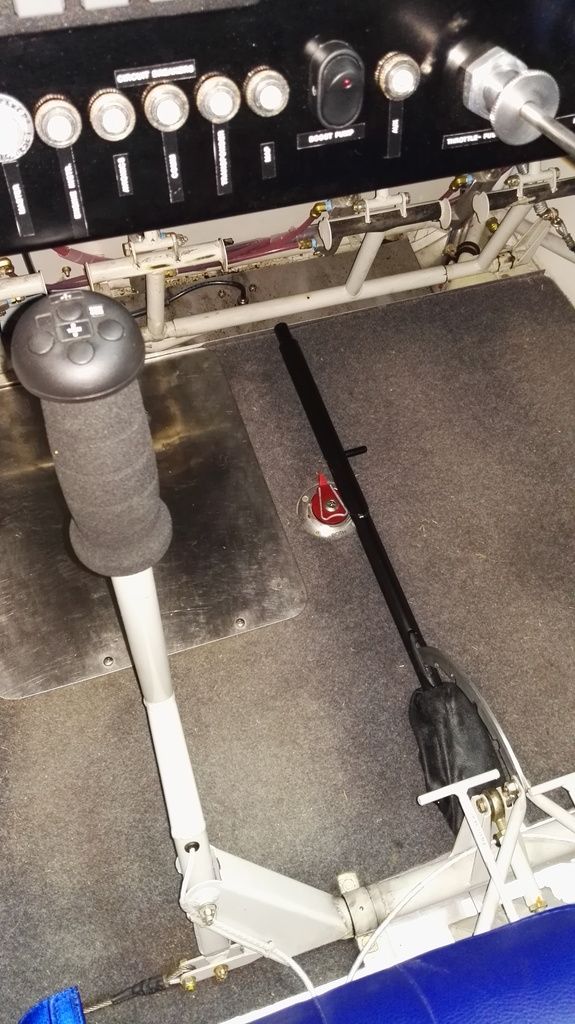
The new flap handle clears the dash with a big thumb resting atop the button. Again this was a 6" extension.
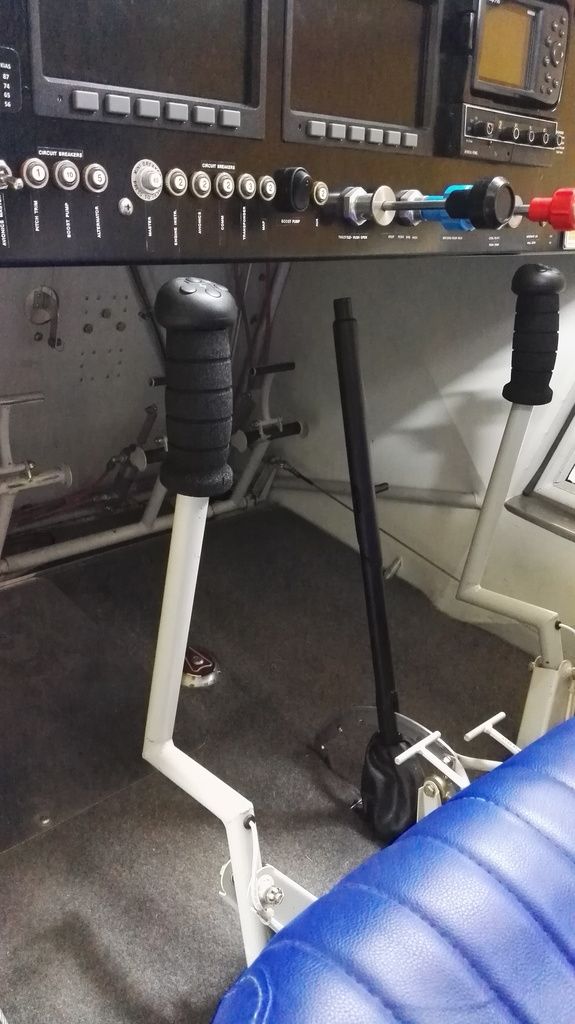
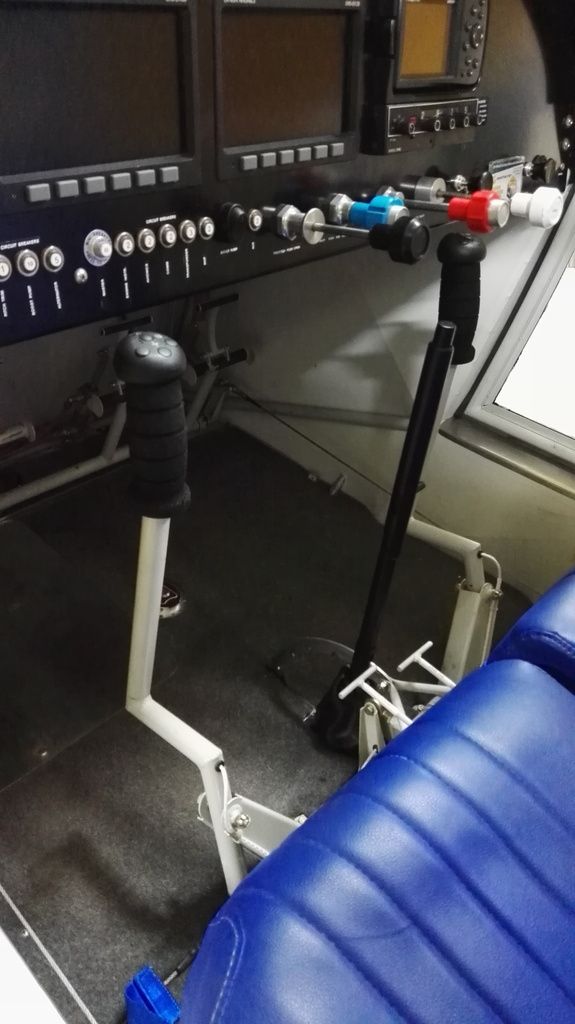
At full flap, the handle is right in front of the pilot, handy to the throttle, and to the joystick. It's also in-view, which is good. Incidentally, the control sticks can still go to full travel without interfering with the flap handle, or the pilots knee. As before this change, there is no accounting for passenger's knees... Note the flap handle is offset toward the passenger seat.
Operationally, this change means I have to observe the existing rules as closely as before. The longer stick will make it easier to select another notch of flap, while flying above the speeds listed in the POH. But then again, the pilot can exceed the operational limits just by lowering the nose at any time..... so PIC's responsibilities don't change whatsoever due to this mod. I am certain that this mod will be favourable in a backcountry flying situation, however I will confirm / deny after the weekend.
So why do I want to change it?
I've found the original lever is simply too short for the recreational backcountry flying, which I enjoy the most. There is insufficient leverage and the pull force is too high for the last two notches are. After repeated use it quickly becomes tiresome. Yes - before you ask - I am always well below the flap speeds when I select a notch, as slow as possible
But in some extreme cases, I need to actuate the flaps perhaps 150 times during the course of 30 or 40 landings, perhaps in as little as three or four hours elapsed time. What's more, 2/3rds of those flap movements are at the higher end of the force scale (3rd and 4th notch). Most days flying are not nearly that severe, but still that short lever makes it harder than other aircraft. I use full flaps and land slow for every single landing I make, except for strong crosswind days.On a number of occasions I have strained my back by jerking the handle once I tire (Latissimus Dorsi) - on one occasion the strain was so bad, I could hardly use the flaps at all for several days. I had to seriously change the way I flew an approach during that time, to avoid repeatedly straining my injury. Notwithstanding my particular circumstances, that last notch is a distraction during an unwelcome critical part of any difficult approach. The small diameter (T11) bar is also difficult to grasp with big hands, and on a hot summer day with sweat on my palms, it's slipped from my hand on a few occasions. But not to worry, the solution was so easy to install!
That's why I decided to make this change. Your circumstances may vary. For most people, they might never want such a change.
What does the change include?
A picture is worth a thousand words...
Here are some words anyway.... I overlapped a larger radius tube on the end of the existing flap handle (welding per AC43.13B). The extension is 6" long with a 2.5" overlap on the existing handle. That gives about a 50% longer handle overall. I lengthened the push-button by welding another equal diameter section onto the end, but first I pulled out the end plug to reuse on the longer button, it was just Loctited in. I welded in a section of the original gauge tube into the end on the extension, so the button has a snug-fitting guide to slide within. The button is now six inches further forward on the floor, which means I have to lean down further when I retract the flaps. To combat this, I added a second way to press the button. To do this, I put slot in flap handle and screwed a thumb-tab onto the innermost tube. This is located where the tip of the original flap button was. With this addition, I can retract the flaps without reaching further forward than before.
So how does it work? I haven't flow it yet, but the reduction in force is obvious. You could easily calculate the reduced kilogram (or Newton) force required, but let me put it in simple terms. Whereas before I could feel the springs growing tighter, now the handle has zero feeling. I don't notice any increase in resistance while I put each notch of flap on. I will report back again after I've flown it this weekend.
It sits above my fuel selector, but there is room for fingers in between without a pinch. The length is about the same as the floorboards / carpeted area, or just a fraction shorter.
The new flap handle clears the dash with a big thumb resting atop the button. Again this was a 6" extension.
At full flap, the handle is right in front of the pilot, handy to the throttle, and to the joystick. It's also in-view, which is good. Incidentally, the control sticks can still go to full travel without interfering with the flap handle, or the pilots knee. As before this change, there is no accounting for passenger's knees... Note the flap handle is offset toward the passenger seat.
Operationally, this change means I have to observe the existing rules as closely as before. The longer stick will make it easier to select another notch of flap, while flying above the speeds listed in the POH. But then again, the pilot can exceed the operational limits just by lowering the nose at any time..... so PIC's responsibilities don't change whatsoever due to this mod. I am certain that this mod will be favourable in a backcountry flying situation, however I will confirm / deny after the weekend.
Comment