

 Tweet
Tweet
I'm one of those guys who raised their door sills with the intent to build gullwing seaplane doors. Because of the new shape of my door sills, I'm having to make new patterns for the aluminum skin that covers between the sill and the lower longeron, around the strut attach and aileron pulley.
First, a few questions about using this method at all: I'm assuming it's to provide a stronger kicking surface than fabric for a high-traffic area getting in and out of the aircraft? Makes sense to me. Super Cubs have a bi-fold door that protects this area when loading. Eric Newton's manual just shows fabric used, so I suppose others are doing that too.
Since the skins only extend about halfway back, there's no obvious vertical tube to terminate the fabric. Page 43 of the quickbuild manual shows a piece of aluminum angle should be adel-clamped to the fuselage to provide this vertical fabric terminus. But, this is the only source for guidance on the task, and those photos are not that good.
Anyone have some better guidance? Pics?
I really dislike adel clamps for something that's a fixed point for fabric. I can weld tabs on, but I'd like to see some better detail of house others have accomplished this.
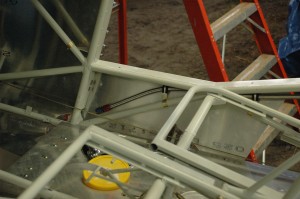
Another question: It appears that the lower edge of these skins is broken around the longeron, then the portion that folds under the belly screws to the belly skin that covers around the shocks. If one does not used the side skins, do you then weld tabs to the longeron to secure the belly skin?
First, a few questions about using this method at all: I'm assuming it's to provide a stronger kicking surface than fabric for a high-traffic area getting in and out of the aircraft? Makes sense to me. Super Cubs have a bi-fold door that protects this area when loading. Eric Newton's manual just shows fabric used, so I suppose others are doing that too.
Since the skins only extend about halfway back, there's no obvious vertical tube to terminate the fabric. Page 43 of the quickbuild manual shows a piece of aluminum angle should be adel-clamped to the fuselage to provide this vertical fabric terminus. But, this is the only source for guidance on the task, and those photos are not that good.
Anyone have some better guidance? Pics?
I really dislike adel clamps for something that's a fixed point for fabric. I can weld tabs on, but I'd like to see some better detail of house others have accomplished this.
Another question: It appears that the lower edge of these skins is broken around the longeron, then the portion that folds under the belly screws to the belly skin that covers around the shocks. If one does not used the side skins, do you then weld tabs to the longeron to secure the belly skin?

Comment