Bearhawk Aircraft Bearhawk Tailwheels LLC Eric Newton's Builder Manuals Bearhawk Plans Bearhawk Store

Announcement

Collapse
No announcement yet.

Fabric Pattern

Collapse
X
 
  • Filter
  • Time
  • Show
Clear All
new posts

  • Fabric Pattern

    Has anyone made up a fabric pattern for the 4 place?

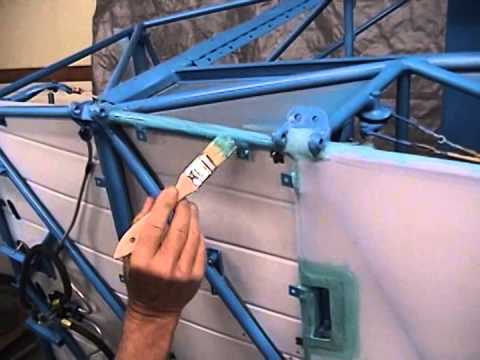
    I am planning on using three pieces for the fuselage. Belly and two sides with a join along the spine.

    Oratex in Focker red is what I will be using.

  • #2
    Simon, the three piece method is what most builders do. One piece across the belly glued to the lower longhorns, and two pieces that cover the sides and top with a sewn seam running on top of one of the stringers. Mark

    Comment


    • #3
      I don't know what Oratex requires for glue overlap. With Stewarts system I used 4 pieces, bottom, sides including vertical fin and separate top piece which gives you the top longerons to glue to and you would not have a long seam to sew. If Oratex does not allow fabric to fabric glue seam, you would have a short sewn seam in front of the vertical stabilizer.

      Comment


      • #4
        I inquired with the Oratex dealer and he said it was not allowed to have a fabric to fabric seam without underlying supporting structure. I was hoping to have a separate upper piece as well.

        Comment


        • #5
          Originally posted by Mark Goldberg View Post
          Simon, the three piece method is what most builders do. One piece across the belly glued to the lower longhorns, and two pieces that cover the sides and top with a sewn seam running on top of one of the stringers. Mark
          Mark, when you did your LSA in Oratex, did you sew a seam along the top?

          Comment


          • Mark Goldberg
            Mark Goldberg commented
            Editing a comment
            No. It was a glued seam 5-6 inches wide. The two pieces were glued together on a long table. Not on the fuselage. Mark

        • #6
          I used Stewart Systems and applied the fabric using the blanket method with no seam stitching. The process for the vertical stabilizer is described in the following video.

          Rob Caldwell
          Lake Norman Airpark (14A), North Carolina
          EAA Chapter 309
          Model B Quick Build Kit Serial # 11B-24B / 25B
          YouTube Channel: http://bearhawklife.video
          1st Flight May 18, 2021

          Comment


          • svyolo
            svyolo commented
            Editing a comment
            Rob I have seen that before a couple of times but that plane is different. It has a transverse member forward of the vertical fin to terminate fabric. I was hoping to be able to do that but there is no tube to terminate the fabric.

            I was really hoping to use separate pieces for the vertical fin like they did in the video.

          • robcaldwell
            robcaldwell commented
            Editing a comment
            I did not have a tube to terminate the fabric so I made sure I had plenty of overlap. Probably a good 6 to 8" inches. It really turned out great! I'll post a pic when get back to the garage.

        • #7
          Originally posted by svyolo View Post
          I inquired with the Oratex dealer and he said it was not allowed to have a fabric to fabric seam without underlying supporting structure. I was hoping to have a separate upper piece as well.
          You could epoxy a strip of aluminum in front of the vertical stabilizer to attach the fabric to.

          Comment


          • svyolo
            svyolo commented
            Editing a comment
            I think you would have to weld a piece of 4130 to the longeron. To epoxy aluminum you need some surface area. You would probably have to wrap at least half way around the longeron, but the fabric wraps this too so I don't think it would look that good. I am still looking at this, and a different solution for the D window. Fabric goes on soon.
        Working...
        X