Tell us what you did today on your Bearhawk Project

Yes there is alot of sanding and had a few wrinkles then add some fiberglass over those areas and added a couple layers at the inbourd edge to build it up for anchor nuts and to fit the wing. I also put a 1 inch peice of foam cut to the template, not sanded covered in packing tape so it wouldnt stick to make it easy to remove once cured. All this so it would fit into the wing nicely and blend in with the rest of the tip. I left the foam in place as it gives a lot of strength weight 3.5 lbs ea tip.
 
Good time to start winter projects. Working on panel and wiring since all the Garmin products have arrived. I do my initial layout on a CNC cut piece of Lexan to see if there are problems before I commit to the final Patrol metal dash. I am using a small hinged subpanel which will allow good access to all the remote mounted components behind the main dash.


​​​​​​​
 

Attachments

  • photo13007.jpg
    photo13007.jpg
    290.7 KB · Views: 1
  • photo13008.jpg
    photo13008.jpg
    781.9 KB · Views: 1
Then I went through your post with remeasured arms ... now I can't wait to get home and measure mine all over. If my gear measurement is wrong and yours correct I will be almost a full inch forward! yeesh.
 
Installed my insulated engine cover today! Perfect fit. I bought it from Bruce's Custom Covers during Oshkosh this year. I would have had it months ago but I was slow getting them the measurements and pictures they needed.

They asked for specific dimensions which I provided as well as I could. They produced a mock-up that included all of the velcro and buckles to check the fit. It wasn't perfect so I marked it up and took pictures. They used that info to make the final cover that fits perfectly. The colour matches really well too!

IMG_0002.jpg
 

Attachments

  • IMG_0002.jpg
    IMG_0002.jpg
    2.8 MB · Views: 0
A few more bits done. The last week was spent building a 52in capacity slip roller for a mechanic friend of mine that helps me on my project when he has time. I finished it this morning and we made these engine cowl doors. The good news is he gets to take this thing to his shop and I get valuable floor space back! The cowl doors came out great.

20221208_100354.jpg20221208_142326.jpg20221208_213008.jpg20221208_214719.jpg
 
AKKen07 I usually just ask Scott (BravoGolf) what he did. ;) But no I don't have a plan yet. Possibly cutting the hole first and drilling the base to the spar wherever it lands.
 
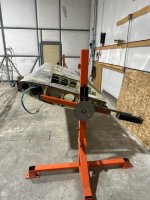
I had started building the wing when I lived in Colorado and when I moved back to Seattle I had crated it up for the move. In CO I had a basement so the wing jig was easy with a 4x4 from the floor to the ceiling. Here I am building in my hangar and it has 25' ceilings so no 4x4 to the ceiling. After working on the fuselage for a bit I finally built a wing jig / wing rotisserie to finish up this wing and assemble the second wing. I built the jig out of free 3" square steel that was used for the crate Eviation used to bring over their prototype fuselage of their electric airplane from Europe to Arlington, WA.

I built the jig bolted to female anchors in the concrete floor. The Jig also allowed me to bolt the attach arms in a fixed position so that I can use it as a wing assembly fixture and then unbolt them so that I can turn it into a rotisserie. I added a lead shot filled square tube as a counterweight so the wing would spin balanced. I used a 10" steel disk from a table saw as sanding disk and a discarded laptop mount from a police car to be able to index the rotation of the wing. If I need a new stop location, I just grind in a new slot. The unit works GREAT. I also plan to use it for painting the wing.
 

Attachments

  • photo13279.jpg
    photo13279.jpg
    73.2 KB · Views: 0
  • photo13282.jpg
    photo13282.jpg
    92 KB · Views: 0
  • photo13280.jpg
    photo13280.jpg
    55 KB · Views: 0
  • photo13281.jpg
    photo13281.jpg
    80.3 KB · Views: 0
  • photo13283.jpg
    photo13283.jpg
    93.5 KB · Views: 0
Nearly finished my rudder fixture, just needs paint, layout and locators. Horizontal stab fixture just needs a few locator blocks. Elevator fixture in work. Also built a mandrel for bending tubing. Made from some mahogany cutoffs from a neighbors home remodel. Will make one for 3/8", 1/2" and 7/8". Hope it works.
Gerry
Patrol #30
 

Attachments

  • 20221231_131421.jpg
    20221231_131421.jpg
    536.4 KB · Views: 0
  • 20221226_144610.jpg
    20221226_144610.jpg
    686.6 KB · Views: 0
  • 20221231_140308.jpg
    20221231_140308.jpg
    655.4 KB · Views: 0
  • 20221231_131454.jpg
    20221231_131454.jpg
    596.8 KB · Views: 0
That looks great John! That steel you used might become famous someday. Will you be able to paint your fuselage with this as well?
 
Chewie. I do not think it will work for the fuselage without major modifications .I was going to build something else for fuselage painting when that time eventually comes.
 
Hope you accounted for spring back in your bending mandrel. I made one with a tighter radius than I would need and adjusted the bend along it to match the full size layout.
 
I noticed you put triangular gussets on the LE tube blocks. I'm going to make an assumption that you are going to get the LE tube close, then force it into place at the end of the bending procedure. .When you bend your tube the goal is to have the piece drop in without any pressure one way or the other, in other words no induced stresses. I had more of a hard time of bending the tube in a horizontal plane, keeping it flat on the table. FWIW, here's how I did mine:

http://www.mykitlog.com/users/displ...&project=527&category=7248&log=144020&row=159

http://www.mykitlog.com/users/displ...&project=527&category=7248&log=144058&row=158
 
Thank you for your comments. The right angle locators are dual purpose, 1. Lift the leading edge tube up off the fixture surface 1.5" so the contoured ribs clear the top of the tool and 2 . Provide a location surface for the leading edge tube. I will make sure that the tube is flat and it's
final contour fits the tool with no preload. If it takes ruining a tube to get it right, I'll have some extra welding practice material.
 
Re-made fuel sight gages. Electrical has come to stop for now....just ordered the COMM, Xpndr, Intercom wiring harnesses. I like my Panel....Love it!! You can make these things without subcontracting everything out.

I took a Sport Air Workshop Fiberglass for RV's class and learned how I should have made my windshield fairing. Haha! Bob's method works fine and its sturdy so I'm sticking with it. But other fairings will be better!! Way Better!!

I'm still messing with my Gear Strut Fairings. The time I've spent on them is ridiculous and I'm still not quite there. EDUCATIONAL!! is the key word. Now I'm fabricating an end cap that will attach to the strut using a tube clamp....it will be sturdy and simple. I also experiemented with pour foam last night. A world of possibilities exist with this stuff!!

Click image for larger version  Name:	69672341440__3737766B-6386-4271-84C2-3EA66C7E870E (1).png Views:	0 Size:	5.48 MB ID:	80927Click image for larger version  Name:	IMG_5559.png Views:	0 Size:	4.98 MB ID:	80923Click image for larger version  Name:	IMG_5570.png Views:	0 Size:	5.63 MB ID:	80924
Click image for larger version  Name:	IMG_5545.png Views:	0 Size:	5.44 MB ID:	80926Click image for larger version  Name:	IMG_5545.png Views:	0 Size:	5.44 MB ID:	80926Click image for larger version  Name:	IMG_5545.png Views:	0 Size:	5.44 MB ID:	80926
Click image for larger version  Name:	IMG_5545.png Views:	0 Size:	5.44 MB ID:	80926
 
Haha, that's light. I weighed my IO-540 before hanging it, 414#, but that was with every engine accessory, 12 quarts of preservative oil, and the engine mount.
 
Trying to wake this thread up... Today I finished up the nutplates for the right main tank. Lotta nutplates! Moving on to the right aux tank now...
01968ebd449dc67fceb48a53475019887fbcaa05c4.jpg
 
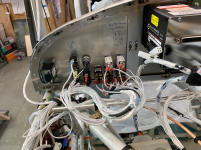
The electrical system is by and large done. I have PTT switches that still need to be installed and the EMS will be wired in connection with Firewall Forward tasks.

I designed the system using Bob Nuckolls' book Aeroelectric Connection. I used his Z101 wiring Diagram, and B&C products throughout. I wired it all myself with the exception of avionics wiring harnesses for the COMM and Transponder. I contracted out to Aviation Electrical Services in Palmer, AK for those items. The Instrument panel has three sub-panels, each face is removable and service loops allow it to pull away at least 10".

To prevent EMI issues I put all the possible noisy wiring on the right and firewall areas, and the the sensitive wiring like Intercom and avionics and future EMS wiring on the left and panel area of the boot cowl.

Click image for larger version  Name:	IMG_5849.png Views:	73 Size:	5.69 MB ID:	82060 IMG_5892.png
IMG_5747.pngIMG_5745.png
 
Last edited:
Scratch built companion update: the ailerons and flaps are done for now. Will need to had the piece to the back of the training ribs once they’re hung to insure proper alignment with the trailing edge of the wing. Sharing a couple quick photos.

Next up, wings!
 

Attachments

  • photo14078.jpg
    photo14078.jpg
    2.2 MB · Views: 0
  • photo14080.jpg
    photo14080.jpg
    3.3 MB · Views: 0
  • photo14081.jpg
    photo14081.jpg
    3 MB · Views: 0
  • photo14082.jpg
    photo14082.jpg
    3 MB · Views: 0
  • photo14083.jpg
    photo14083.jpg
    3.3 MB · Views: 0
Congrats. I see you riveted the angles to the ribs first instead of the spars. I wonder if that makes those corner rivets easier to get at. That was a tricky spot for me.
 
Yes, riveted the angels to the trailing ribs before final assembly. Couldn’t see any reason not to, and it makes for four very easy rivets. Chewie
 
Dry-fit the tailfeathers for the first time. Angle of incidence of the horizontal stab was perfect as per the plans, and after unsticking a stuck hinge gummed up with paint on the rudder, all parts move freely. Almost like it was made for it!
 

Attachments

  • BH Progress April 4 2023.jpg
    BH Progress April 4 2023.jpg
    1.5 MB · Views: 0
Dry-fit the tailfeathers for the first time. Angle of incidence of the horizontal stab was perfect as per the plans, and after unsticking a stuck hinge gummed up with paint on the rudder, all parts move freely. Almost like it was made for it!

Looking awesome! Which model are you building?
 
  • Like
Reactions: Nev
I absolutely can't take any credit for that! It was a very generous gift from Graham Johnson, who recently finished his Patrol. I did him a favor a while back and he offered me his rotisserie when he no longer needed it! I'm very grateful for his help, and aim to pay it forward when I'm done :)
 
Clint is great to work with. In my case I needed a custom exhaust for my IO-540 because of my cold air induction. Later I sent my heat muffs back because I needed the intlet and outlet offset. Such good service and quality!
 
IMG_4439.jpg
Today I took the tail fathers off. Then used the forge the Grandpa, Noah, and Dad, Frank, made when they built the farm shop many years ago, to melt lead for the elevator and aileron balance weights. Dad was a commercial and instrument rated flying farmer, who loved flying and would have love this project.
 
I love that forge!! I used a Coleman white gas stove and an old camping sauce pan to melt mine. The forge helps me imagine me father in law’s old barn. I have the anvil from it.

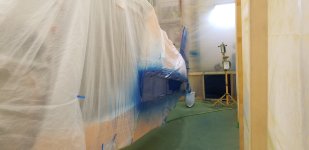
I’m painting aluminum. I shot the window frames and a few other items yesterday and took these shots of the today.

This is the third booth I fabricated and I believe building the booth wrong is easy to do and poses risk non of would accept if properly educated. Clogging up the exit airflow while painting large parts is the error to avoid.

IMG_0197.jpg
 
A bit more organizing and then got the shock struts cleaned, inspected and assembled... shoutout to Bruce (aka Spinning Wrench) for his help with a detailed checklist in PDF format to illustrate the process.


Click image for larger version  Name:	shock struts done.jpg Views:	19 Size:	403.6 KB ID:	84810
 
Last edited:
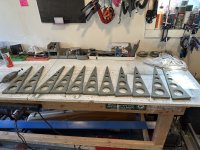
I finished building a home made 12 inch long brake and I am making the stiffeners for the ribs. I figured if I had about 200 of them to make- I might as well try to streamline it. Also continuing to make the .025 main outer ribs. That going pretty easily so far. ( I have not made scrap yet--- but the day is yet young ! ) I also have 5 more routered out blanks for the thicker inner ribs ready to hydro-form. :-)

Tim
 
In Canada, we must have a Transport Canada approved organization (MD-RA, Minister Designate - Recreational Aviation) perform inspections and sign off for experimentals at certain points in the build process. One of these is "pre-cover". The inspector must be able to inspect pretty much every nut, bolt, cotter pin, rivet head, weld joint, etc BEFORE you permanently close up any surface be it by riveting or fabric. He/she will leave you with official paperwork that details any observations/deficiencies and whether or not you can proceed to covering.

The MD-RA inspector is just a regular person who gets specialized training from MD-RA and has either a regular day job outside of MD-RA or is retired. Our local inspector in Eastern Ontario is actually a member of my EAA chapter and is a multi-experimental owner/builder as well as a retired AME (A&P in the US).

Yesterday was my "pre-cover" inspection which has been coming for 11 years on my scratch build 4pl. I was both nervous (what is he going to find) and confident (I'm sure this is a solid airplane and I don't see any major issues). Well, I passed my pre-cover so I am good to do, but he did find 7 deficiencies, a couple of which I am embarrassed existed. I guess after so long building your eye just doesn't see some small things like a few overdriven/squashed rivets is hard to reach places, etc.

In the end, I am super happy with the outcome and I know that it will take just a few days to rectify those things I really should have seen for myself. This means I can finish rivet the flaps and ailerons (once I fix the bad rivets), and finish rivet the skins on the wings. Then it is on to covering and paint. I have already wired, fitted, and smoke tested my avionics and panel, and the engine has been fitted, plumbed, and removed. I would REALLY like to fly to Osh next year but I'm not going to set myself up for disappointment; I'll assume that I have one more year of flying the Maule to Osh (oh, the tragedy....) before I get to show off the new airplane.

image.png
 
Glad the inspection went well. It is good to see your post and progress. Thanks for the visit at the Bearhawk dinner and seeing the bikes. Like Nev said, "Nice work!!"
 
Thanks, Roger! Linda and I really enjoyed our visit with you at the BH dinner. It was great to meet with a fellow cyclist (well, Linda is the REAL cyclist having done bike tours of Europe...) Hopefully we'll see you again next year.
 
Thanks, Nev. Although I started building a looooong time before you did, I have taken a lot of inspiration and motivation from your YouTube channel, your forum posts, and your blog. Thank YOU for sharing with the rest of us. And as Eric Idle would say, I have lovingly ripped off a bunch of your ideas and incorporated them into my build.
 
Wow, nice work Mark. Congratulations on the pre-cover inspection. If you need a hand for bucking the wing skin rivets, let me know. Michel.
 
Looks great Paul. Installing the wings for the last time felt like a big accomplishment. The fairings took way more time than I expected, hope it goes faster for you.
 
Fuel bay panel nutplate holes drilled and deburred (waiting on a few corner nutplates) - started on inspection panels
Access panel 1.jpg
 
Last edited:
I've been painting sheet metal over the summer.....but living life slows down my progress. July was work and OSH. Aug was work and a west coast wedding. Sept is work plus a Vacation in Durango to see/fish with two of my boys. Life is good and the airplane comes in third of fourth behind my wife, my four boys, and work.

When I started painting, I did not enjoy it. I found it stressful. I was slow. The paint job sends a message to everyone who looks at the aircraft. So it matters to me. This makes it a bit scary. My confidence was low, and so my concern was this data point....I will be stuck with however poor or good the paint gets applied.

But I've learned a lot, have become more comfortable. Painting is now easier and faster and unknowns are fewer. Fear is trounced with a healthy bit of experience and knowledge. I shoot for a trophy job, am satisfied a good amateur job. I only have one run so far in a hard to see area, and some very minor orange peel in places. I set up the shop better this time too. For example, this is my third paint booth. I have everything painted except the wings and the engine cowl. The cowl is not fabricated yet. My goal is to paint the wings before it gets too cold out, and finish the rest of the firewall forward next.

I paint using Stewarts Systems. I have a very good compressed air supply that complies with Stewarts Systems requirements. The paint booth air system is also working very well. Air movement through the booth is moved by an exhaust fan and exits outside using an elephant trunk with no filter. I learned that Exhaust Filters clog quickly with overspray and create a severe health hazard, so no filter is a good design I think.

Click image for larger version  Name:	71702941633__BF9B6079-2D20-4D78-8229-BA1168A9D700.png Views:	7 Size:	5.45 MB ID:	85612 Click image for larger version  Name:	IMG_0365.png Views:	7 Size:	5.44 MB ID:	85613
Click image for larger version  Name:	IMG_0379.png Views:	7 Size:	5.34 MB ID:	85614 Click image for larger version  Name:	IMG_0362.png Views:	6 Size:	5.29 MB ID:	85615
 
Last edited:
After a lengthy layoff from Patrol work due to a fully torn rotator cuff (argument with a mountainside in Ecuador... the mountain won as they usually do) and a fun bit of surgery to reattach with lengthy rehab, back at it this weekend with another new Patrol builder out of my home field (KFDK - Frederick Municipal, MD). Worked on some flap weldments and a bit of strategerizing on further collaboration. Nice to have a very experienced rag, tube, and sheet metal guy around (Bronze Lindy for his radial-engined bipe, and a lovely Mustang 2 in his hanger). Never 'misunderestimate' the value of teamwork, right? My homework is to finish these up and fab some additional frame brackets, which is within current physical limits. Thinking I will like TIG versus OA - especially for the small stuff. Truth in advertising... I watched the welding to get the technique down and did some fab work (first time in someone else's work space is always a watch/learn/try not to break anything). Will get some hands-on once I fab some trial stuff before tackling my ail/flap frames and smaller weldments.

Should be at Bob's this October for the fly-in, either in the Hatz or the Aircam if weather cooperates, and cameras in hand. Click image for larger version  Name:	IMG_4701.jpg Views:	0 Size:	2.24 MB ID:	85627
 
Last edited:
...The paint booth air system is also working very well. Air movement through the booth is moved by an exhaust fan and exits outside using an elephant trunk with no filter. I learned that Exhaust Filters clog quickly with overspray and create a severe health hazard, so no filter is a good design I think.
Nice. What are you using for an exhaust fan and how are you dealing with paint build up on same?
 
https://www.vevor.com/portable-util...MIyvjFj_3IgQMVNBWzAB1oVgPpEAQYAiABEgIGc_D_BwE

I used a Vevor utility blower fan. The trunk and the fan were purchased as a unit. It’s well built but loud.

To prevent paint buildup on the blower I sprayed the unit with spray silicone before I used it. So far so good but it’s been about six sessions of small parts. This serves as a good reminder to inspect the fan blades and clean them prior to spraying the wings. My hope is If I have build up on the blades that it comes off easily due to the silicone.
 
Last edited:
I've been trying to find a reliable source of materials for the scratch built Model 5 here in the Middle East - possibly from Australia or China? Or is the U.S. my best bet? Now I gotta go to work...
 
Click image for larger version  Name:	IMG_0531.jpg Views:	0 Size:	2.20 MB ID:	85752

I had three days at home between trips. I need 70f (21c) to shoot paint, it’s now October and I’m concerned about paint & shop temperature. My paint booth conflicts with my shop’s ceiling mounted tube heater. So I hustled and got the first wing painted yesterday. It took one day to etch and prime the whole wing. The next day I sprayed the wings bottom aft of the lap joint seam about 10” aft of the leading edge, On day three I painted the leading edge and top of the wing.

I don’t like having a time constraint when I build. It worked though. Hopefully I can get the left wing paint before it gets too cold when I’m back.

I’m using Stewart’s System. I’ve never painted before building the Patrol. I went to a class and I constantly re-read the manual and product literature. I’m feeling more confident and seeing better results than when I started.

I see no drips. Minimal orange peel. A rotisserie is a highly valued tool. It’s beyond “nice.” I do a better job with less effort. When painting that pays huge dividends. Get a hold of a good one that can adapt to the fuselage and the wing.
 
Last edited:
Last Friday was main and aft spar bend day at a local industrial sheet metal shop… a 12’ shear and 12’ knife brake are wonderful things. Will have to tweak flange angle, but not too difficult.
Click image for larger version  Name:	IMG_0057.jpg Views:	0 Size:	2.09 MB ID:	85815

Sat PM and Sunday was fab of the remaining flap and aileron frame brackets and start of welding them up.

Click image for larger version  Name:	IMG_0056.jpg Views:	0 Size:	2.20 MB ID:	85816

1/3 of my spar bench is busy masquerading as a printer bench in the garage, but will be reverting to primary use once I figure out where the snow blower goes… who parks a snowblower in the middle of a perfectly good shop?

Click image for larger version  Name:	IMG_0057.jpg Views:	0 Size:	2.09 MB ID:	85815
 
... which I would love to take credit for, but primarily the work of my build-buddy, Carlo. Also the reason why I am swapping over to TIG... when you have a serial tube builder handy for welding instruction, you go with his approach and consider the cost for the swap to be cheap tuition. Carlo gets the benefit of all the jigs and fixtures plus rubber press and flow-forming technique for ribs. I don't feel too bad - probably saved him an easy 200 hours on templates and forms, and having two heads to work through some of the fuzzy spots in the plans is useful.
 
I reminded myself of why I am building… Carlo’s Hatz running a Rotec radial… did some streamer cuts after this… nice way to spend a mid-Fall evening with summer temps. Did get my Swag finger brake running on my 20
ton press after finishing the last of Carlo’s ribs. Should let me get the last of the 4130 stuff out for the wings.
 

Attachments

Back
Top