

 Tweet
Tweet
I didn't drill all the way through the balance tube. I did countersink the tube and dimple the rib and the nose skin. CCC - 44 stainless rivets from Wicks were used (I just double checked the package). My balance tube holes in the ribs are very close tolerance as well.
-
-
Following the plans for my 4-place, I'm trying (and struggling) to use flush stainless steel rivets on my flap and aileron trailing edges. I'm using Cherry CCC-42 stainless rivets (w/stainless mandrel), but it seems the force required to break the stainless mandrel is so high that it's occasionally pulling the bulb of the mandrel all the way through the aluminum material. This leaves the mandrel broken off above the head of the rivet, and probably a weaker riveted joint:
rivet.png
I'm getting the best results by drilling a #31 hole (vs #30) before dimpling, which gives a somewhat "sloppy" fit for the rivet after dimpling (and before pulling). The pulled rivets seem secure but still "overpulled" as shown in the photo about 1 time out of 10.
I tried (in scrap) drilling to #40 and then dimpling with a 1/8 dimple die (the .125 nose on the dimple die did a nice job of expanding the #40 hole). The dimpled hole looked great and the rivet "slop" was gone, but I started getting cracking around the hole (on the shop head side) when I pulled the rivets.
Any suggestions would be welcome! I'm pondering using backup washers (SS) or going to aluminum rivets...
Comment
-
Thinking Cherry Max CR3212-4-2... shear looks good, and they seem to pull more consistently in my spare parts aileron test piece than stainless CCC-42. About $122 worth of rivets for flaps and ailerons, so not cheap. Less issue with dissimilar metals. The grip length is 0.013 shy, but I'll try to get some 3214-4-01 to see what works best. The minimum hole size I can dimple using a -4 tool without cracks is a #31, which produces aLast edited by SpruceForest; 08-24-2024, 07:54 AM.Comment
-
I ended up using the following process after consulting with my EAA Tech Counselor:
- Prime "shop side" of the stainless Cherry CCC-42 rivets
- Drill #40 and deburr
- Dimple with -3 tool
- Drill #30
- Deburr again
- Set rivet
The result was a very consistent shop head, with no "pull through" of the SS mandrel through the aluminum sheets.
The -4 rivet head in a -3 dimple sits a bit proud of the surface, but it should be cosmetically fine after fabric covering.
YMMV... On to the next challenge!Comment
-
It was good you stayed with stainless rivets rather than aluminum. I just rebuilt and covered a set of Helio Courier ailerons and most of the cherry max rivets used along the trailing edge and rib intersections were loose.Comment
-
Had a long discussion with my A&P-AI last night at the usual weekend summer's evening hanger BBQ re: relative merits of using driven rivets, SS hardware-store consumer pull rivets, the aviation-adjacent CCC-42 and CCP-42 SS pull rivets, and Cherry MAX pull rivets. His opinion (and you know what an opinion is worth these days) was:
- Use AD driven rivets if at all possible, due to nominal shear strength and compatibility with other materials used in aileron and flap TE area. Carlo's Patrol aileron and flap TE's were all done with AD3 bucked rivets, and if the reader has already built up and riveted his or her flaps, etc. it gives you some idea of his skill level and range of available bucking bars. This one is amazing for working inside the TE or snugged up tight to a rib, but I suspect you'd have to find it on eBay or other second-hand site, as it does not appear to be cataloged on the usual sites.
IMG_0973.jpg IMG_0972.jpg IMG_0971.jpg
- Second choice would be Cherry MAX due to equivalent-to-AD driven rivet shear strength for same size and authorization for direct replacement of driven rivets in many applications as well as lack of any heightened probability of galvanic corrosion. He also noted available NAS 1079 reduced head size (so-called 'oops rivets'), which would answer for Dpearson's prep post above and still produce a flush head without shaving with a carbide cutter).
- Third choice would be the CCC-42 and CCP-42 with proper hole & corrosion prep and care in driving, with the understanding that Bob would not have called out an inherently low shear strength fastener if the actual shear strength requirement was anywhere close to solid rivet limits in double shear (stainless steels usually have relatively low shear strength numbers as mentioned)
- Last choice would be hardware store stainless steel pull rivets, primarily because the level of QC and conformance to material and process spec for a Chinese-manufacturered consumer-grade pull rivet would be anyone's guess.
On the Helio Courier aileron rebuild, given the number of Cherry MAX and Cherry LOK rivets used in commercial aviation for routine replacement of driven rivets due to required shear strength and authorization as a direct replacement for those solid AD and NAS rivets, I have to ask...
First - were the Cherry Max factory-installed rivets or had the aileron been rebuilt prior to your rebuild?
Second - were you able to do some post-mortem work to determine whether the correct size of Cherry MAX was used? I ask because - and this comment is intended for the more general audience rather than than Steve W. - the hole size for a Cherry MAX is a lot more critical than a driven rivet. One of the reasons why there are multiple diameters of each size (-4, -5, etc.) of Cherry MAX (nominal and ~ 1/64" oversized) is that larger diameter is specifically for rebuild use. If a Cherrymax is replacing a driven rivet or a nominal-sized Cherry MAX, the hole has nearly always have been enlarged over the nominal size, so use of an oversized Cherry MAX is necessary. Use of a nominal-sized Cherry MAX in an over-spec sized hole will produce a rivet much more likely to work and loosen.
If the aileron and flap is opened and dimpled with the usual #31/-4 bit & dimple die (minimum flat sheet hole size to get a -4 dimple die in), the resultant hole size is about .140-143 in the 0.025 material Bob calls out for ribs and TE. Reaming to .144 (#27 drill size) gets everything to Cherry MAX recommended hole size for the oversized pull rivet and avoids the heavy deburring seen with a #27 drill.Last edited by SpruceForest; 08-26-2024, 09:17 AM.Comment
-
“First - were the Cherry Max factory-installed rivets or had the aileron been rebuilt prior to your rebuild?”
That’s an good question. Of the four ailerons I was given to try and make a pair, they all had cherrys used on the TE. Two of them I would guess had very old covering. The other two had medium fabric. The prints indicate heavy fabric is to be used which would suggest they were recovered sense new. I had the blue prints in my hand when I started the repairs last fall. I can’t remember if the callout for those rivets indicated cherrys or not. I used OS’d rivets on all the loose holes. I do know there were loose rivets on all four of the ailerons.
-
-
Thanks! Excellent info!
Had four U-10A (Super Courier) and two UB-18A (Twin Otter) that I was supposed to have owned as a Special Forces Aviation Detachment CO in the late 1980's/early 1990's... all of the U-10's had been banged up in landing or takeoff mishaps by the Guard or AC - mostly up in AK, so never saw them despite years of trying to get those airframes into depot and reissued. The Army never bought the required number of Twin Otters to support the SF groups that retained their own aviation through 1995... I got 4 x OH-58 and 2 x UH-1H or 4 x UH60A instead. Would have preferred the airplanes for our mission. We briefly considered leasing a couple PC-6 Turbine Porters for the mission, but we were already shutting down the Group and I needed a new job worse than continuing to piss off AVSCOM's equivalent of a class desk. Bummer!Last edited by SpruceForest; 08-26-2024, 10:26 AM.Comment
-
So just a bit more off topic about the Helois, the guy I repaired the ailerons for has one flying, one he’s building up that he wanted the ailerons for, and three tractor trailers full of parts, fuses, wings, NOS. He bought it all somewhere in the US and shipped it up here to Alberta. He has several wings he wants me to re skin so Ill get a better idea what he has for inventory when I have a look at what’s involved in the repairs. Its suppose to be a large pile of stuff. Is there a market out there for Helio parts or is it a one man’s treasure thing?
-
-
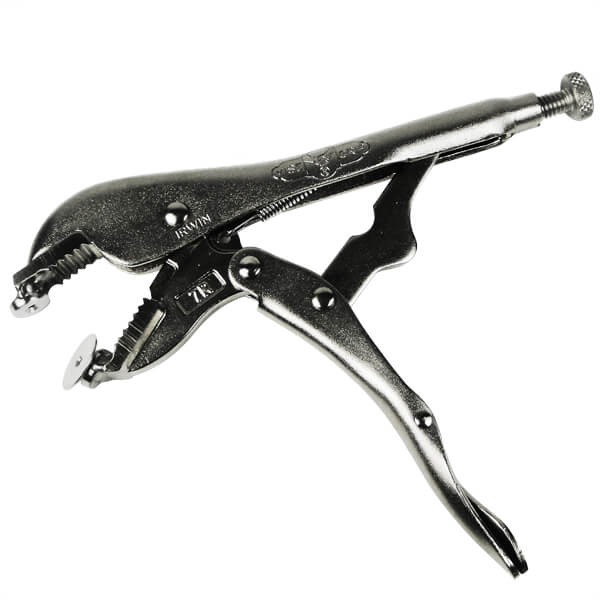
FWIW, I had no issues on either 3/32" or 1/8" countersinking on TE or flap/aileron ribs using the Avery ViseGrip-based dimplers. These are essentially a set of male/female dies welded to a modified set of ViseGrips... very well made.
Three things :
1) You may have to grind in just a little relief on the female die to get into those really tight spaces, but does not affect function
2) For best dimple, set up for a very firm closure, then work the release using a 1/2" x 1" or so, 10 inch long piece of maple... insert between handles, then twist... allows control of the tool and avoids the snap of the release lever
3) Buy both sizes ... those pop rivet dies work well, but they are much slower than the modified Vise Grip tools, and once you have the tools, you'll use them for more than just the tight stuff.
4). Remember to put the aluminum spacer back between the dies for storage - I have not had an issue, preserving the dies helps provide a long working life
I have an air over hydraulic squeezer I used for most of the flap and aileron dimpling, but especially around the nut plates for the hinges, it was way easier to use the ViseGrip-based dimples, as well as the aforementioned rib ends and TELast edited by SpruceForest; 08-27-2024, 02:25 PM.Comment
-
Yes, a Vise Grip dimpler is key to these tight spaces. When I realized I needed one I made a "home brew" 1/8" version by drilling and countersinking a bit of scrap steel (harvested from a wing crate) for the female side and then MIG welding it to the nastiest pair of Vise Grips I had. I notched the other jaw of the Vise Grip to allow for indexing a "factory made" male dimple die. And of course removed material as needed for work piece clearance. They work quite well. I'll take the link from SpruceForest and buy a 3/32" version from Spruce. Those look a bit less 'redneck' than mine")
Dimple1.jpg Dimple2.jpgComment
-
Comment
-
I miss the days when I was surrounded by redneck mechanics that could get a seemingly impossible thing done in an afternoon with whatever was at hand. Special tool needed? Never too special not to get locally fab'd out of water pipe, bits of hardware from the local ferreteria, and a stick welder.
SpecOps was very different from the regular service... when we were headed down-range, they handed each of us young captains a pile of American Express travelers checks and told us to use them as we saw fit (but be prepared to 'splain how we spent the money in the unlikely and unfortunate event that we were ever a guest before the House Select Committee on Junior Officers Doing Super-Dumb Stuff). A big chunk of that universal currency was paid out for local transport and the usual stuff seen in the banana republics of CA and SA.
After the first couple weeks operating out of a coastal site know for its lovely beaches and excellent aerial gunnery opportunities, we had to shift operations to the Amazon-facing side of the mountains. After moving nearly everything else necessary with our organic transport -a small fleet of rental Chevy/Izuzu Troopers, Mitsubishi SUVs, and the odd mini-pickup - we still had one very large, very heavy box of around 7000 lbs to move from one side of the mountains to the other along the usual Andean mountain roads (no semis on what were essentially single-track goat paths that someone had laid gravel on - ravines along the series of cliff-edged switchbacks littered with vehicles that had made the 1500'-3000' plunge). Despite some close calls, our local dude and his flatbed got us there in one piece with just the one roadside bandit persuaded to seek easier prey after a game of 'you show us your semi-functional, poorly maintained Russian antique firearm and we will show you way, way more hardware.'
All was good when we arrived at the jungle base of the group we were working with... other than the lack of a loading dock we had been assured was there. My 'red neck mechs' got a very, very used, WWII-era D7 running - a feat in and of itself - then built us a loading dock and ramp from rebar, steel plates, ironwood-like timbers used by the locals for heavy framing, and lots of local jungle soil by AM chow. Steady parade of busted stuff at our door for the next couple weeks... left that place in excellent shape and with 20 pairs of local jump wings from an obliging, very grateful base CO (regular troops collect pretty campaign ribbons - we rather irregular guys preferred foreign jump wings).
Was back there about 10 years later with a very interesting gentleman claiming to work for the Department of Agriculture (career SpecOps operator prior to that ... was messing around with small boats on the border during my first trip down) and the locals were still using that field-expedient dock as the primary truck load/unload point for a 2500 person permanent base they had built on the remains of a 1940's oil exploration site. The main drag through the village crossed the runway, so you had traffic lights at the mid-field... DC-3 with open overhead bus-style racks for bags came in every other day... good times.
Red neck mechs, indeed.Last edited by SpruceForest; 08-29-2024, 05:46 AM.Comment
-
A few things I saw using spare TE stock and mocked-up ribs (scraps of 025 which mimic last 2" of ribs) and pulling TE rivets....
Back-side mandrel clearance is an issue with the CCC-42 and even more critical for Cherry Max. For those that have not yet drilled the TE/rib holes, think about assembly order and available offset to deconflict those pulls. With min edge distance at front and back of the rib and TE, there is some room to move things if you pre-plan. The CCC-42 is actually pretty tolerant of not being perfectly seated at the beginning of the pull as the shop head does not expand in the same way as a Cherry Max, but using an electric or air puller gives you a split second at most to get things seated as the mandrel clears the already-pulled, opposite-side rivet. The Cherry Max is pretty intolerant - it must be firmly seated prior to pull or interesting things happen will get your attention. If a Cherry Max does not seat, I should suggest not trying to begin the pull.Comment
-
Yup. I learned that the hard way long ago. Definitely lots of down contact pressure before and during the pull. I re skinned a set of Wipaire C3200 wheel skis for a buddy a few months ago. When I drilled off all the forward fairing CR rivets, most of the heads were not down against the surface of the fairing and were like that from the factory.
-

Comment