You are using an out of date browser. It may not display this or other websites correctly.
You should upgrade or use an alternative browser.
You should upgrade or use an alternative browser.
Tell us what you did today on your Bearhawk Project
- Thread starter Bcone1381
- Start date


Chewie
Well-known member
It's definitely a work in progress. Most of my education so far was over youtube and text message; not sure I would make the best teacher. Practice practice practice. But do check these out if you're gas welding:
https://www.youtube.com/watch?v=M0uHBCkics8
https://www.youtube.com/watch?v=Q7Vv_gZfHgo
https://www.youtube.com/watch?v=M0uHBCkics8
https://www.youtube.com/watch?v=Q7Vv_gZfHgo
Last edited:


Ray Strickland
Well-known member
Last week I hung the engine on my 4-place for the last time, so I’ve been doing firewall forward hook-ups, wiring, plumbing, attaching accessories, etc, which will probably continue for another 2 or 3 weeks; then it will be time to hang the wings...starting to get a little excited about this 13-year project getting ready to fly.
Last Friday I discovered that the typical dynafocal engine mount ring is not compatible with the Lycoming IO-360-A3B6D; the ring blocks access to a necessary engine oil port...had to spend part of today using a torch and some big pliers to reshape the ring slightly to provide clearance...got ‘er done!
Last Friday I discovered that the typical dynafocal engine mount ring is not compatible with the Lycoming IO-360-A3B6D; the ring blocks access to a necessary engine oil port...had to spend part of today using a torch and some big pliers to reshape the ring slightly to provide clearance...got ‘er done!
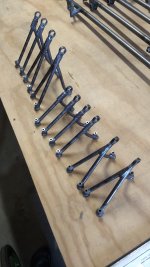
I made 13 of my 15 nose ribs (one side). 2 of those were test ribs which I prob wont use. I can make one now in
about 15 min. Next I am making a "little" brake to fold the rib stiffeners. also making a "plug die" to push the circular
flanges from 20 degrees to 30 degrees. My rubber pad doesnt get it quite all the way. Have to buy more .025 sheet next week.
I am looking at that like progress
Tim
about 15 min. Next I am making a "little" brake to fold the rib stiffeners. also making a "plug die" to push the circular
flanges from 20 degrees to 30 degrees. My rubber pad doesnt get it quite all the way. Have to buy more .025 sheet next week.
I am looking at that like progress
Tim
Attachments


Well done!

Sebastian
J/M N324WC 4Place QB
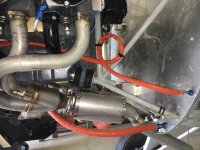
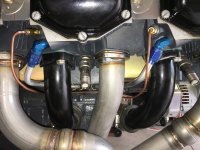
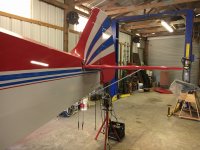
Haven't posted any progress in awhile but I now have a few things that I have accomplished.
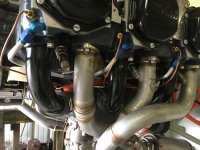
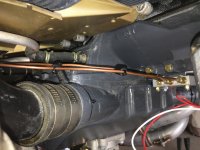
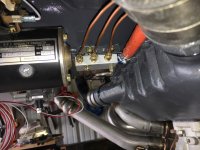
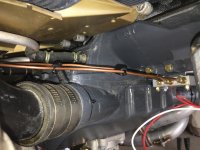
#1 I got my fuel primer plumed.
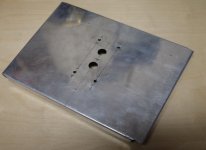
#2 Finely figured out my panel layout and had it water jet cut. (that is an awesome piece of equipment would recommend it to anyone) had to do a few modifications myself since I forgot that the slots I had them cut weren't the size of the nuts that hold the controls.
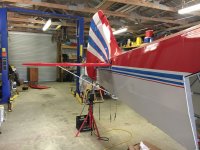
#3 Started putting the tail feathers on today. Unfortunately I didn't have all the right size hardware. Figures I have a pretty good selection but there is always something I'm missing.
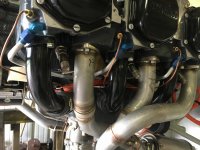
I'm attaching some pictures of the above mentioned.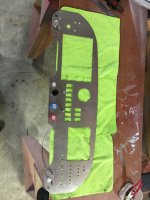




#1 I got my fuel primer plumed.
#2 Finely figured out my panel layout and had it water jet cut. (that is an awesome piece of equipment would recommend it to anyone) had to do a few modifications myself since I forgot that the slots I had them cut weren't the size of the nuts that hold the controls.
#3 Started putting the tail feathers on today. Unfortunately I didn't have all the right size hardware. Figures I have a pretty good selection but there is always something I'm missing.
I'm attaching some pictures of the above mentioned.
Attachments




RatherBFlying
Well-known member

Olm
Junior Member
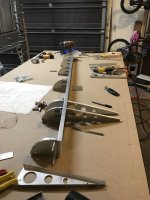
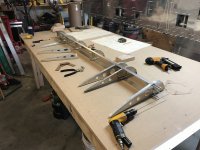
Let me tell about my progress. One aileron was assembled after about 3 month...
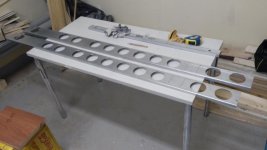


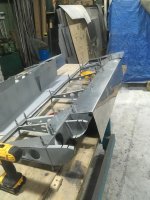

Attachments
-
 30262166_1868571929829821_237108823536435200_n.jpg92.5 KB · Views: 0
-
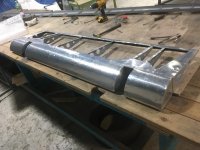 30724914_1880434325310248_3349249852864200704_n.jpg121.2 KB · Views: 0
-
 30740987_1880434328643581_4760294953475637248_n.jpg116.7 KB · Views: 0
-
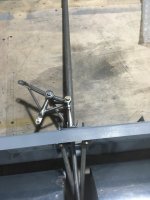 30729529_1880437795309901_940085813297807360_n.jpg97.7 KB · Views: 0
-
 30729529_1880437795309901_940085813297807360_n.jpg97.7 KB · Views: 0
Last edited:
RatherBFlying
Well-known member
Do the Patrol plans include lightening holes in the flap and aileron spars? My 4-place plans don't show any, I've seen pictures from various build threads that show it both ways, some with holes, some without.
Shoncollins
Member
Shoncollins
Member

Archer39J
4 Place Kit Builder
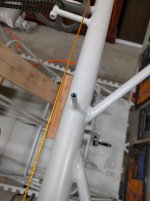
Finally finished the starboard skylight former. Used the steel wing formers to bend the aluminum u-channel sourced from my local metal supermarket. I threaded the fwd standoff to accept a #10-32 screw (NAS1801-3-6 specifically) and bent a steel bracket to accept the u-channel. The aft stud was wide enough I felt comfortable just popping a AN3 through it with some washers to secure the u-channel laterally. The aft brackets attach to the crossbar made from stringer material and are themselves fabricated from an L-bracket I pulled off a 737 galley. After almost being bit by my miter saw I decided snapping and grinding was the way to go, I really need a band saw...
Now to do all this again for the port side.
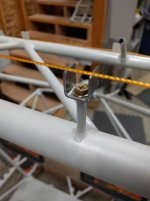
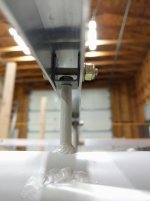

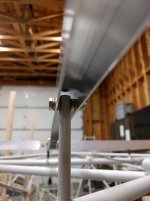

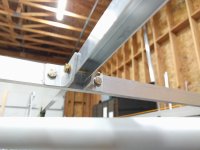

Now to do all this again for the port side.
Last edited:
Ray Strickland
Well-known member

Ray Strickland
Well-known member

svyolo
Junior Member
I finally got my new air tools up and running. My Makita compressor was DOA on arrival from where I bought it originally. Home Depot in Guam. I bought a California Air Tools compressor for HomeDepot.com. Very quite. The Makita would wake the dead.
Pounded my first rivets. Countersunk a few holes with a squeezer. Drilled a bunch of holes with an an air drill. Now just have to figure out how to do it correctly.
Pounded my first rivets. Countersunk a few holes with a squeezer. Drilled a bunch of holes with an an air drill. Now just have to figure out how to do it correctly.
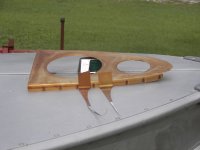
Working on perfecting the alodineing of the nose ribs. They are looking MUCH nicer now that I have diluted my alodine
3:1 with water. Nice pale gold color ! This was the first one I did -it was WAY too dark-- I scotchbrited it mostly off and re-did
but its all splotchy. Probably fine- just Fuggly. About the 3-rd one they were really nice looking -- like factory.
They will get green eco-poxy soon. Then the stiffener riveted on.
Tim
3:1 with water. Nice pale gold color ! This was the first one I did -it was WAY too dark-- I scotchbrited it mostly off and re-did
but its all splotchy. Probably fine- just Fuggly. About the 3-rd one they were really nice looking -- like factory.
They will get green eco-poxy soon. Then the stiffener riveted on.
Tim
Attachments

JimParker256
Bearhawk Enthusiast
I recently purchased one of those California Air Tools compressor, and it is amazingly quiet, considering it will deliver up to 120 psi... You can barely tell it's running, unless you're standing right over it. The one I bought was a smaller portable model, used to air up the tires on the RV, take to the hangar to fill the airplane tires, etc. Now that my wife has heard (or rather – not heard) this one running, I've got the "green light" to replace the Craftsman unit that powers the shop. Still doing research on exactly which model I will get.

Bdflies
Between Projects
Well, it's been HOT down here! Can't tell y'all how many times I wanted to fly, recently, but couldn't convince myself to work up the sweat to get the Patrol out. I had to 'vacate' the house before 8:00 this morning and the sky was cool and clear... So we went for a real nice flight. Dropped in to visit a good friend and chat about planes and stuff. As we visited, the wind steadily crept up. Not strong winds, mind you, but near exactly 90 degrees cross wind. Concern? Not even a thought... the Patrol has such great control authority and predictable behavior, it was nothing but fun. This isn't exactly a tale of what I did ON the Patrol, but rather a tale of what I did WITH the Patrol...
The flight was great, the visit was long over due and I did get to work up a sweat getting the plane back into the hangar...
Bill
The flight was great, the visit was long over due and I did get to work up a sweat getting the plane back into the hangar...
Bill

robcaldwell
Model B Quick Build Kit
I recently purchased one of those California Air Tools compressor, and it is amazingly quiet, considering it will deliver up to 120 psi... You can barely tell it's running, unless you're standing right over it. The one I bought was a smaller portable model, used to air up the tires on the RV, take to the hangar to fill the airplane tires, etc. Now that my wife has heard (or rather – not heard) this one running, I've got the "green light" to replace the Craftsman unit that powers the shop. Still doing research on exactly which model I will get.
I have the 8 gallon California Air Compressor and absolutely love it! Replaced my ridiculously LOUD Craftsman with it. Can't run a paint gun with the California, but some small air tools. Soooo quiet.

Bcone1381
Finished Patrol
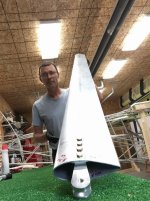
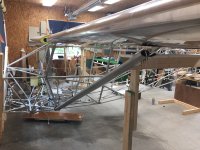
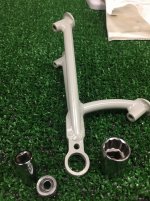
My struts and wings are drilled and mounted. Last week started the process of mounting the flight controls, by pressing bearing into place, and drilling hinges. Now I am waiting for a tool delivery (10 small c-clamps) to hang the flight controls. In the meantime, I painted some things that needed attention. I used the paint that came with the kit, applying it with am airbrush. I have never used one before and it worked pretty darn good for the small areas & pieces that I had. A table spoon of Part A and Part B paint measured with a syringe would last about 15 minutes of spraying.
I seldom set goals. I find that I I just go into the shop with a task, and work on it until its done with a quality I am excited about achieving. But I want to get all the big parts of the Kit installed before Oshkosh. If the ailerons and flaps get put on next week, I think we'll be there. The kit was delivered in March of 2017. I think I am a slow builder, but make up speed by putting a fair amount of time in the project. I have no idea if this is a three year or 5 year project. After the big parts are installed, it seems like the builder is making lot of decisions, where as up to know, Bob and Mark made the decisions for me by virtue of the design & Kit Parts .

I seldom set goals. I find that I I just go into the shop with a task, and work on it until its done with a quality I am excited about achieving. But I want to get all the big parts of the Kit installed before Oshkosh. If the ailerons and flaps get put on next week, I think we'll be there. The kit was delivered in March of 2017. I think I am a slow builder, but make up speed by putting a fair amount of time in the project. I have no idea if this is a three year or 5 year project. After the big parts are installed, it seems like the builder is making lot of decisions, where as up to know, Bob and Mark made the decisions for me by virtue of the design & Kit Parts .
Ray Strickland
Well-known member
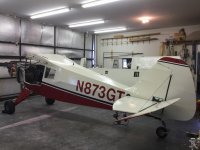
Plans-built 4-place N873GT (IO-360 angle valve) was put on the scales today: 1375# with an empty C.G. @ 11.6â€.

Very respectable weight!
Ray Strickland
Well-known member
I made contact with a DAR last week, sent him some of the required papers, and set a tentative date for him to do the inspection of N873GT during the last week in July. I also learned that the FAA now wants the engine run on the ground for one hour prior to first flight; so, today I did 40 minutes of that in 10-minute increments (with 20 minute cooling periods) starting at 1000 rpm and stepping up to 1300 rpm for the final block. I watched CHT carefully; it never got above 300 deg, even though it was hot and muggy. Made adjustments to idle rpm and mixture, and received a “loud and clear†com check from W13 Unicom. All engine parameters looked good. I’ll run it at 1400 and 1500 later this week. Taxi tests and full power run-up will have to wait until I get a “moving status†go-ahead from my insurance company, hopefully soon.
This is always a concern Brooks, balancing the new engine's preference for break-in with the new airplane's preference for flight testing.
Bdflies
Between Projects
Jared is so right! My DAR instructed me to "have at least an hour on the hobbs and a lot of dirt on the tires." Whether the DAR wants it or the FAA demands it, without the DAR's signature, it's not an airplane. Because of issues with my original electronic ignition, I probably had closer to 2 hrs. I don't think it's remotely possible to break in the rings, on the ground. It takes more power than can be cooled. And cooling is most important. Keep the ground runs fairly short. I know it's widely said to never run un-cowled, but you're looking for leaks and stuff that's about to fall off.. Watch the temps and don't overheat! My #4 was pumping oil like crazy by the time I was able to fly. During this year's condition inspection, I fixed a couple of nuisance oil leaks. In the 10 hours since, I haven't added any oil. The moral of the story is to do enough ground runs to be absolutely confident that it will be running when your first flight is complete. If you don't overheat it, it'll break in fine.
Bill
Bill

Gerhard Rieger
Well-known member
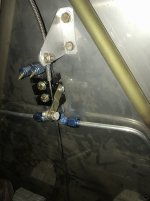
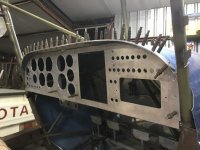
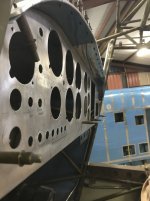
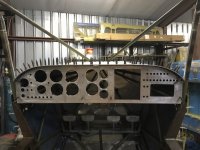
I completed my installation of the park brake and did all the drilling for the holding down screws on the instrument panel as well as installing a doubler to stiffen up my sun vizier.
Attachments
Ray Strickland
Well-known member
Today N873GT received go-ahead from the insurance company for flight status. So, I began taxi tests: burnishing brakes and getting used to ground handling and sight picture...definitely going to have to be peripheral vision until the tail comes up. Did a brief full throttle run-up. Everything stayed cool: max CHT was 275. I’ll do more taxiing this week and then give the DAR a call, hopefully getting certificate next week.

stinger
LSA Builder
I flew my LSA again today so here is the report: 30 hrs, flys hands off. I flew along side a Piper Vagabond short wing. yes, he is side by side and he is a rag wing. We started at 80mph he was turning 2400 rpm I was at 2100. Progressed to 100mph he was turning 2600rpm. I was at 2300rpm. He moved to full power 2750, I was turning 2500 along side, I pushed mine full power 2750 and walked away!. Both aircraft have Cont.0-200 both turned red line 2750. Just a little to compare!.. Stinger
Attachments


Peter Bishton
Member
Stinger
what was your LSA cruising at for the two highest power settings ?
1. 2500rpm
2. 2750 rpm
at the lower settings you mentioned 80 and 100 mph
just curious it certainly gets along for an O200
Peter 4 place
scratch build #1186
what was your LSA cruising at for the two highest power settings ?
1. 2500rpm
2. 2750 rpm
at the lower settings you mentioned 80 and 100 mph
just curious it certainly gets along for an O200
Peter 4 place
scratch build #1186
Ray Strickland
Well-known member
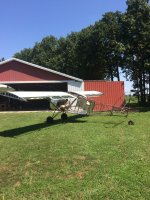
High-speed taxi tests for N873GT went well yesterday morning; she really wanted to fly as the tail came up...just a touch more throttle would have done it. I stopped at the FBO to add fuel and drew a crowd...lots of questions and positive comments about the Bearhawk. Back in the hangar, I noticed a leaking fuel tank sump valve...bummer. Had to drain the tank, pull the tank bay cover and remove the valve...found a tiny metal sliver under the o-ring...no apparent damage. Put it all back together, added fuel, no leak. DAR may be here late this week. Will spend the time until then going through the rest of the fuel system: gascolator, filter, servo screen. Ditto for oil suction screen. Also need to write out checklists and test card for first flight.

Bearhawk535
Junior Member

Ray Strickland
Well-known member
You gotta love it when it begins to look like an airplane...
Sorry ... off topic here, but I can no longer find old stuff on the Forum; something has changed (and not for the good)/
I cannot find the Search option using my browser. Clicking on the [search] blank on the upper right gets me into Google and their search results are crap.
Hell will freeze over before I lower myself to becoming part of the Google database.
So perhaps whomever posted a list of various nut-plates required for the Patrol could post it again; I think it was only 3 weeks or so ago that I saw such a list posted on the Forum.
Bergy
I cannot find the Search option using my browser. Clicking on the [search] blank on the upper right gets me into Google and their search results are crap.
Hell will freeze over before I lower myself to becoming part of the Google database.
So perhaps whomever posted a list of various nut-plates required for the Patrol could post it again; I think it was only 3 weeks or so ago that I saw such a list posted on the Forum.
Bergy
Sorry ... off topic here, but I can no longer find old stuff on the Forum; something has changed (and not for the good)/
I cannot find the Search option using my browser. Clicking on the [search] blank on the upper right gets me into Google and their search results are crap.
Hell will freeze over before I lower myself to becoming part of the Google database.
So perhaps whomever posted a list of various nut-plates required for the Patrol could post it again; I think it was only 3 weeks or so ago that I saw such a list posted on the Forum.
Bergy
Jared switched to Google search because generally it does a better job returning results than the built-in search. However, if you find that you prefer the old search engine, you can still find and use it here:
https://bearhawkforums.com/search
~Chris

spinningwrench
Patrol
Mark Goldberg
Bearhawk Aircraft
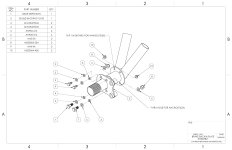
Looks very good Bruce. One comment. Many builders use smaller, all metal nuts on the brake caliper mounting ring because everything is so tight. Meaning sometimes the bolt holes are close to the weld bead and smaller profile nuts fit better. Mark
spinningwrench
Patrol


Rollie
Well-known member
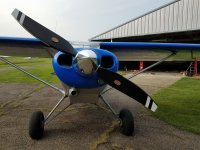
Finished up my paint job. I hadn't painted the engine cowl because I was concerned that I would need to modify it during the test flying process. I did modify it for better engine cooling so I'm glad I waited. I'm pretty happy with the end results. Not bad for an amateur painting in my garage. I wanted to take it outside and get some good pics but it started raining while we were putting the cowl on. I'll get better pics soon.
Attachments

Ray Strickland
Well-known member
Looks great, Rollie. I like that shade of blue with the gray. I know you are glad to have that chore behind you. What paint system did you use?
Rollie
Well-known member
I used Stewarts Systems right from the beginning. I like the fact that you can do it all without much ventilation since there aren't any solvents. The paint can be a bit of a challenge but I found that once I bought the spray gun they recommend things went smoothly. The colors are Stewarts Silver Metallic and Blue Metallic.
Rollie
Well-known member
I spent the last three days making an extended baggage compartment. There are a couple things that I always have in the plane and I don't like them taking up space in the baggage area. They are a tool kit with my idea of what I may need along the way and tie downs. The Claw tie down kit is kind of big and bulky and heavy (9 pounds) and my tool bag (including a full quart of oil and window cleaning stuff) comes in at 10 pounds. Once I was finished I loaded some weights into my new extension and looked for any deformation or sagging. My removable belly panels came in very handy for making this mod and allowed me to see what was going on during the load test. I put 80 lb in there and nothing moved then I emptied it out and pushed up on the top of the compartment to check for negative load. That part wasn't quite as scientific as I didn't have a scale that would fit and allow me to exert 40 lbs of pressure like I wanted to, but it was probably close enough. I'm setting the max weight for the extension at 20 lbs and now it is tested for +4 / -1 G, possibly -2 G. I don't plan to pull or push that hard but now if I hit some turbulence or something I don't have to worry about whats happening back there. Then I came home and adjusted my empty W&B and added a line to my W&B worksheet. The compartment is 29" long so I set the arm at the center, at 105", if I remember correctly. I can still fly with my wife, full gas and enough baggage to hit my max weight of 2100 lb and not quite hit the aft cg limit.
Attachments





rv8bldr
4A Scratch Builder
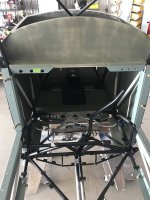
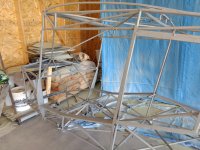
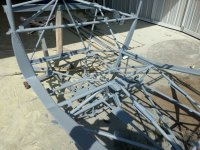
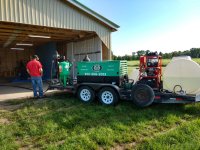
I had to leave my unprimed/unpainted 4pl fuselage in my garage for the winter last year. As you can imagine, there was quite a bit of surface rust (nothing serious). I have been dreading the whole sandblasting thing, but bought a sandblaster pressure pot to use with my large compressor. Well, after spending hours and hours of trying to get this to work, I finally gave up as my large compressor is apparently not large enough
I found a local mobile sandblaster company and they came to my house and did the whole fuselage, control system bits (control stick parts, etc), engine mount, and empennage in 4 hours! It cost me $700 CAN including media, so I call that a deal.
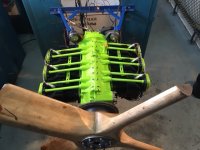
The next day, I broke out my HVLP turbine and managed to get all of the fuselage steel fully primed/sealed with a two part epoxy, painted the cockpit interior and control system parts white, and painted the engine mount Chrysler Gecko Green. I am sooooooo glad that is over with and I can rest easy this winter not thinking about rust and work on the OTHER wing panel (i have the left wing mostly skinned). When that is done, I'll be a the quick build stage (I shoulda bought a kit)....
I found a local mobile sandblaster company and they came to my house and did the whole fuselage, control system bits (control stick parts, etc), engine mount, and empennage in 4 hours! It cost me $700 CAN including media, so I call that a deal.
The next day, I broke out my HVLP turbine and managed to get all of the fuselage steel fully primed/sealed with a two part epoxy, painted the cockpit interior and control system parts white, and painted the engine mount Chrysler Gecko Green. I am sooooooo glad that is over with and I can rest easy this winter not thinking about rust and work on the OTHER wing panel (i have the left wing mostly skinned). When that is done, I'll be a the quick build stage (I shoulda bought a kit)....
Attachments



Aero_tango
Flying since Oct. 2018...
Wow, nice job Mark. I really like the green engine mount. Mike.
Aero_tango
Flying since Oct. 2018...
Hi Mark, it seems that the spar-fuselage attach points are not installed/welded. Just curious why you haven’t put them on yet?
rv8bldr
4A Scratch Builder
Hey Mike
I am holding off on the spar attach points until I have both wings to the "quickbuilt" stage. I want to use the wings in situ to ensure everything is in alignment when I tack the attach points in place. I will just sandblast the areas around where I need to weld, get the attach points installed (and have Ritz or Dale Lamport inspect my welds!) then reprime and paint.
I am holding off on the spar attach points until I have both wings to the "quickbuilt" stage. I want to use the wings in situ to ensure everything is in alignment when I tack the attach points in place. I will just sandblast the areas around where I need to weld, get the attach points installed (and have Ritz or Dale Lamport inspect my welds!) then reprime and paint.
Aero_tango
Flying since Oct. 2018...
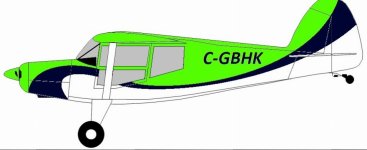
Amazing paint scheme!!! I love it.
rv8bldr
4A Scratch Builder
While not strictly Bearhawk project related, I have built a cheap, mobile, and, it turns out, highly effective engine preheater for my Maule that will be perfect for my Bearhawk when it is done. I bought a small ceramic heater from Amazon ($39 CDN), some home ducting bits and casters from the Aviation department at Home Dumpo, and used some scrap wood from the hangar project. The unit is super light and I just wheel it underneath the fuselage pointing the outlet into the exhaust ramp. At 0C/32F, it had the WHOLE engine at room temperature in a couple of hours. My RV-8 had a sump heater, but that really just got the oil warmed up, and the cylinders were still quite cold. I like the idea of everything under the cowl being warm.
Attachments
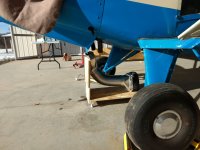
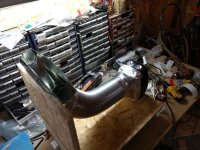

Crafty! I have cylinder bands on mine in addition to the sump. But the C-140 I flew before this did not, and I had a similar setup. Works like a champ!
rv8bldr
4A Scratch Builder
Hi Brooks,
Well, the airport IS at home I have a hangar and grass strip. It's a 150' walk from my front door to the hangar. However, I do have a Switchbox (http://switchboxcontrol.com/the-switch-box/) lying around that I used to use for my RV-8 when I kept it at the airport. Those WiFi based ones you pointed to would certainly do the trick if you can get to them remotely. The heater I used in my new setup is a Lasko-CD09250 I got from Amazon and it doesn't draw a lot of current.
Cheers
Well, the airport IS at home
I have a hangar and grass strip. It's a 150' walk from my front door to the hangar. However, I do have a Switchbox (http://switchboxcontrol.com/the-switch-box/) lying around that I used to use for my RV-8 when I kept it at the airport. Those WiFi based ones you pointed to would certainly do the trick if you can get to them remotely. The heater I used in my new setup is a Lasko-CD09250 I got from Amazon and it doesn't draw a lot of current.Cheers
Chewie
Well-known member
Mark;
Can you turn it on from home before you drive to the airport?
goo.gl/YsQMwy
First world problem!

rv8bldr
4A Scratch Builder
Bill, I only have one thing to say to that: Grrrrr....
Personally, I use heat anytime the ambient temperature is below about 10C/50F to minimize stresses and allow oil to get circulating to the important parts as quickly as possible. I don't normally fly at all when the temperatures get below -10C/15F because I'm a wimp. It regularly gets to -25C/-15F here winter for a few weeks at a time.
Personally, I use heat anytime the ambient temperature is below about 10C/50F to minimize stresses and allow oil to get circulating to the important parts as quickly as possible. I don't normally fly at all when the temperatures get below -10C/15F because I'm a wimp. It regularly gets to -25C/-15F here winter for a few weeks at a time.

Mark Moyle
Well-known member
Before installing a Tanis system I used a Red Dragon heater..or a small electric heater under the cowl behind the engine baffles...and only when temperatures are below freezing. My cold weather cut off is -25F... even then I have to use carb heat until the throttle is firewalled on take off...then push the carb heat in slowly..
Mark Moyle
Well-known member
Mark;
Can you turn it on from home before you drive to the airport?
goo.gl/YsQMwy
Like 75’ to the hanger from my bed...another 100’ to the taxi way.. the heating system is for when I’m tied down someplace not like home...

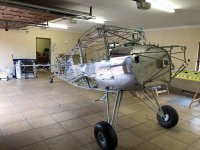
Mark Goldberg
Bearhawk Aircraft
Looking good Paul. Mark

Gerhard Rieger
Well-known member
Looking great Paul

PaulSA
Bravo Quick Build
What did I do on my Bearhawk Project today? I'll tell you what I did today - made a right cock of the flap brackets, that's what I did!! 
Deep breath........
Fortunately, although being dumb, I was smart enough to start off with undersize mount holes and clecos which gave me a 1/16" here and there wriggle room. Finally got it sorted. Now I've worked out what I am doing, the right wing is going a lot better.....
I am learning that "Quick Build" it may be but VANS CNC match-drilled kit it ain't .........
Deep breath........
Fortunately, although being dumb, I was smart enough to start off with undersize mount holes and clecos which gave me a 1/16" here and there wriggle room. Finally got it sorted. Now I've worked out what I am doing, the right wing is going a lot better.....
I am learning that "Quick Build" it may be but VANS CNC match-drilled kit it ain't .........
Mark Goldberg
Bearhawk Aircraft
Vans CNC hole puching machines are $400,000 each. And they have two. Our little operation can´t quite pull that off. MG
Bdflies
Between Projects
If the CNC punching/shaping is of value, there are job shops that do this very thing for companies that can’t justify their own machines. You have to furnish the coordinates to them. After that, it’s either T&M or batch work. I had a customer with such equipment who did such work for Ford. The project wasn’t big enough to invest in the equipment, but the precision was needed.
Bill
Bill
As it turns out I am working right now on that section of the manual right now. Can you help me understand better what went wrong?
PaulSA
Bravo Quick Build
Jared. Tried to measure the outer brackets rather than offer up and mark - I was on my own and handling 10' of flap is not easy. Got it wrong by about 5/32". And contrary to what I said, I'm not 100% certain I have sorted it. It may need a bit of a repair such as an extra doubler or splicing in a new section of spar. Still thinking about it and am going to look at it again in the cold light of a new day. I would certainly recommend that you start off with 3/32" holes in the brackets so as to give maximum adjustment after the first fitting before finally drilling the 3/16" holes.
I was so pleased to get off the fuselage and start something new that I rushed things. Old story. I'm sure it's fixable
I was so pleased to get off the fuselage and start something new that I rushed things. Old story. I'm sure it's fixable
Last edited:
PaulSA
Bravo Quick Build
In which case, the build guidance needs changing since it is the first job you are told to do on the wings. In any case, I don't see why. You can cleco the stiffener in place and see where everything is without having to final rivet. And it had nothing to do with my stupid mistake......
Anyway, it looks like I might end up with 3 or 4 holes out of 12 slightly ovalled. My AP says that a second doubler behind the spar will suffice to fix that. Could probably get away without anything but better to be safe......
Anyway, it looks like I might end up with 3 or 4 holes out of 12 slightly ovalled. My AP says that a second doubler behind the spar will suffice to fix that. Could probably get away without anything but better to be safe......
Paul, have you been using this: https://www.mindmeister.com/917081852 for the sequence? This is the same map that displays at https://bearhawk.tips/kit/ but it's easier to read and scroll at the first link. The content from old manual is almost entirely incorporated now, but all of its topics are on the map. As of today the only sections of the old manual that aren't live are mounting the ailerons and flaps, mounting the wingtips, pitot tube mounting, and wing wiring. All of those topics are on the map. If you can think of anything else that we need to add please let me know.
JimParker256
Bearhawk Enthusiast
Yeah, Mark, but in the summer, when it's 105ºF and 99% humidity... You get the last laugh...
robcaldwell
Model B Quick Build Kit
jaredyates This is the first I am seeing this mindmeister site. Is there a site description or "user instructions" somewhere? I'm not sure what I am seeing or what to do when I click on the link. I appreciate the concept!
Rob, most of the steps on the map have links. Most of those links take you to the corresponding article on bearhawk.tips, in theory. Is that not how it is working?
JimParker256
Bearhawk Enthusiast
Jared, just my opinion, but the huge diagram is unwieldy to use, even on my large 27" Mac screen. Maybe it's time to re-factor it into smaller sub-sections for easier navigation?
robcaldwell
Model B Quick Build Kit
I agree with Jim. That and I am not finding the page to be very intuitive.
What would be the ideal? A more compact tree, a collapsible tree, getting away from the tree? Maybe we should start a thread.
JimParker256
Bearhawk Enthusiast
Waiting to comment further until the new thread starts...
Thanks Jim, here it is: https://bearhawkforums.com/forum/be...december-2018-manual-update-request-for-input

rodsmith
Well-known member
Made mounting structures for a GPS/SXM antenna for Garmin G3X, GPS antenna for Garmin GTN 625 and the ELT antenna on top of the fuselage. Used .032 aluminum and mounted them directly, flush to the top of the aluminum stringers. Garmin recommended 8" square mininum ground plane for GPS. I will use copper tape radials under the fabric to increase the effective ground plane for the ELT antenna. Garmin provided very detailed patterns for mounting the antennas so I don't need to buy them yet.