Bearhawk Aircraft Bearhawk Tailwheels LLC Eric Newton's Builder Manuals Bearhawk Plans Bearhawk Store

Announcement

Collapse
No announcement yet.

Solicitation for Skylight details and pics

Collapse
X
 
  • Filter
  • Time
  • Show
Clear All
new posts

  • Solicitation for Skylight details and pics

    I'm pacing around the fuselage and not getting a lot done. Overthinking this skylight thing. Need a little push and/or help.

    Because I'm scratchbuilding the fuselage, I have options. That probably the problem.

    Right now, this is my going in approach:

    1) Minimize the BH hump by lowering the trim wheel and top stringer heights to just clear the trim cable fairleads.
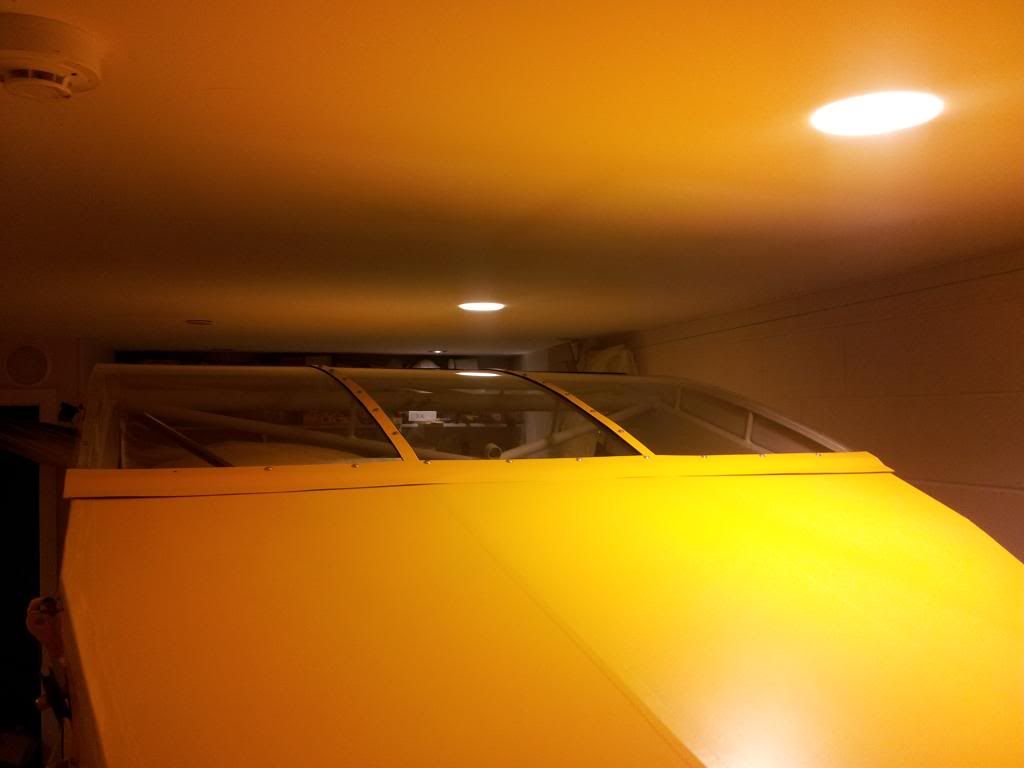
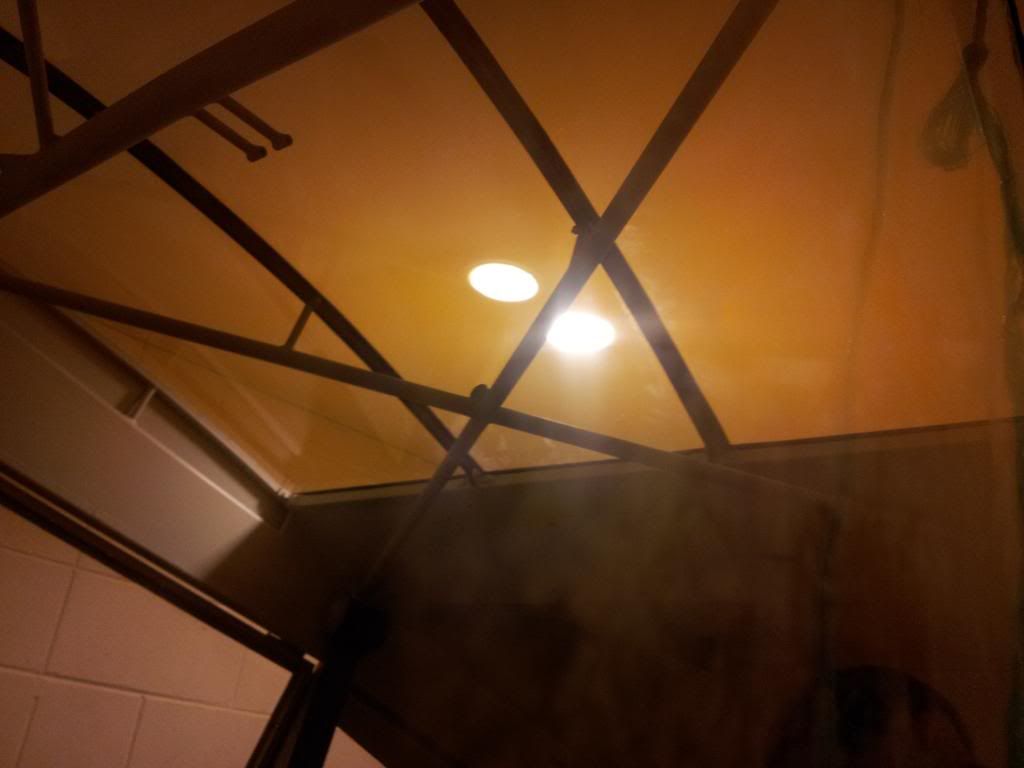
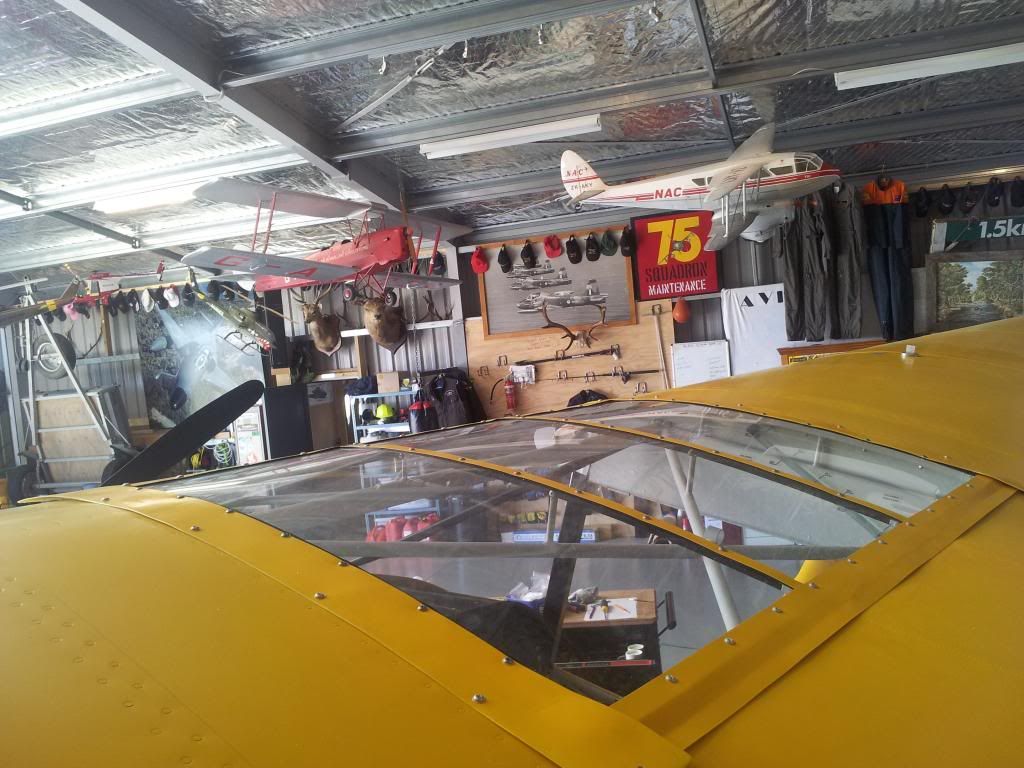
    2) Strongly considering using welded tabs with aluminum formers for the skylight. More like some of the patrol skylight formers. I have discussed this with Bob. He agreed it could be done, just a matter of working out the details. I think this is method Heath Sneller used for his skylight. Heath, if your out there, appreciate any pics. Chasing your empty weight achievement.

    Any pics or suggestions appreciated.
    Thanks too much,
    John Bickham

    Los Lunas, NM Mid Valley Airpark E98
    BH Plans #1117
    Avipro wings/Scratch
    http://www.mykitlog.com/users/index....er&project=882

  • #2
    Steve's Aircraft in White City, OR has a Facebook page with pictures of their skylight STC for the Pacer. I sorta kinda followed that. I've got a few pics of what I did but I'm using electric trim so I got rid of the hump completely.

    Untitled by Jon Whee, on Flickr

    Untitled by Jon Whee, on Flickr

    Untitled by Jon Whee, on Flickr
    Last edited by whee; 01-06-2016, 09:09 AM.
    Scratch Built 4-place Bearhawk. Continental IO-360, 88" C203 McCauley prop.

    Comment


    • #3
      Steve's Aircraft skylight stc is fairly easy. Uses rivnuts and nut plates. I used rivnuts front, sides and down the center. Difference between the Bearhawk and Piper, Piper used 3/8" channel.... Really thin stuff. Brian and Steve use nuts and screws where the sky light attaches to the channel. Back edge used nut plates.


      Sent from my iPad using Tapatalk
      Last edited by Mark Moyle; 01-06-2016, 02:05 PM.

      Comment


      • #4
        We did have a kit as a starting point - but we cut into it and removed the hump completely, we definitely prefer the humpless look having seen both in person.

        We used aluminium formers and rear support for the skylight. It worked out great. No extra welding, much lighter, and still extremely rigid when finished. It seemed a bit flexible at first, but the fabric and plexiglass helped pull everything up tight. We used 3mm (1/8") plexi.

        Here's a comparison of the lines we wanted to achieve compared to the original line of the "Bearhawk hump"
        20120729_184700_zps1e28924e.jpg

        Here's how we cut and tapped the stringer stand-offs to lower the hump.
        60999511.jpg


        f34b57a9.jpg

        Finished product, no welding required.
        b459dbd1.jpg

        Here are some shots of the finished product when we first fitted the skylight:


        And here it is when we started screwing on the last of the fairings (job half done as pictured).
        Last edited by Battson; 10-18-2017, 02:44 PM.

        Comment


        • Bcone1381
          Bcone1381 commented
          Editing a comment
          Battson's last three photos do not show up...."Please update your account to enable 3rd party hosting." message is in place of the photos. Most of Battsons other phots lately have had the same notice on other threads.

      • #5
        Il still at the plans approval stage. But it may be worth considering how hot it can get in the cab in the skylight gives wonderful visibility in an aircraft and along with a greater degree of safety however it can get a bit hot on your head it might be worth considering tinted polycarbonate . The other photos look great .

        Comment


        • #6
          I agree. Mine will be a smoke tint.
          Scratch Built 4-place Bearhawk. Continental IO-360, 88" C203 McCauley prop.

          Comment


          • #7
            I added mine to a quickbuild kit so I had to remove the "bearhawk bump" formers. I added an arched crossbar in the rear to help the straight-back lines of the aircraft. I used 2 formers instead of just one like Whee, but this is personal preference. The posts were there so I used both sets.

            Welding is not quite complete, though it is more than tacked in. Even my pro TIG welder buddy was having a hard time welding the underside welds in this orientations. We'll finish it up when I can roll the fuselage.


            Comment


            • #8
              That's almost exactly how I did mine Zane. Run a bolt through the trim wheel mount, heat and bend the mount down about 1/2 inch for the wheel to clear.

              Comment


              • #9
                I'm a Patrol builder, but always watch (and learn) from the other forums as well. I saw something in the RV (camper, not airplane) world that I'm going to try to use on my Patrol... I'm sure you're familiar with those accordion-fold blinds that go in the camper windows, right? Well, you can buy them that have a bar in the middle, as well as a bar on each end, with the accordion-pleat blind material in between. Normally, those have a translucent panel on one side and a very dark panel on the other. My thought is to custom-order one with a medium-density translucent fabric on both sides, and permanently attach the middle bar at the fore/aft center of the cockpit, and the guide strings at the front and rear of the skylight opening. That way, one half can be slid forward by the front-seat occupant, and the other can be slid aft by the rear-seat occupant. It would be two straight runs, instead of trying to rig a curved track that never seems to quite work out. I'm not there yet in my build, but I'll post pictures when I do get there. (You gotta love experimentals!)
                Jim Parker
                Farmersville, TX (NE of Dallas)
                RANS S-6ES (E-LSA) with Rotax 912ULS (100 HP)

                Comment


                • #10
                  Jim, did you have any luck with the skylight folding blinds? If so, what was the source and do you have any pictures?

                  Comment


                  • #11
                    Not there yet, sorry. I'm apparently on the "5 year" plan, though I originally thought I might finish in 2 years... LOL

                    What I was planning to do was order a custom-made shade from Camping World. On their web side, just look up "custom-made day/night shades" Just taking a rough stab at the dimensions, I came up with a rough price of about $30 for a 28x32 shade with one blackout panel and one semi-translucent panel. You can pretty much order any size you want, in 1/8" increments for both width and length.

                    It comes with "strings" which are to be strung fairly taut between the front/rear attachment points. This supports the shade and the three "slider bars." The bars themselves have some sort of a friction mechanism where the strings go through that keeps them from sliding on their own. It keeps the shades in place reasonably well. In the "typical" configuration, there is a slider bar on one end, where the "blackout" (or night) shade starts, and a bar at the other end, where the "day" (light permeable) share ends. In between (attached to both "day" and "night" shades) is the middle bar that separates the day/night areas, and allows you to choose which share is "open" at any given time.

                    Assuming the "end" bars are all the way to the front and rear, you can slide the middle bar forward or aft, so that you're either exposing the entire "day" shade (light permeable) or the "night" shade (blackout). Then if you want to block the light for the rear seater, you can move the front bar to the midpoint, leaving the rear bar all the way aft. Basically, you could adjust it anywhere from "100% shade" to "100% open", provided you can reach back far enough to grasp the bars.

                    Or you could use the same fabric on both sides of the middle bar, and "anchor" that middle bar security so that it does not slide. In that configuration, the front bar would slide forward to provide pilot shade, and the rear bar would slide aft to provide passenger shade.

                    Lots of options, depending on what you want. Just don't tell them it's for an airplane, or they would have to jack the price up even further! LOL
                    Last edited by JimParker256; 11-29-2017, 05:35 PM.
                    Jim Parker
                    Farmersville, TX (NE of Dallas)
                    RANS S-6ES (E-LSA) with Rotax 912ULS (100 HP)

                    Comment


                    • #12
                      Jim---- I think I remember some of the old WW2 era planes had exactly those blinds in the skylight. seems like it could have been something like a Howard, or a
                      stagerwing or a closed-in waco. we were thinking about that system under the skylight in the Fairchild 24. That overhead sun can burn the top of your head when
                      your roof is missing some shingles :-)
                      T

                      Comment


                      • #13
                        I cut down my upper stringer standoffs today for what I am going to do with my skylight. Still a little bit of a hump, less than the stock kit. 3/4" higher at the rear standoffs than the wing profile. But started thinking about making the rear former a continuous, simple curve. So the front of the skylight is flat, then slowly changes to a slight curve at the rear former where the fabric and skylight both terminate. The fabric makes the transition from curve to stringers in the next frame.

                        My rear former will terminate at the first standoffs aft of the kit hump formers. I think a majority have chosen the same place, but not all.

                        I have never done a fabric covered airplane. Actually I have never flown, or even sat in, a fabric covered airplane.

                        Opinions?

                        Comment

                        Working...
                        X