Bearhawk Aircraft Bearhawk Tailwheels LLC Eric Newton's Builder Manuals Bearhawk Plans Bearhawk Store

Announcement

Collapse
No announcement yet.

Univair Sight Gauge Balls... are these flight critical?? :-/

Collapse
X
 
  • Filter
  • Time
  • Show
Clear All
new posts

  • #16
    The restrictor fitting is a requirement in Canada. I talked to the MDRA this week about this because there's been a few posts about Canadians not being allowed to use sight gauges in the cabin without shut off valves at the gauge. They're fine with a site gauge but they want to see a 0.040 restrictor on the inlet and outlet side. I'm not sure what the best way to build that is but I'm figuring that out now. Anyone got suggestions?

    I'm sure the restrictors would dampen the sloshing which will be nice. I've got open sight gauges in my current plane and they do slosh around a lot if there's any turbulence. They're still useful but definitely not as accurate as they could be.
    4-Place QB kit #111. First flight May 2022.
    IO-470 - 260hp

    Comment


    • Pbruce
      Pbruce commented
      Editing a comment
      My MDRA didn’t mention this, or the rudder pulley requirement (also apparently required in Canada) but it does make sense to do since the utility is better and it may add safety. But should it be done on both the top and bottom fitting of the fuel gauge tube in case of sloshing when full?

    • TimTall
      TimTall commented
      Editing a comment
      I did the restrictor on the top and bottom. It won't really do anything on the top fitting since it's pretty much always above the fuel level but it won't hurt anything.

      I haven't done anything about the rudder pulley yet. I'm going to measure mine and see what the actual angle of the direction change is before I do anything.

    • noema
      noema commented
      Editing a comment
      I have added restrictors to both steel (oil pressure port) and aluminum fittings (sight gauge ports). It's a matter of blocking the fitting and then drilling the hole you want. For the steel fittings soldering works well with flux and proper heat. The aluminum fittings can be plugged with a rivet. Simply squeeze it a bit so it needs a bit of hammering to get it in. Then sand off the excess. This article shows how but goes completely overkill by using a lathe. A lather is not required. https://www.kitplanes.com/no-restrictions/

      Of all the mods you could do to an experimental, adding these restrictors is a very sensical way of delaying your first flight.

  • #17
    Would this work?

    Comment


    • AKKen07
      AKKen07 commented
      Editing a comment
      Nice find!

  • #18
    Originally posted by TimTall View Post
    The restrictor fitting is a requirement in Canada. I talked to the MDRA this week about this because there's been a few posts about Canadians not being allowed to use sight gauges in the cabin without shut off valves at the gauge. They're fine with a site gauge but they want to see a 0.040 restrictor on the inlet and outlet side. I'm not sure what the best way to build that is but I'm figuring that out now. Anyone got suggestions?

    I'm sure the restrictors would dampen the sloshing which will be nice. I've got open sight gauges in my current plane and they do slosh around a lot if there's any turbulence. They're still useful but definitely not as accurate as they could be.
    I tapped the bore of my AN fittings and inserted a threaded plug (Allen key drive). Before I inserted it, I filed a small keyway into the side of the plug (into the threads) of the desired size. I did it this way because drilling such a small orifice is near impossible.

    This has the obvious advantages of reducing sloshing and restricting leak rate in case of a broken sight gauge.
    It does have disadvantages. A small bit of debris could block a orifice, leading to the dreaded stuck fuel gauge.
    Last edited by Battson; 09-01-2019, 08:10 PM. Reason: Fix a very confusing typo

    Comment


    • #19
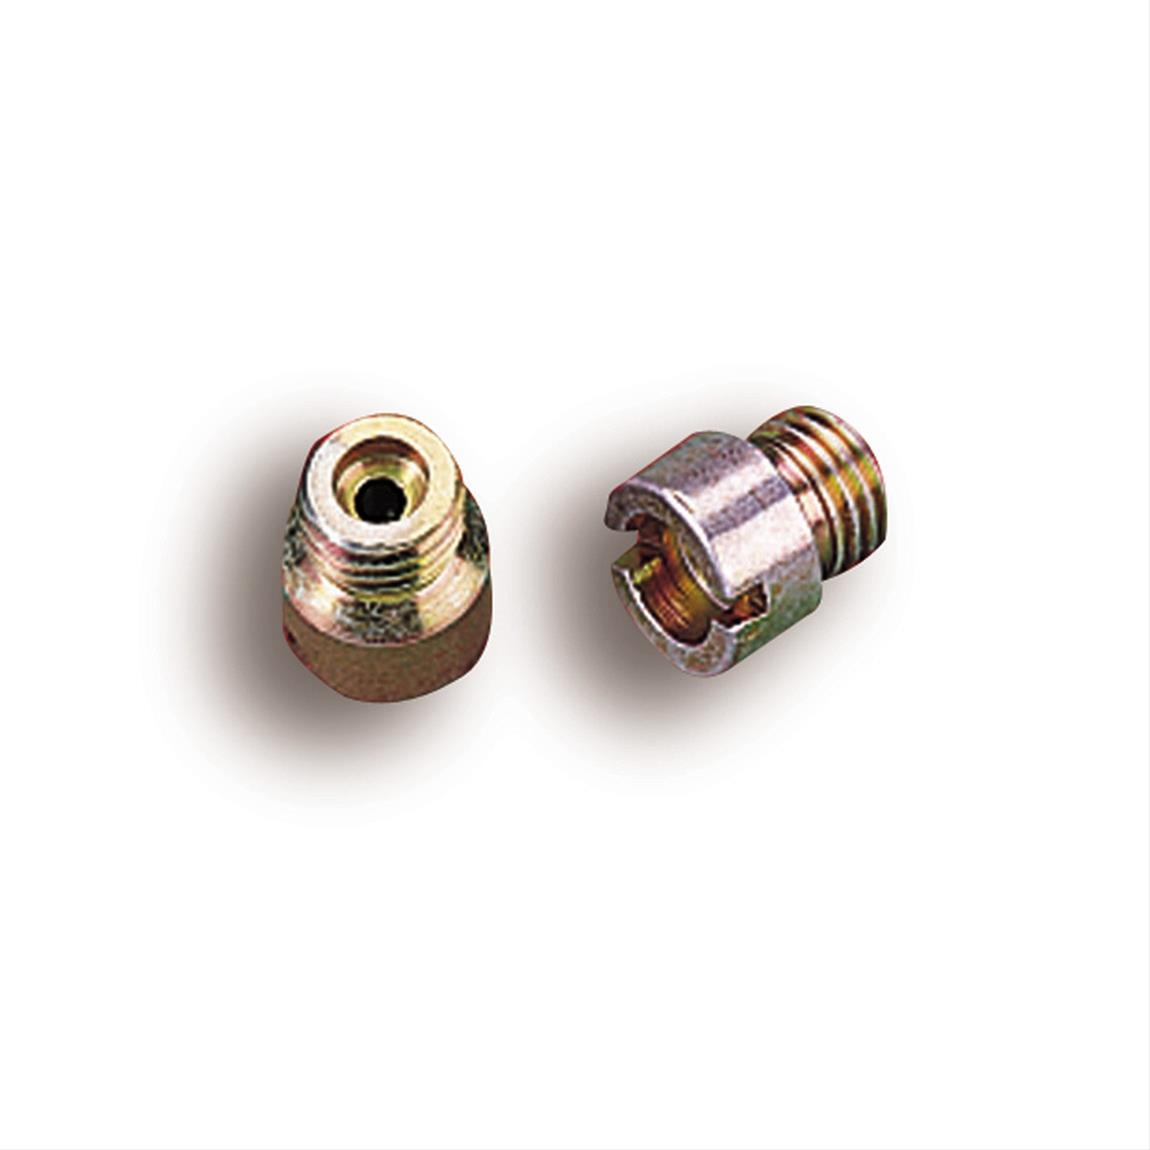
      Here's an 0.040 size orifice. Compact and inexpensive:

      Free Shipping - Holley Standard Main Jets with qualifying orders of $99. Shop Carburetor Jets at Summit Racing.
      Patrol #107
      LSA #005

      Comment


      • #20
        Another data point is found in Tony Begelis' book "Firewall Forward" p.229. Drill out a rivet and insert it into your elbow fitting. His book shows this method plus another one if you use a brass fitting.
        Brooks Cone
        Southeast Michigan
        Patrol #303, Kit build

        Comment


        • James
          James commented
          Editing a comment
          That's pretty clever Brooks.
          I hear a lot about these Tony Bingelis books. I'll have to look out for them.
          James

        • JimParker256
          JimParker256 commented
          Editing a comment
          Love the Bingelis books. But I'm thinking that $8.50 Wicks part LSA052 found is worth avoiding the trouble of drilling a 0.040" hole in a rivet... LOL

      • #21
        Yeah, righto Jim - so i've found a set of Tony's books on offer over here for much cheaper than I can buy them from the States - you'd recommend that I get them?
        The Barrows Bearhawk: Who knew my wife could get jealous of a plane?

        Comment


        • JimParker256
          JimParker256 commented
          Editing a comment
          Yeah, I'd jump on them. For a complete novice like me, they're invaluable. Lot's of great info on almost every topic you can imagine.

      • #22
        Looks like you have more than enough information about adding orange balls to the fuel site gauge. But here’s one more: I like them as there is no way I can not see just how much fuel is in there—except when one of them decides to stop floating and sink to the bottom. Weird because eventually it comes back to the top. This has happened twice in 420 hours and I have no idea why. We run avgas/auto 50/50 most times.

        Comment


        • #23
          To add another date point here, here's how I did my sight gauges using an aluminium caravan awning track. Initially one of them leaked. I added some soft clear rubber tubing between the blue AN fitting and the clear plastic tubing which seems to have sealed it up nicely.

          D925727F-5563-4069-A92C-0F261DC14124.jpg
          Nev Bailey
          Christchurch, NZ

          BearhawkBlog.com - Safety & Maintenance Notes
          YouTube - Build and flying channel
          Builders Log - We build planes

          Comment


          • #24
            Originally posted by Nev View Post
            Initially one of them leaked. I added some soft clear rubber tubing between the blue AN fitting and the clear plastic tubing which seems to have sealed it up nicely.
            Seems is a key word.

            You don't want those leaking! If you're out and about, once the leak starts they are basically impossible to stop - short of emptying the tank onto the ground (or into the cabin). My instinct is the get lots of Loctite fuel sealant in there (or use a design which cannot leak!)

            Heat is the other issue, it it will soften things up a lot. It can easily get to 40 to 50 degrees on a black panel like that with the sun blazing down, when the ship is parked up with the doors shut.

            Are many people using the clear flexible tubing for sight gauges?

            Comment


            • #25
              I believe in most cases (maybe not all) the bead at the end of a tube is meant as a hose retainer, not a seal. Some type of fuel line clamp at each end might not be a bad idea. The crimp style, or constant tension (spring) might fit right into the end of your aluminum channel.

              Comment


              • Battson
                Battson commented
                Editing a comment
                Good comment - it does need a compression clamp over that AN fitting, to make a seal.

                Nev - you could easily shorten the metal sleeve and put a clamp over the plastic, butted up against the metal tube. It would look quite tidy and deliberate.
                Last edited by Battson; 11-28-2021, 04:03 PM.

            • #26
              I’m still using clear fuel line with no ball. Works fine and is easy to see the fuel level.
              Scratch Built 4-place Bearhawk. Continental IO-360, 88" C203 McCauley prop.

              Comment


              • #27
                I have no issues with clear fuel lines. It was a toss up for me. I almost used them. I ended up using threaded elbows in clear PVC, Battson style. Marine code (regulations) for underwater fittings all require 2 hose clamps per fitting. I have not read that for aviation regs. But looking at the AN hose barbs, they are always very long, with more than enough room for double hose clamps. They made them extra long, just for the fun of it? Aviation stuff is usually made to some spec/minimum.

                Gasoline above my head?

                Comment


                • #28
                  Seems is a key word.
                  I'll edit it to remove that word. Should fix the issue
                  Nev Bailey
                  Christchurch, NZ

                  BearhawkBlog.com - Safety & Maintenance Notes
                  YouTube - Build and flying channel
                  Builders Log - We build planes

                  Comment


                  • #29
                    We had one of those fuel lines, with the solid plastic pipe, get hot while parked up on a hot summer's day in central NZ - hot enough that the plastic softened and permanently changed shape - it sagged under it's own weight by about 1/2" in the top 1/3rd of the line. The bottom 1/3rd had fuel inside and stayed straight as an arrow. I was more than a little surprised and disappointed. I think the refraction inside the plastic could be part of the issue, combined with the cabin overheating.

                    I think the shroud that Nev has used will help keep the fuel line straight and shaded from the sunlight.

                    Flexible plastic fuel line probably has a lower threshold for temperature. I have seen it melt just from contact with modestly hot parts. There's probably a book value out there somewhere.

                    Comment


                    • #30
                      Thanks for the pointer about sagging, Battson. Added carbon sleeves to prevent that.

                      - I used AN833 fittings (no taper no stress to the pvc tube)
                      - hand-cut the background pattern from white electrical tape.
                      - used Loxeal thread sealant (similar to Loctite)

                      The sealant takes quite some time (1-2 weeks) to fully cure even with plenty activator. I tested both Loxeal 58-11 and Loctite 577 and they seamed almost identical. The force it took to remove the AN fittings from the PVC tube was impressive.

                      Attached Files
                      Bearhawk "XHawk" Patrol, O-360, Trailblazer 80", tubeless 26" Goodyears, Stewart Systems. See XHawk Build Log.

                      Comment


                      • Battson
                        Battson commented
                        Editing a comment
                        Wow - those look tidy. Nice attention to detail.
                    Working...
                    X